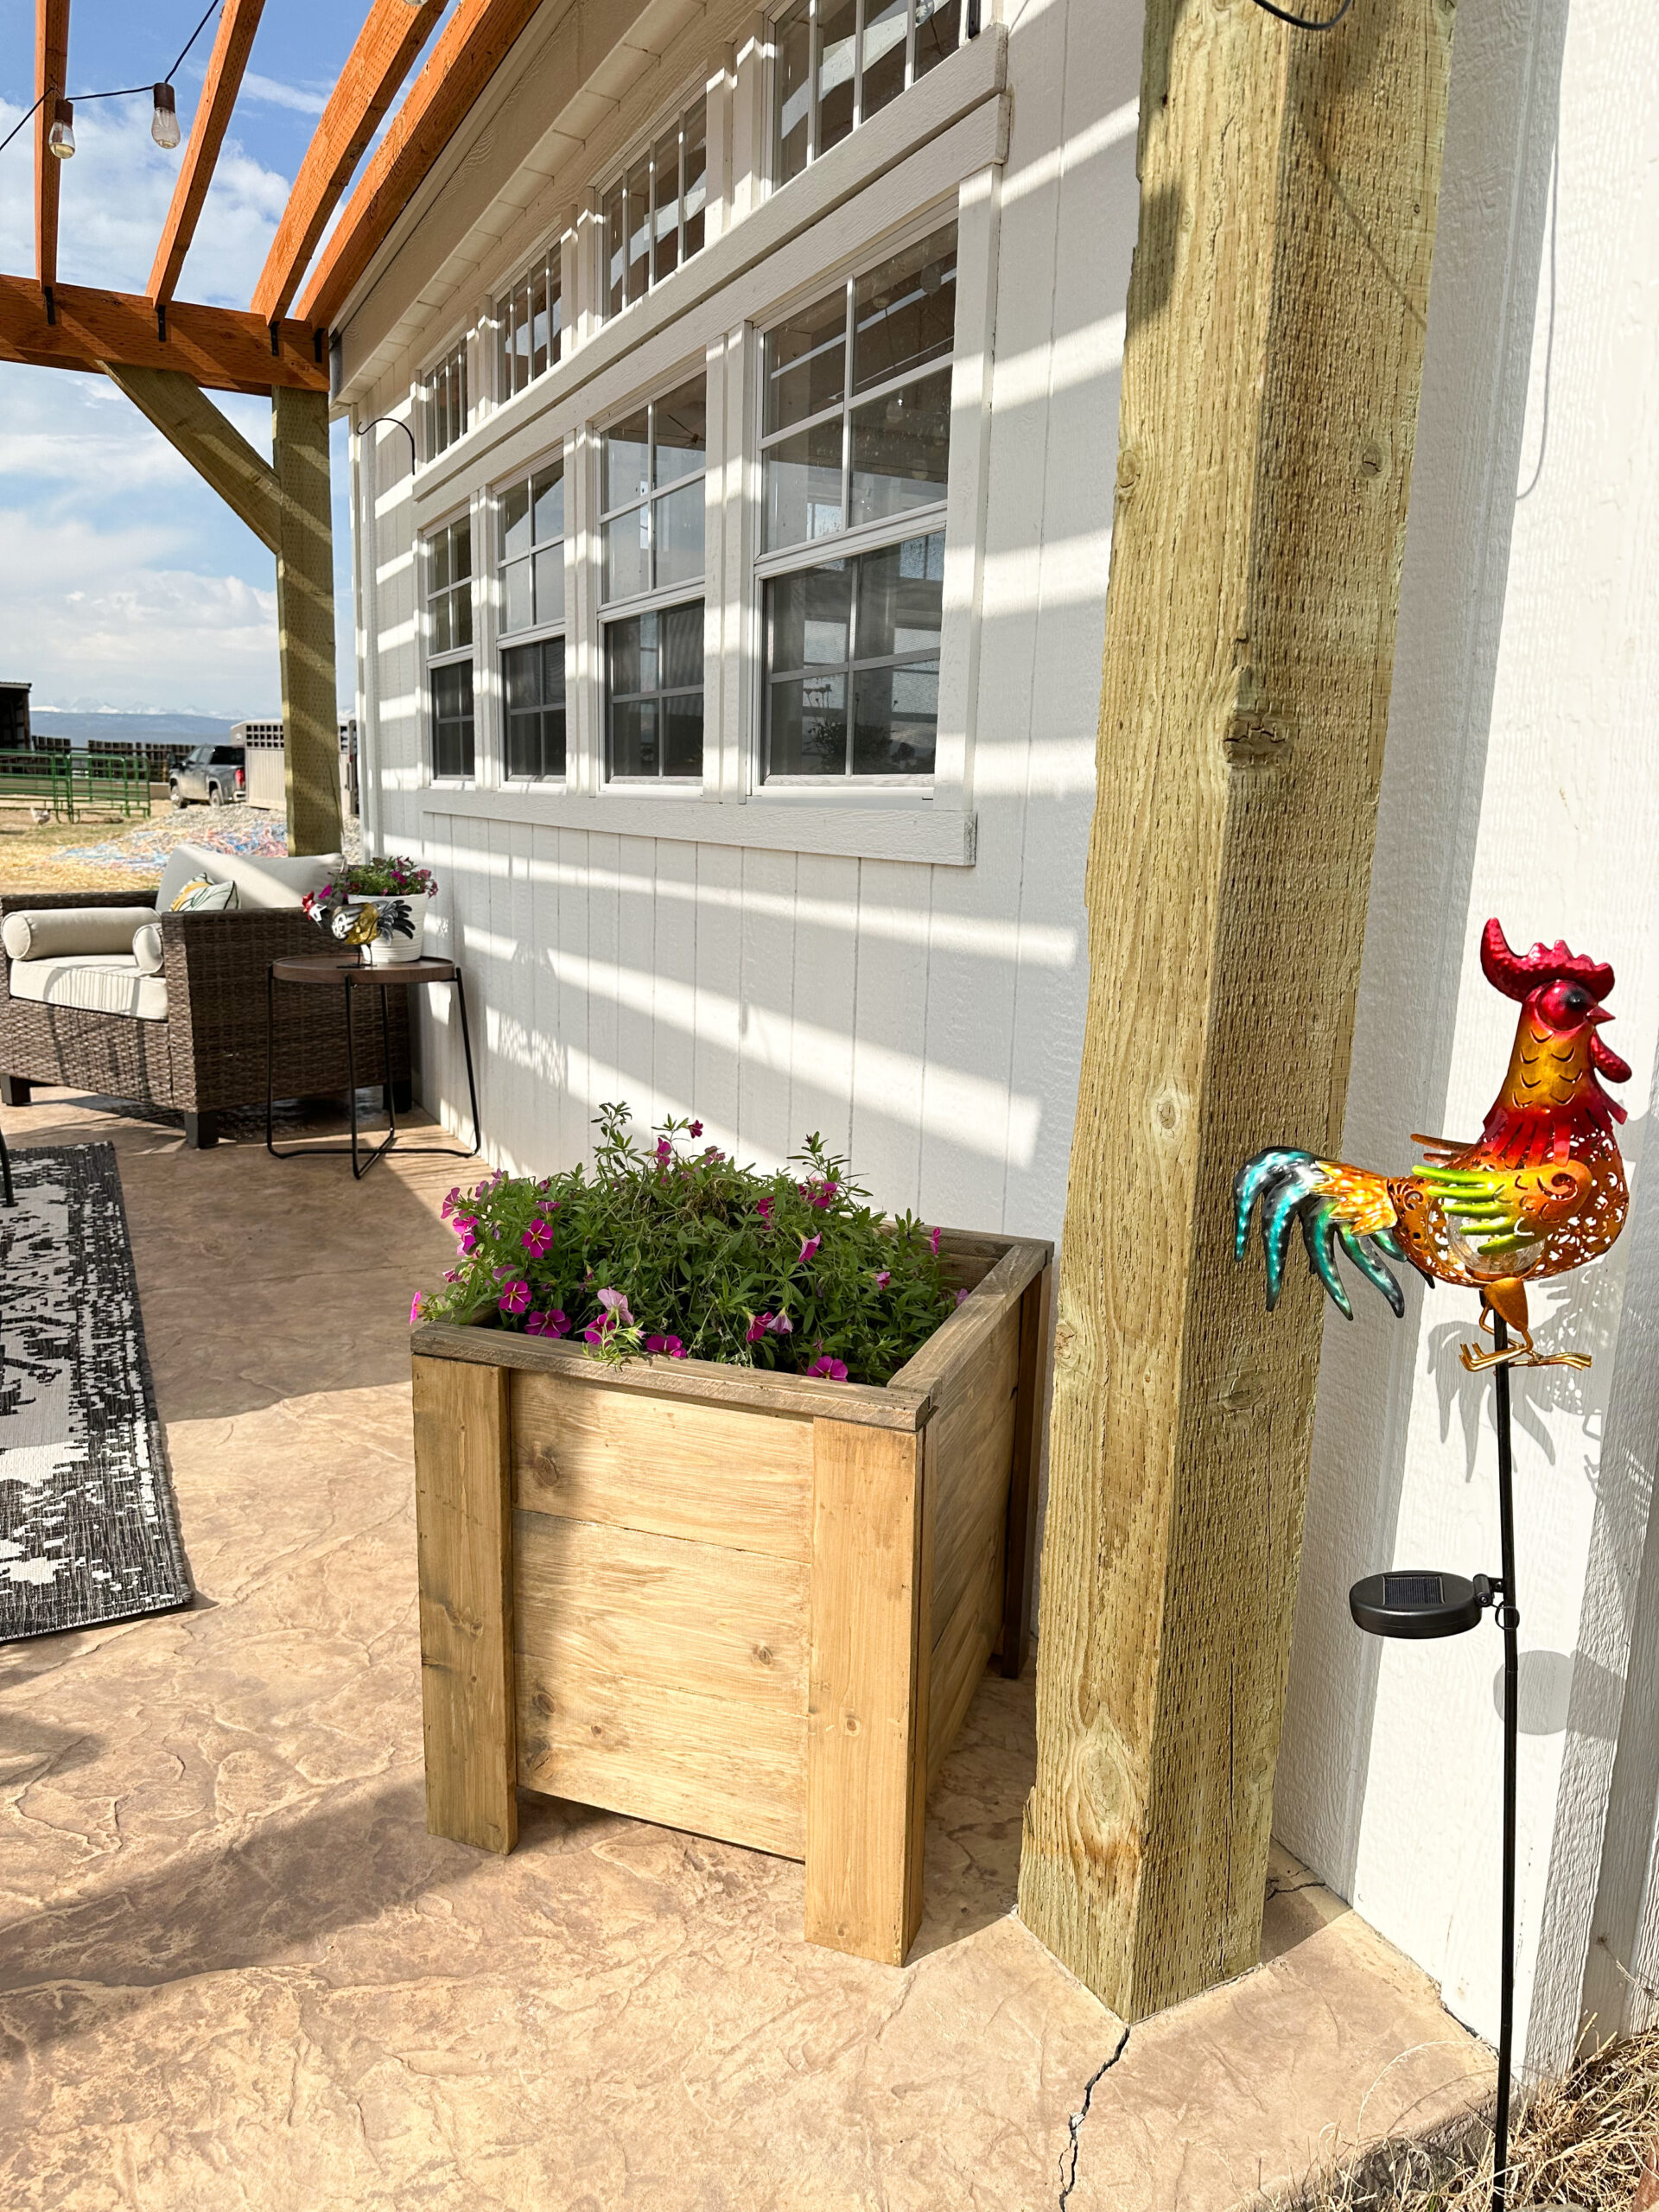
DIY Shiplap Planter
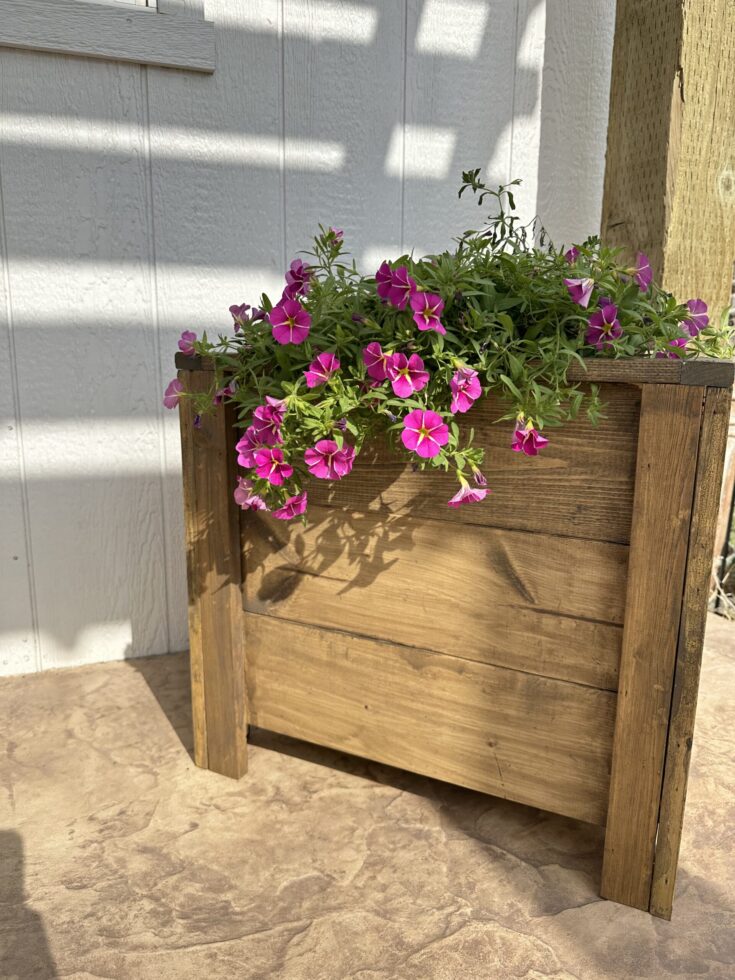
DIY outdoor shiplap planter! This project cost about $40 and is perfect for a beginner DIYer! I love how it turned out!
I’ve made quite a few and like to either keep them plain with a great wood stain or add some cut out wood words. They make great gifts as well!
Active Time
1 hour
Total Time
1 hour
Difficulty
Moderate
Materials
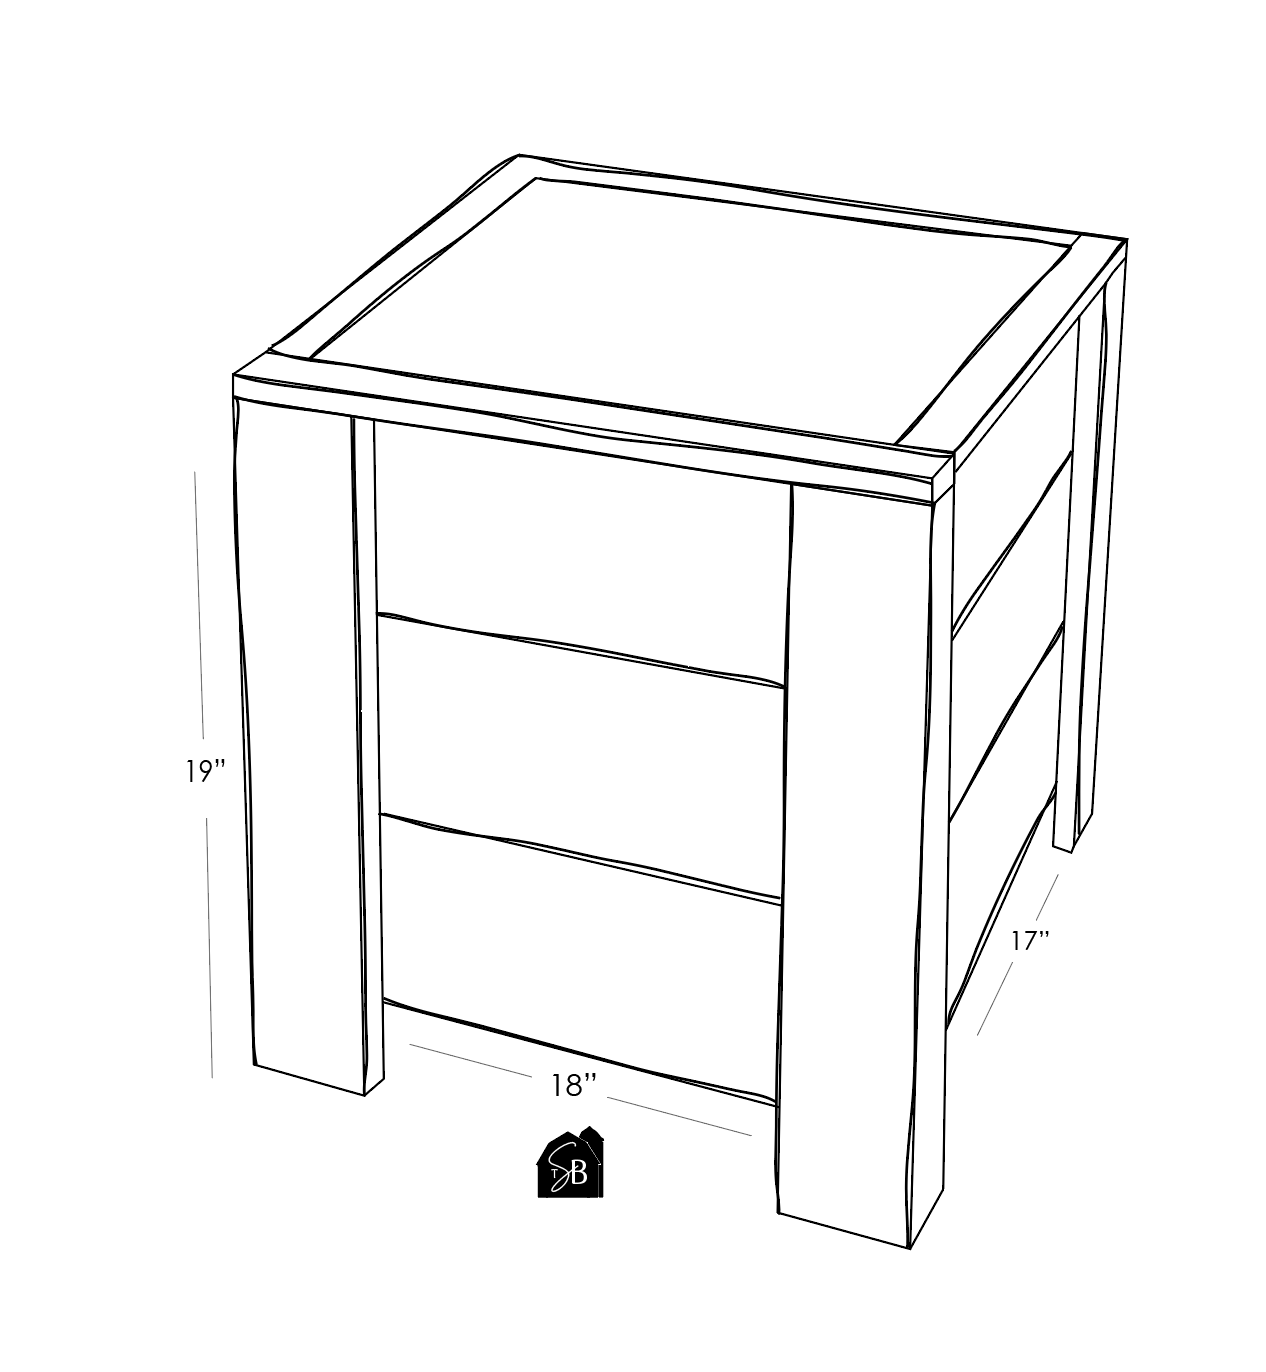
- 6 (1x6) pieces of wood- cut to 18 inches
- 6 (1x6) pieces of wood- cut to 17 inches
- 4 (1x2) pieces of wood- cut to 19 inches
- 4 (1x3) pieces of wood- cut to 19 inches
- Brad Nailer with 1 inch and 1 1/4 inch nails
- Wood glue
- Paint or wood stain of your choice
- Minwax Polycrylic Sealer
Tools
- Miter Saw
- Brad Nail Gun (or use a drill and exterior wood screws)
Instructions
 Directions
- Start by building your legs. You will use your 1×2 and 1×3 to build four legs. Place the 1×2 on its side, apply wood glue, and place the 1×3 on top. I like to use a block to help support the 1×3. Use 1 1/4 inch brad nails and nail the 1×3 to the 1×2. (See example below)
- Take your legs and place them with the 1×3 face side down. You will add your 18-inch 1×6 pieces starting with the first one flush with the top and adding the 2 below. I like to use Applewood glue on the sides, add the 1×6, and then use 1-inch nails to nail the sides. You will have two sides completed!
- Place your two sides vertical and attach your 17-inch board the same way as the 18-inch boards. I like to use 1 1/4 inch brad nails for these sides along with wood glue. Once your 3 boards are attached on the one side, flip and complete the last side!
- You have a completed planter! At this point, you can either add trim to the top with the remaining 1×2 or leave as is. If you choose the trim, just measure the top and cut the pieces to size and glue and nail with 1 1/4 inch nails.
- Measure the inside of your box and add cleats on either side with 1×2 with wood glue and nails. Add 2-3 pieces of wood on top of the cleats to hold a plant.
- Stain or paint your planter, add a sealer, insert a pretty plant, and BAM! You’ve made yourself a shiplap planter!
- If I’m not using an exterior stain and am painting an outdoor project, I like to use Minwax Polycrylic for the sealer, which protects it from getting wet at all since it is going to be outside!
Notes
Be sure to follow along on IG @thesassybarn for more projects and tutorials!