Peppermint Vanilla Whipped Cream… SO GOOD. Do not make hot chocolate without making this to go with it, it’s honestly good with coffee or chai too! Homemade whipped cream takes less than 10 minutes to make. It will be the perfect addition to your holiday drink and everyone will love how festive it is! You can store this in the freezer and pull it out to thaw slightly just before use! It is easy to make a big batch of this and freeze for when you need it! Let me know if you try this easy recipe!
Let’s get Started!
Homemade Peppermint Whipped Cream (Easy Holiday Treat!)
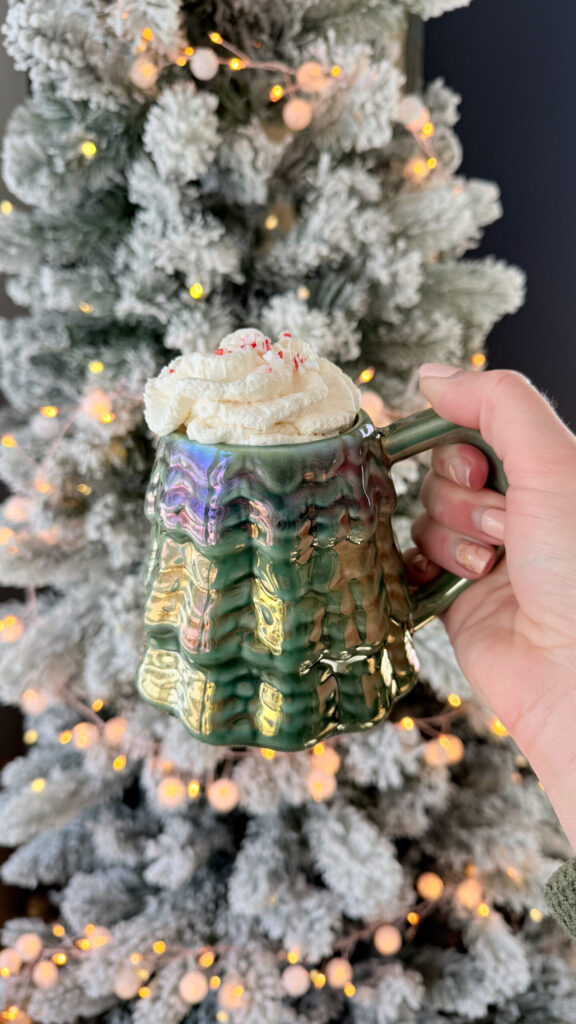
If you’re looking for the perfect holiday topping to elevate your festive drinks and winter desserts, this Homemade Peppermint Whipped Cream is the recipe you’ll want to save and make all season long. Light, fluffy, minty, and incredibly easy to make, this peppermint whip comes together in just minutes and adds the dreamiest holiday flavor to hot chocolate, coffee, brownies, pies, and more. Whether you’re hosting a Christmas party or just want to make cozy drinks at home feel extra special, this simple peppermint whipped cream is the perfect seasonal touch.
Why You’ll Love This Peppermint Whipped Cream
There are so many reasons this recipe is a staple in my holiday kitchen.
• It uses only four simple ingredients you probably already have.
• It comes together fast—just 3 to 5 minutes with a mixer.
• The flavor is perfectly balanced: sweet, creamy, and minty without being overpowering.
• It’s an easy way to add holiday flair to every drink and dessert.
• It can be made traditionally in a bowl, or you can make it in a whipped cream canister for multiple uses.
If you’re searching for peppermint whipped cream, Christmas whipped cream topping, or an easy holiday dessert garnish, this recipe is a go-to favorite.
Ingredients for Homemade Peppermint Whipped Cream
To make this cozy winter whip, you only need four ingredients:
- 1 cup heavy whipping cream
- ¼ cup powdered sugar
- 2 teaspoons peppermint extract
- 1 teaspoon vanilla extract or vanilla paste
These simple ingredients create fluffy, sweet, mint-infused cream that pairs beautifully with every seasonal treat.
How to Make Peppermint Whipped Cream (Two Easy Methods)
The best part about this recipe is that you can make it two different ways, depending on your preference and kitchen tools.
Method 1: Traditional Bowl + Mixer
This is the classic way to make peppermint whipped cream.
- Add the heavy whipping cream, powdered sugar, peppermint extract, and vanilla into a large mixing bowl.
- Use a hand mixer or stand mixer fitted with the whisk attachment.
- Mix on medium-high speed until soft peaks begin to form, then continue until stiff peaks hold their shape.
- Taste and adjust flavoring if needed—add a splash more peppermint for extra holiday zing.
This method gives you quick and fluffy peppermint whipped cream that you can dollop on drinks, scoop onto desserts, or pipe for a pretty presentation.
Method 2: Whipped Cream Canister (Great for Multiple Uses!)
If you love having fresh whipped cream ready whenever you need it, this method is a game changer. This is the whipped cream canister I recommend. You will also need these chargers for it.
- Add the heavy whipping cream, powdered sugar, peppermint extract, and vanilla to a mixing cup.
- Stir or whisk until everything is well combined—this step ensures the sugar dissolves fully.
- Pour the mixture into a whipped cream canister.
- Attach and activate a whipped cream charger, following the instructions for your specific dispenser.
- Shake gently and store the canister in the refrigerator.
This method keeps your peppermint whipped cream fresh, airy, and ready to use for days. Just shake and dispense whenever you need a festive touch!
How to Use Peppermint Whipped Cream
This holiday-themed whipped cream is incredibly versatile. Try adding it to:
- Hot chocolate or peppermint mocha
- Holiday coffees or lattes
- Brownies, chocolate cake, or cupcakes
- French toast, waffles, or pancakes
- Milkshakes or dessert cocktails
- Holiday pies like chocolate, peppermint, or even classic pumpkin
The cool peppermint paired with creamy sweetness makes every treat taste instantly festive.
Tips for Perfect Whipped Cream Every Time
• For best results, start with cold heavy cream.
• Chill your mixing bowl for a few minutes for extra fluffiness.
• Don’t overmix—once stiff peaks form, stop.
• Add more peppermint extract for a stronger mint flavor, but start small; a little goes a long way.
Enjoy Your Festive Holiday Whip!
This Homemade Peppermint Whipped Cream is the easiest way to bring holiday flavor to your kitchen. Whether you dollop it, pipe it, swirl it on top of hot cocoa, or keep it in a whipped cream canister for everyday use, it’s a delicious and simple recipe to pull out every Christmas season.

Add it to your favorite drink, and ENJOY!
Ingredients
Method
- This is the classic way to make peppermint whipped cream.
- Add the heavy whipping cream, powdered sugar, peppermint extract, and vanilla into a large mixing bowl.
- Use a hand mixer or stand mixer fitted with the whisk attachment.
- Mix on medium-high speed until soft peaks begin to form, then continue until stiff peaks hold their shape.
- Taste and adjust flavoring if needed—add a splash more peppermint for extra holiday zing.
- This method gives you quick and fluffy peppermint whipped cream that you can dollop on drinks, scoop onto desserts, or pipe for a pretty presentation.
- If you love having fresh whipped cream ready whenever you need it, this method is a game changer.
- Add the heavy whipping cream, powdered sugar, peppermint extract, and vanilla to a mixing cup.
- Stir or whisk until everything is well combined—this step ensures the sugar dissolves fully.
- Pour the mixture into a whipped cream canister.
- Attach and activate a whipped cream charger, following the instructions for your specific dispenser.
- Shake gently and store the canister in the refrigerator.
- This method keeps your peppermint whipped cream fresh, airy, and ready to use for days. Just shake and dispense whenever you need a festive touch!