Football season is upon us, and whether you’re tailgating at the stadium or hosting a watch party at home, good food is just as important as the game itself. Here’s a roundup of some easy, crowd-pleasing gameday recipes that will keep your guests satisfied from kickoff to the final whistle!
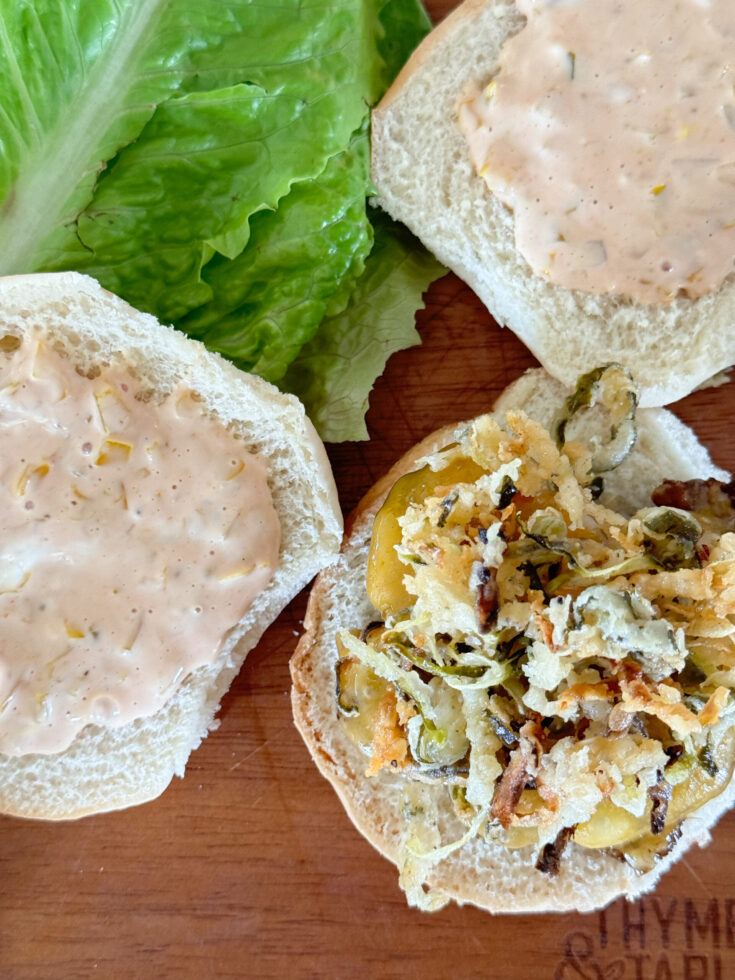
Fried Pickle Straws
I had this idea late at night to take some whole pickles that I had and run them through my spiral attachement for my chopper. You know, the spiral cutter you use for zucchini or other vegetables to make veggie noodles?
I thought it would be fun to do a twist on the classic fried onion straws that you top on burgers but with pickles!
Man oh man, did it turn out so good and probably going to be on repeat anytime we make burgers.
Let’s get started!
Ingredients
- 2-3 whole dill pickles
- 1 cup buttermilk (optional- see notes)
- 1 cup flour
- 1 tsp pepper
- 1/2 tsp garlic powder
- Cooking oil (I used avocado oil)
Instructions
- Take your whole pickle and spin it through the spiral cutter. You want long strands of pickles. Take the strands and soak in a bowl with the buttermilk for at least 30 minutes.
- In a pot, heat two inches of oil to 375°. While it heats, Stir together the flour, pepper and garlic powder in a shallow bowl. Set aside. Transfer the pickles to a colander and drain off the excess buttermilk.
- Grab a handful of the soaked pickles and transfer them to the flour. Stir them around until each one is well coated in the flour and they don't stick together. Shake off excess flour and transfer them to the hot oil. Cook for 5 minutes or until golden brown (times may vary)
- Transfer the fried pickle strings to a plate lined with paper towels. Repeat until all the pickle strings are cooked. Top on your burger and enjoy!

Notes
I tried a few variations and you definitely can just skip the buttermilk part and pat dry then add to flour, however I really liked the flavor when I soaked them in buttermilk first!
Pickle Queso

If you're a fan of queso and have a love for pickles, you're in for a treat! Combining the creamy, cheesy goodness of queso with the tangy crunch of pickles creates a unique and addictive dip that's perfect for any occasion. Whether you're hosting a game night, a party, or just craving something delicious, this pickle queso will be a hit.
Ingredients
- 8 ounces cubed Velveeta cheese
- 1 block of cream cheese
- 10 oz Queso fresco
- 1 cup dill pickle, diced
- 1 large jalapeño chopped and seeds removed
- 1/2 cup red onion
- 14 ounces rotel
- 6 ounces evaporated milk
- 1 tsp cumin
- 1/4 cup chopped cilantro
- 2 cloves minced garlic
Instructions
Preheat the oven to 350°
In a 13×9 baking dish, add the Velveeta cheese, queso fresco, cream cheese, pickles, jalapeño, cilantro, red onion, can of rotel and spices.
Pour the evaporated milk on top. Do not stir, bake uncovered for 25-30 minutes or until the cheese is melted.
Stir to combine.
Serve immediately with chips!
Mini Pickle Burgers
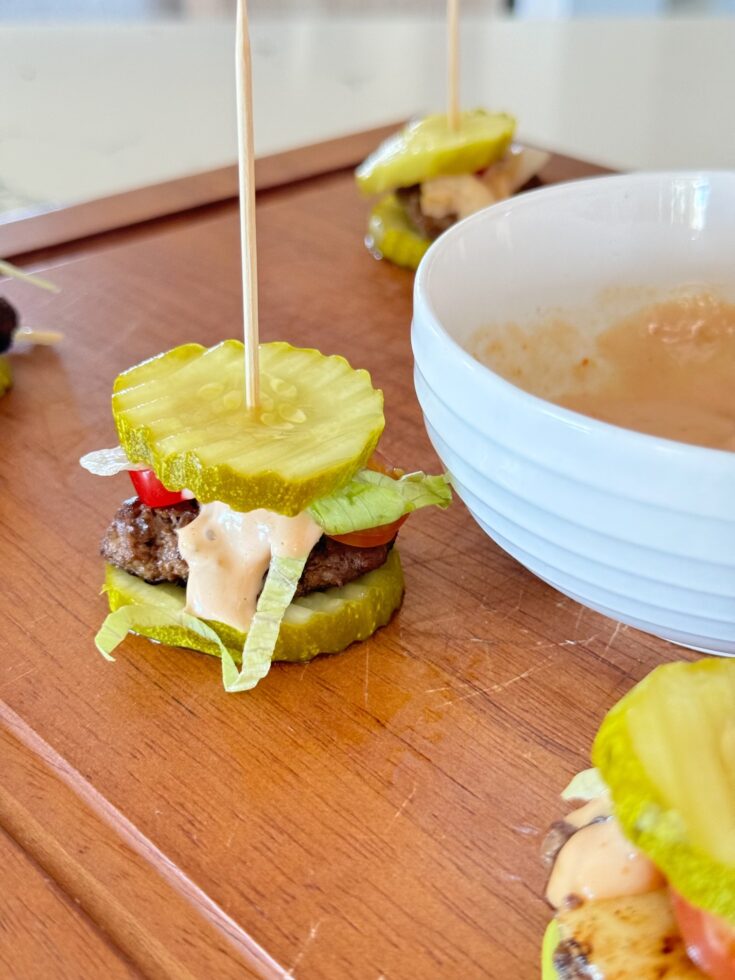
Who doesn’t love a good burger? Imagine the juicy goodness of a burger, but in a fun, bite-sized form. Introducing the mini pickle burger! Perfect for parties, picnics, or just a fun dinner at home, these little treats are sure to be a hit. Follow along with this easy recipe to make your own mini pickle burgers.
Ingredients
- 1 lb ground beef
- 1 teaspoon salt
- 1/4 teaspoon black pepper
- 1/4 teaspoon garlic powder
- 1/4 teaspoon onion powder
- 1 tablespoon Worcestershire sauce
- 2 Tablespoons Mustard
- 20-24 dill pickle chips
- 1 cup shredded lettuce
- 1/2 cup sliced cherry tomatoes
- 1/2 cup sliced cheese (cheddar or American)
- 1/4 cup ketchup
- 1/4 cup mayonnaise
Instructions
In a mixing bowl, combine the ground beef, salt, black pepper, garlic powder, onion powder, and Worcestershire sauce.
Mix until all ingredients are well combined.
Shape the mixture into small patties, roughly the size of the pickle slices. You should get about 10-12 mini patties.
Heat a grill or skillet over medium-high heat.
Cook the patties for about 2-3 minutes on each side, or until they are cooked through to your desired doneness.
If adding cheese, place a slice on each patty during the last minute of cooking and cover to melt the cheese.
Spread a little ketchup, mustard, and mayonnaise on the bottom half of each mini bun.
Add a mini burger patty on top of each pickle slice.
Top with shredded lettuce and a slice of cherry tomato.
Finish with the top pickle.
Crockpot Lasagna

Lasagna is a classic comfort food that brings warmth and joy to the dinner table. However, making it can sometimes feel daunting due to the time and effort involved. That's where the magic of a crockpot comes in! This Crockpot Lasagna recipe is a game-changer, allowing you to enjoy all the delicious layers of cheesy, saucy goodness without the fuss. Perfect for busy weeknights or a cozy weekend meal, this recipe will become a family favorite. Let's dive into the easy steps to create this mouthwatering dish.
Ingredients
- 1 pound ground beef
- 1 small yellow onion diced
- 3 cloves garlic minced
- 2 (24oz) jars of spaghetti sauce
- 2 tablespoons Italian seasoning
- 12 ounces lasagana noodles, not the no boil kind
- 1/2 cup water
- 15 ounces ricotta cheese
- 1/2 cup cottage cheese
- 1 large egg
- 16 ounces mozzarella shredded
- 1 cup Parmesan cheese
- Salt & pepper to taste
Instructions
Step 1: In a large skillet over medium heat, add the ground beef. Cook until it begins to brown, breaking it up as you cook. Add the onion and garlic. Cook until the onions are soft, about 5 minutes. Drain the excess fat.
Step 2: Add the tomato sauce, water, italian seasoning, salt and pepper to the meat mixture and set aside. Taste and add more salt and/or pepper to taste.
Step 3: Set aside 1 1/2 cups of mozzarella and 1/4 cup of parmesan cheese. This will be for topping at the end. In a large bowl mix together the ricotto, cottage cheese, eggs, and the remainder of the mozzarella and Parmesan.
Step 4: Spray your 6 to 8 quart crockpot with cooking spray. Add some of the sauce and meat mixture to the bottom. Add a layer of uncooked lasagna noodles. You will need to break them and rearrange them to fit. Top the noodles with some of the cheese mixture and then more sauce and meat. Repeat until you have used all the ingredients. Top with the set aside cheese.
Step 5: Cover the crockpot and cook on low for 4 to 6 hours. Cooking times on crockpots vary greatly. It was finished in my crockpot after 4.5 hours.
Fried Pickle Cheese Balls
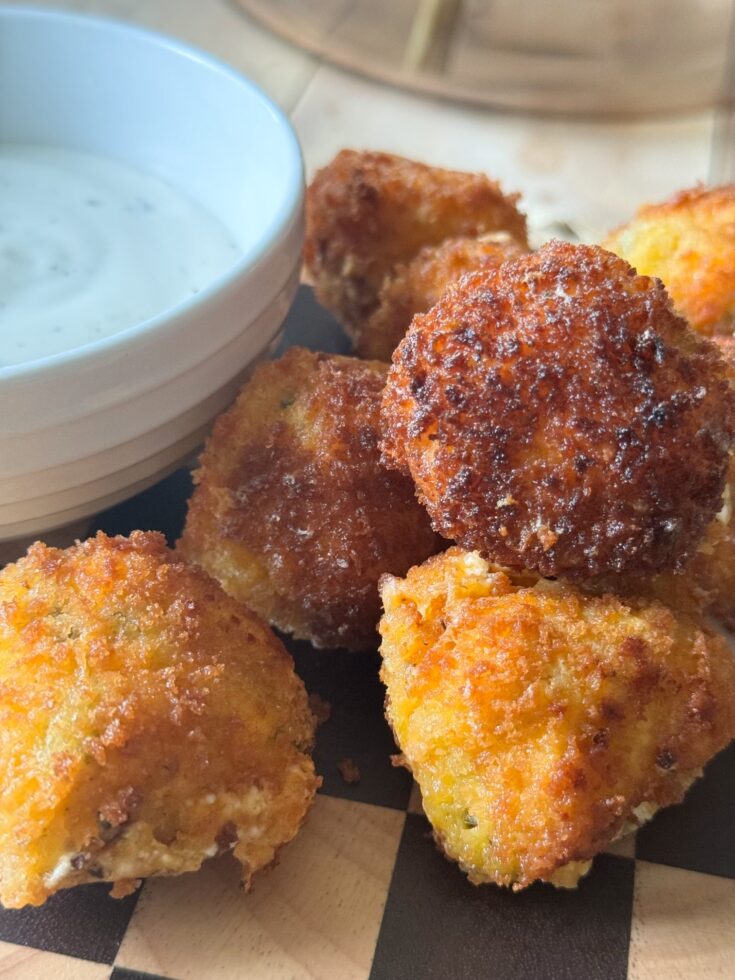
If you're on the lookout for a crowd-pleasing appetizer that combines the best of tangy pickles, gooey cheese, and a satisfyingly crispy exterior, then fried pickle cheese balls are your answer. This delightful treat is perfect for game days, parties, or simply when you want to indulge in a savory snack with a twist. Let's dive into the recipe and learn how to make these irresistible fried pickle cheese balls.
Ingredients
- 4 oz sharp cheddar cheese, shredded
- 4 oz cream cheese, softened
- 1/2 cup dill pickle, chopped small and drained
- 1/2 tsp crushed pepper flakes
- 1/2 tsp dried dill
- 1/2 tsp salt
- 1/2 tsp pepper
- 1 tbsp ranch seasoning
- 1 cup flour
- 2 eggs
- 1 1/2 cups panko bread crumbs
- 1-2 cups oil, I used avocado
Instructions
1.In a large bowl, add both cheeses, drained pickles, crushed pepper, salt, dried dill and pepper and mix together. Roll into small balls, about 1 inch and place on a small baking sheet. Flash freeze for 30-45 minutes.
2. Set up a dredging station with 3 bowls. The first bowl with flour and ranch seasoning mixed together, the second with the egg mixed together, and the third with the breadcrumbs.
3. In a large frying pan or skillet, heat oil over medium-high heat. Roll each ball into flour, then into the egg mixture, next in the breadcrumb mixture, back into the egg mixture and back into the breadcrumb mixture.
4. Place a few of the balls into the hot oil at a time, cook until golden on all sides. Remove with a slotted spoon and place on a plate lined with paper towels. Work in batches until all are fried up and then serve with your favorite dipping sauce.

Notes
You can airfry these!
Airfry at 400° for 7-10 min or until golden brown. Turn half way through. I suggest spraying with avocado oil.
Crispy Baked Chicken Tender
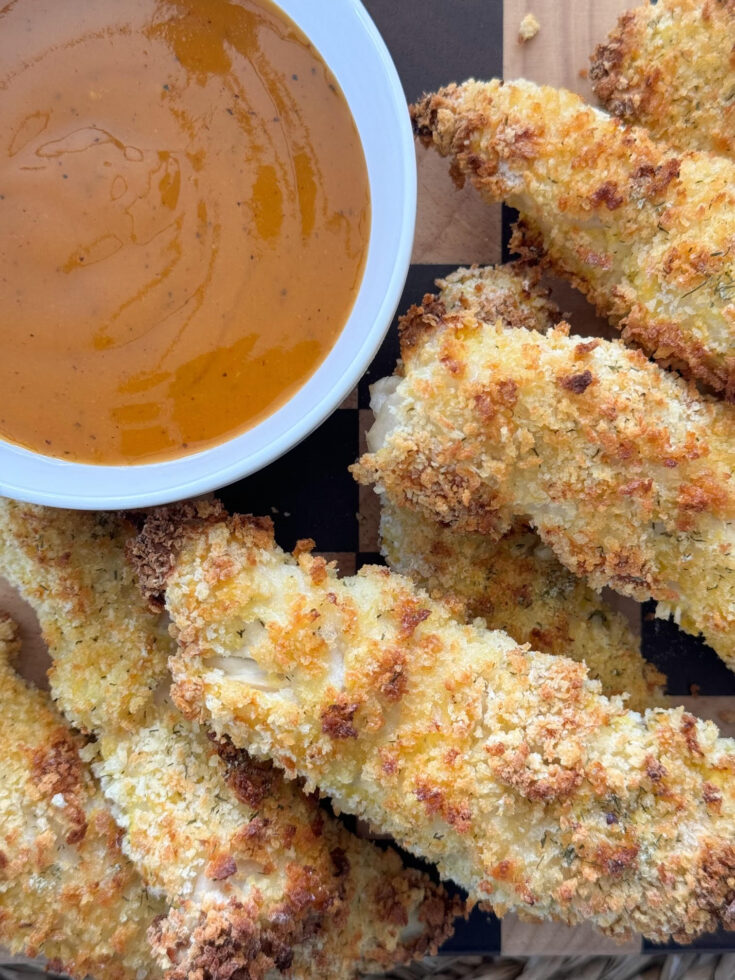
When it comes to comfort food, few things hit the spot like chicken tenders. But what if you could enjoy all the crispiness and flavor without the guilt? Enter Crispy Baked Chicken Tenders—a lighter, healthier version of the beloved dish that doesn't skimp on taste. Perfect for a family dinner, meal prep, or a quick snack, these baked tenders are sure to become a staple in your kitchen.
Ingredients
- 2 lbs. chicken tenders
- 1 cup pickle brine
- 1 1/3 cups panko bread crumbs
- 1 cup all-purpose flour
- 1 tsp baking powder
- 2 large eggs
- 1 tsp garlic powder
- Salt and freshly ground black pepper
Instructions
Place your chicken tenders in a shallow dish or bowl and pour in the pickle brine. Cover and place in fridge for 2 hours.
Preheat your oven to 425°F. Spray a large oven-safe cooling rack with non-stick spray and place it over an 18 by 13-inch baking sheet.
In one dish, combine the flour and baking powder. In a second dish whisk the eggs. In a third dish, combine the panko bread crumbs, dried dill, garlic powder, salt and pepper.
Begin by dipping two chicken tenders at a time into the flour, ensuring they are evenly coated. Next, dip them into the whisked eggs. Finally, coat them in the panko mixture, pressing gently to ensure the crumbs adhere well. Shake off any excess coating.
Place the coated chicken tenders on the rack, ensuring there is space between each tender for even cooking.
Place in the preheated oven. Bake for 15-20 minutes, turning half way and you want the tenders to be golden brown.
Serve up with your favorite sauce and enjoy!

Notes
Notes- want more dill flavor? Add dill and salt to the panko
Easy Nacho Sauce
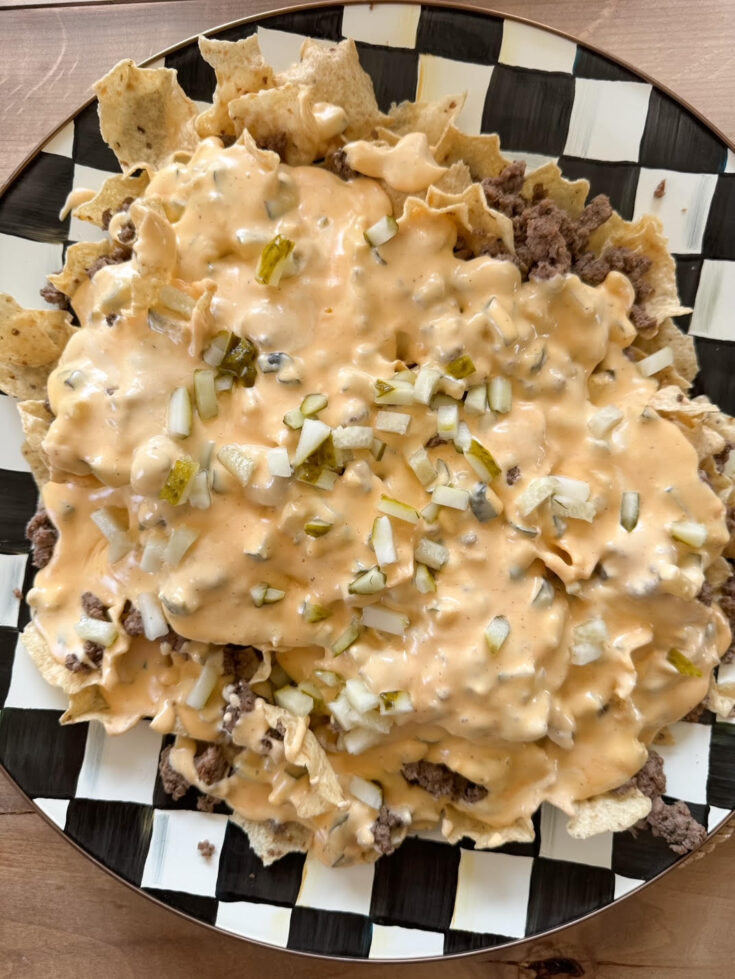
Who doesn't love a warm, creamy nacho cheese sauce? It's the ultimate comfort food and perfect for a quick snack, party dip, or a topping for your favorite dishes. The best part? You can make this nacho cheese sauce from scratch in just a few minutes with ingredients you probably already have in your kitchen. Here's how!
Ingredients
- 2 tablespoons butter
- 3 cloves garlic minced
- 2 teaspoon cumin
- 2 teaspoons chili powder
- ½ teaspoon onion powder
- 12 ounces canned evaporated milk
- 8 ounces cream cheese
- 8 ounces shredded sharp cheddar or velveeta
- 1/4 cup milk see note
- 1 tablespoon hot sauce salt to taste
- 1/2 cup chopped dill pickles (optional)
Instructions
•Melt the butter in a skillet over medium heat. If using pickles or onion and jalapeños, cook for 3-5 minutes
•Add the garlic, cumin, chili powder, and onion powder and cook for 30 seconds more.
•Add the evaporated milk and cream cheese to the pan and cook, stirring over medium heat until the cream cheese has melted, about 5 minutes.
•Reduce heat to low and add the shredded cheese or velveeta, whisking constantly, until the cheese has been added and the sauce is smooth and creamy.
•Add additional milk as desired to reach the consistency you prefer. Season with hot sauce and salt to taste.