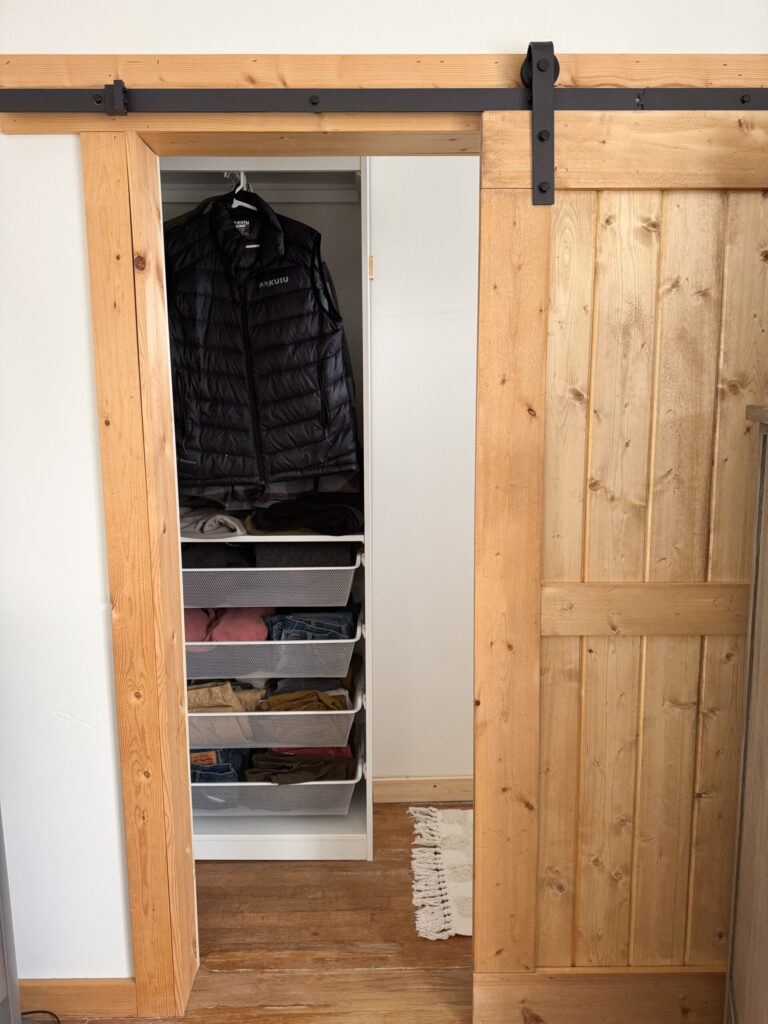
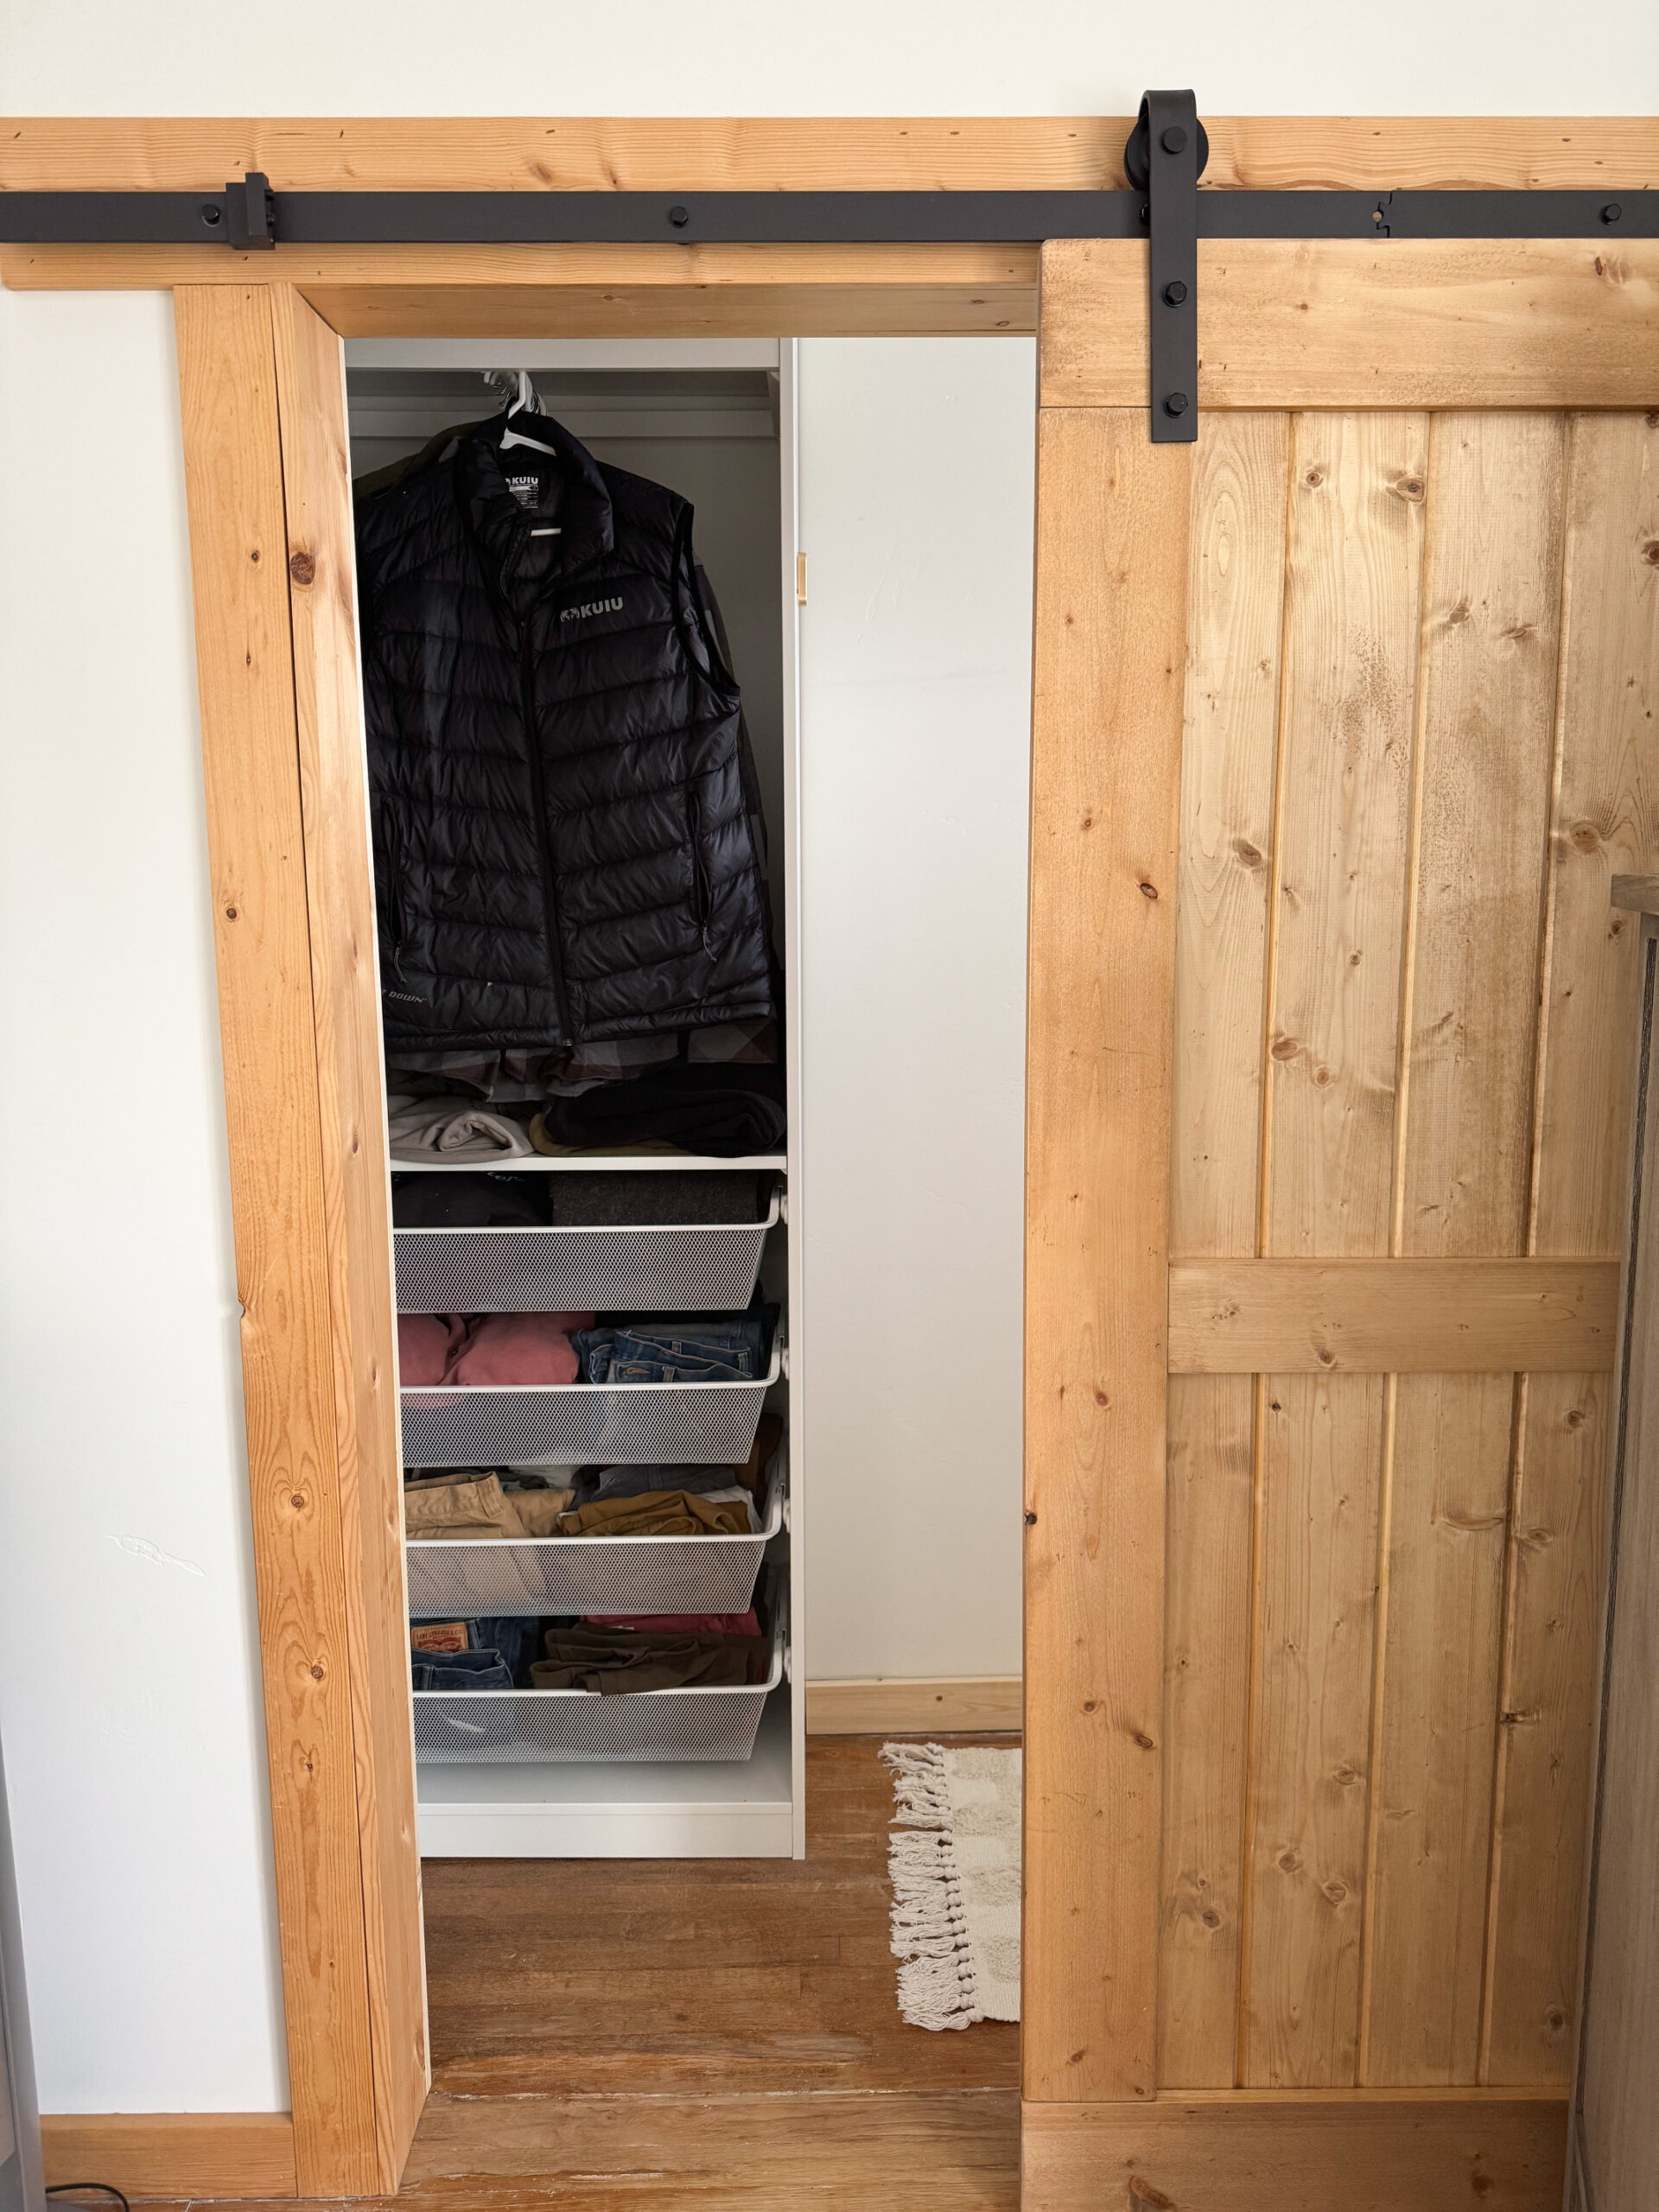
I built a new sliding door for my closet refresh! I went with a simple design using tongue & groove and 1X6 boards that I cut to size. Love how it turned out!
A door slab is a versatile addition to any home improvement project, offering endless customization options. Whether you’re upgrading an old door or starting fresh, creating a DIY door slab is a cost-effective way to add personality and functionality to your space.
Materials:
- A solid wood or MDF board (cut to the desired size)
- Hinges (if attaching to a frame)
- Door handle or knob
- Sandpaper (120 and 220 grit)
- Wood stain or paint (optional)
- Paintbrush or roller
- Measuring tape
- Pencil
- Power drill
- Safety goggles and gloves
Step 1: Select and Prepare the Material
- Choose Your Material: Pick a sturdy and durable material such as solid wood for a traditional look or MDF for a smooth, modern finish.
- Cut to Size: Measure your door frame or opening, and cut the board to fit. Most hardware stores can cut the material to your specifications.
- Smooth the Edges: Sand the entire surface and edges with 120-grit sandpaper to remove roughness. Finish with 220-grit sandpaper for a polished feel.
- Customize the Finish: Apply a stain for a natural wood look or paint it in your favorite color. Allow it to dry completely.
Step 2: Add Functional Features
- Mark Hinge Placement: Measure and mark the locations for the hinges on the door slab and door frame. Standard doors typically have three hinges.
- Attach Hinges: Using a power drill, secure the hinges to the door slab. Ensure they align properly with the frame.
- Drill for the Handle: Mark and drill holes for the door handle or knob, following the manufacturer’s instructions.
Step 3: Install the Door
- Position the Door Slab: Align the hinges with the corresponding spots on the door frame.
- Secure the Hinges: Use screws to attach the hinges to the frame, ensuring the door opens and closes smoothly.
- Check Alignment: Test the door to confirm it’s level and properly aligned. Make adjustments as needed.
Step 4: Finishing Touches
- Seal the Surface: Apply a clear sealant to protect the finish and add durability.
- Decorate Around the Door: Add trim or molding to enhance the look and provide a polished appearance.
- Accessorize: Consider adding a door stop or decorative hardware to complete the project.
Tips for Success
- Measure twice, cut once to ensure accuracy.
- Use a stud finder if mounting the door to ensure hinges are attached securely.
- Enlist a helper for holding the door slab during installation.
DIY Door Slab
A door slab is a versatile addition to any home improvement project, offering endless customization options. Whether you’re upgrading an old door or starting fresh, creating a DIY door slab is a cost-effective way to add personality and functionality to your space.
Materials
- A solid wood or MDF board (cut to the desired size)
- Hinges (if attaching to a frame)
- Door handle or knob
- Sandpaper (120 and 220 grit)
- Wood stain or paint (optional)
- Measuring tape
- Pencil
- Safety goggles and gloves
Tools
- Paintbrush or roller
- Power drill
Instructions
Step 1: Select and Prepare the Material
Choose Your Material: Pick a sturdy and durable material such as solid wood for a traditional look or MDF for a smooth, modern finish.
Cut to Size: Measure your door frame or opening, and cut the board to fit. Most hardware stores can cut the material to your specifications.
Smooth the Edges: Sand the entire surface and edges with 120-grit sandpaper to remove roughness. Finish with 220-grit sandpaper for a polished feel.
Customize the Finish: Apply a stain for a natural wood look or paint it in your favorite color. Allow it to dry completely.
Step 2: Add Functional Features
Mark Hinge Placement: Measure and mark the locations for the hinges on the door slab and door frame. Standard doors typically have three hinges.
Attach Hinges: Using a power drill, secure the hinges to the door slab. Ensure they align properly with the frame.
Drill for the Handle: Mark and drill holes for the door handle or knob, following the manufacturer’s instructions.
Step 3: Install the Door
Position the Door Slab: Align the hinges with the corresponding spots on the door frame.
Secure the Hinges: Use screws to attach the hinges to the frame, ensuring the door opens and closes smoothly.
Check Alignment: Test the door to confirm it’s level and properly aligned. Make adjustments as needed.
Step 4: Finishing Touches
Seal the Surface: Apply a clear sealant to protect the finish and add durability.
Decorate Around the Door: Add trim or molding to enhance the look and provide a polished appearance.
Accessorize: Consider adding a door stop or decorative hardware to complete the project.
Tips for Success
Measure twice, cut once to ensure accuracy.
Use a stud finder if mounting the door to ensure hinges are attached securely.
Enlist a helper for holding the door slab during installation.