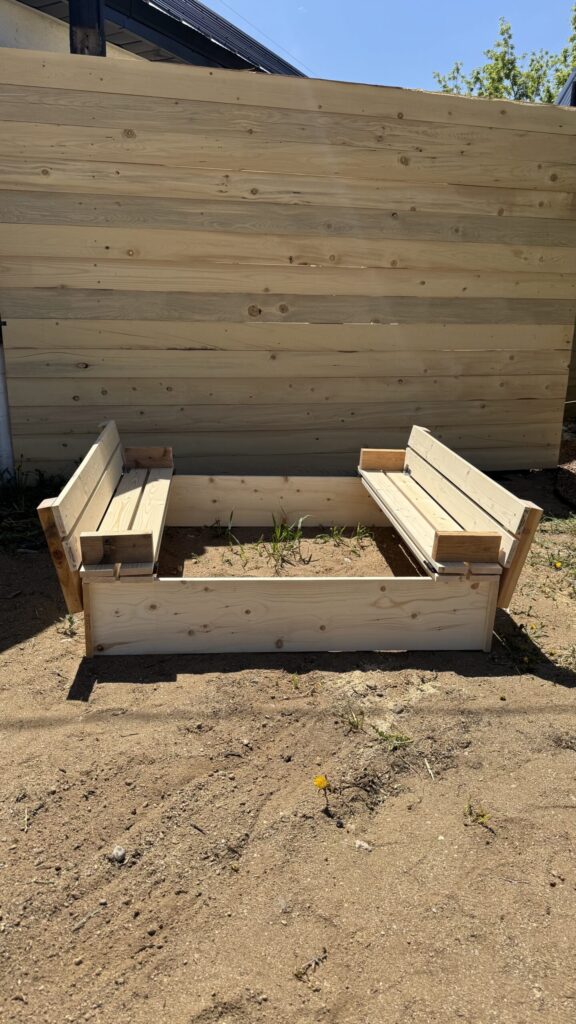
If you’re looking for a fun weekend project that your kids will love and adds charm to your backyard, this DIY covered sandbox is it! This simple design includes built-in bench seats that fold closed to keep the sand clean and dry when not in use. With a few basic tools and materials, you can build a custom sandbox that’s functional, budget-friendly, and built to last.
Finished Size:
47 1/2″ W x 47 1/2″ D x 9 1/2″ H
Materials:
- (2) 1 x 10 @ 8 feet long
- (6) 1 x 4 @ 8 feet long
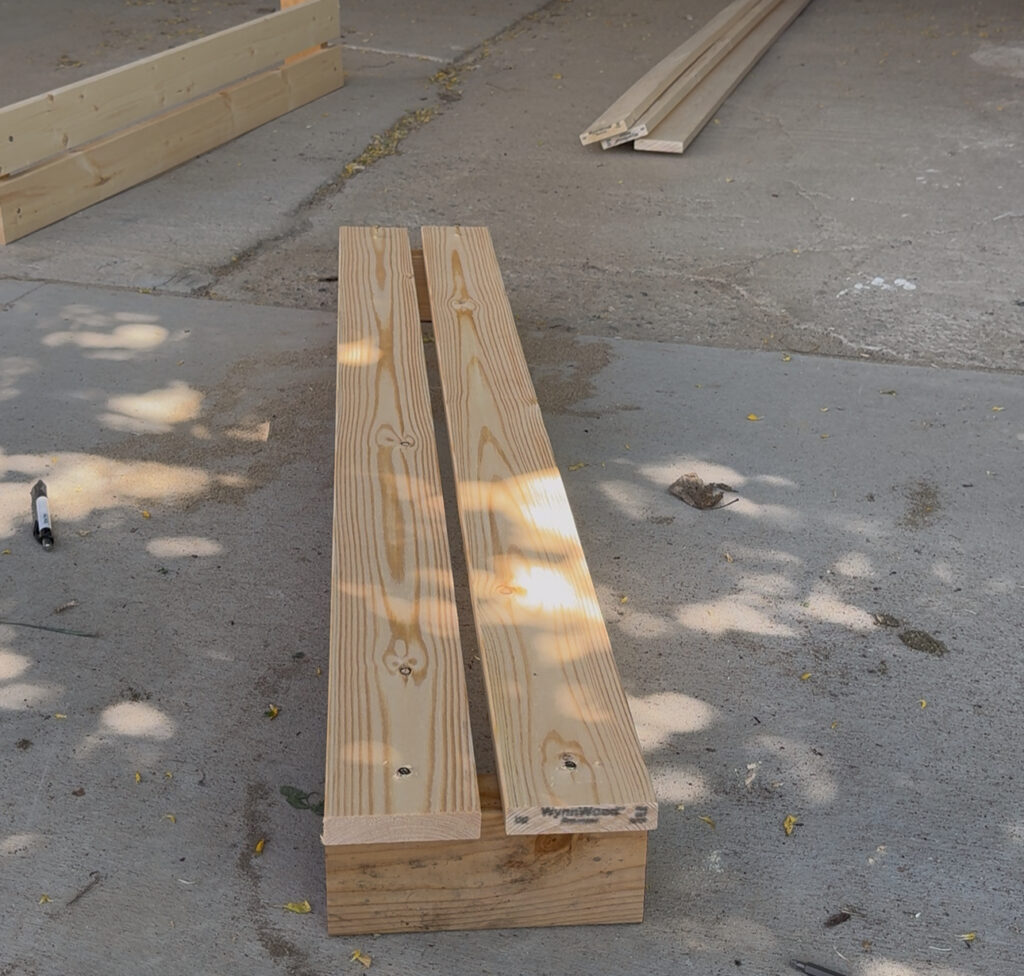
- (1) 2 x 4 @ 8 feet long (or stud length)
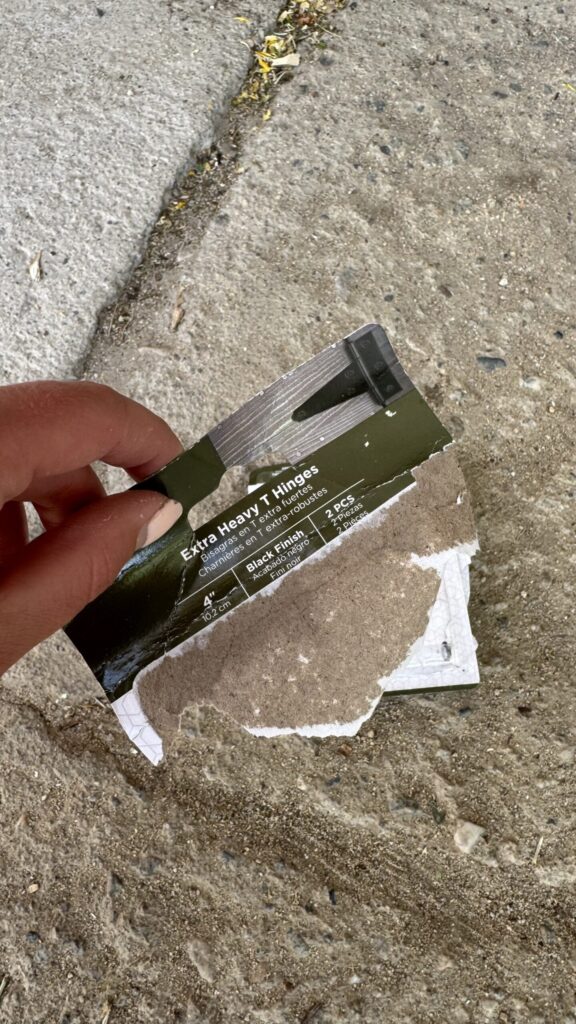
- (4) Sets of exterior-grade hinges
- (4) Exterior-grade handles
- 1 3/4″ exterior screws
- Exterior paint or stain
Cut List:
- (2) 1 x 10 @ 47 1/2″ (long sides of the box)
- (2) 1 x 10 @ 46″ (short sides of the box)
- (12) 1 x 4 @ 47 1/2″ (top planks)
- (4) 2 x 4 @ 7 1/2″ (armrests)
- (4) 2 x 4 @ 12 1/2″ (back supports/handles)
Tools Needed:
- Miter saw
- Drill
- Sander
- Tape measure
Instructions:
1. Build the Box Frame
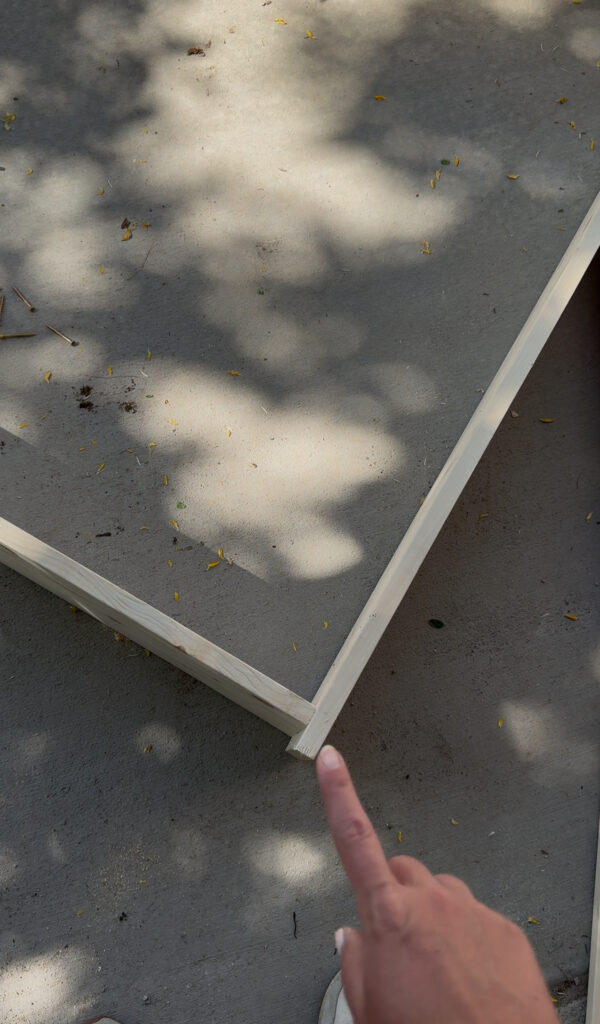
Start by assembling the base of the sandbox. Attach the short sides (46″) between the long sides (47 1/2″) to create a square frame. You can use pocket holes for a clean look or pre-drill and screw through the long sides using 1 1/4″ screws. Make sure everything is square and level. You’ll see in the picture that I inset the boards that are 47 1/2 about an 1/2 inch or so.
2. Add the First Layer of Planks
Screw two of the 1 x 4 planks on each side of the box to begin creating the lid/seat. Space them 1/2″ apart and countersink your screws to avoid sharp edges.

3. Build the Folding Seat Panels
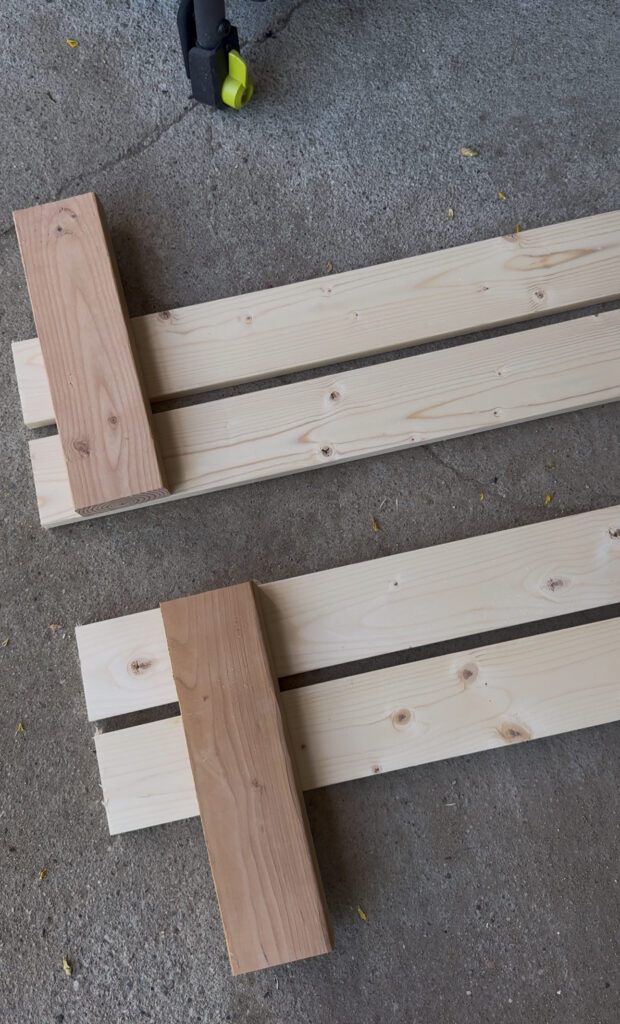
Next, you’ll create the seating panels that fold open and closed. For each side, lay out 4 planks (1/2″ apart) and attach them to two 2 x 4 armrests (7 1/2″ each). The 2 x 4s should be inset at least 1″ from the edge so they fit neatly inside the box when folded down. You’ll make two of these panels.
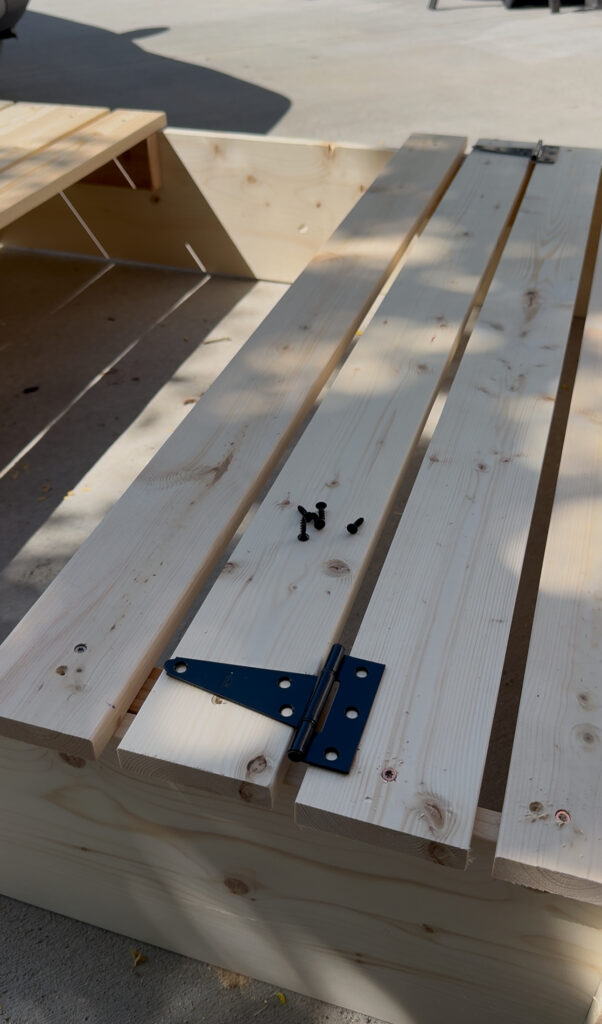
4. Install Hinges to Seat Base
Position the seat panels next to the two fixed planks already attached to the box. Leave a 1/2″ gap between them. Attach the hinges to connect the fixed planks and the foldable seat panels. Once all four hinges are installed, carefully flip the entire sandbox over to make sure the hinges are secure and aligned.
5. Create the Backrests
To make the seat backs, line up four more 1 x 4 planks (again spaced 1/2″ apart) and attach two 12 1/2″ 2 x 4s to the back, about 4″ from each end. Repeat this step to make the second backrest.
6. Attach Backrests with Hinges
Slide each backrest under the bench seats, keeping a 1/2″ gap from the seat panel. Attach your second set of hinges (door hinges work well, with the pin side down) between the backrest and the existing seat panel to allow it to fold up and down smoothly.

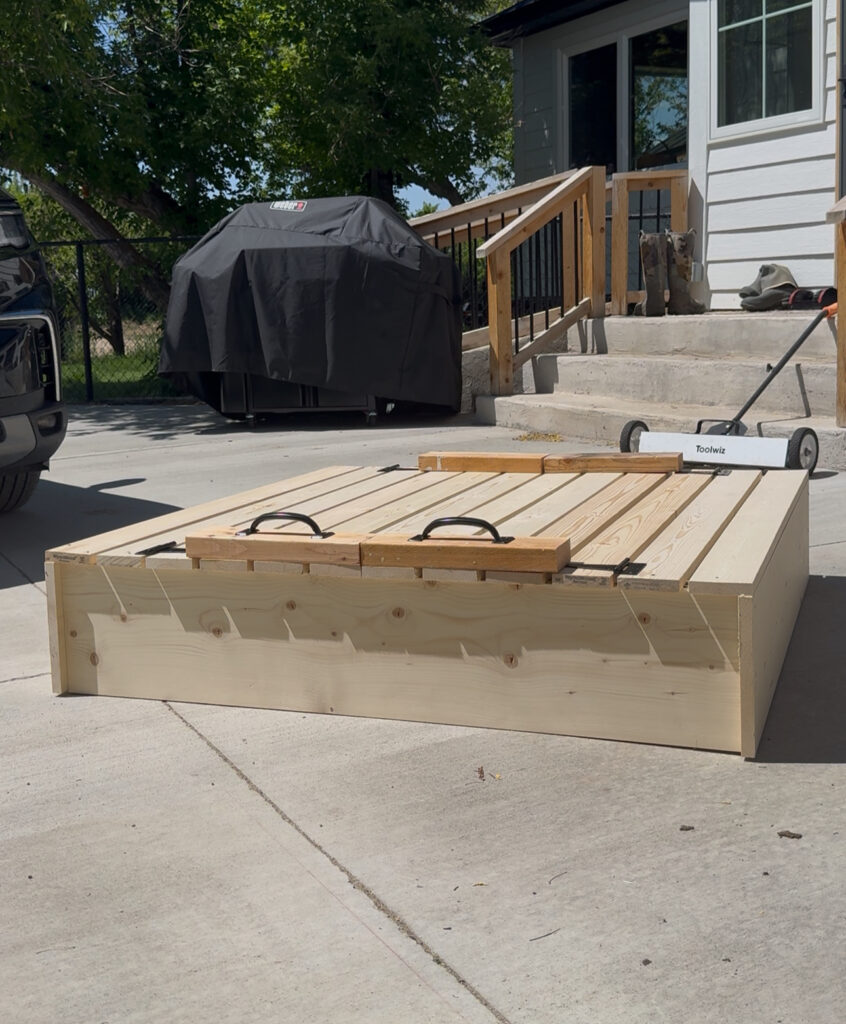
Once everything is assembled, give the whole sandbox a thorough sanding to remove splinters or rough spots. Paint or stain your sandbox with an exterior-grade finish to protect it from the elements. Add handles to the backrests to make opening and closing the benches easier for little hands.
7. Add Finishing Touches

Enjoy Your New Sandbox!
DIY Sandbox

If you're looking for a fun weekend project that your kids will love and adds charm to your backyard, this DIY covered sandbox is it! This simple design includes built-in bench seats that fold closed to keep the sand clean and dry when not in use. With a few basic tools and materials, you can build a custom sandbox that’s functional, budget-friendly, and built to last.
Materials
- (2) 1 x 10 @ 8 feet long
- (6) 1 x 4 @ 8 feet long
- (1) 2 x 4 @ 8 feet long (or stud length)
- (4) Sets of exterior-grade hinges
- (4) Exterior-grade handles
- 1 3/4" exterior screws
- Exterior paint or stain
- CUT LIST:
- (2) 1 x 10 @ 47 1/2" (long sides of the box)
- (2) 1 x 10 @ 46" (short sides of the box)
- (12) 1 x 4 @ 47 1/2" (top planks)
- (4) 2 x 4 @ 7 1/2" (armrests)
- (4) 2 x 4 @ 12 1/2" (back supports/handles)
Tools
- Miter saw
- Drill
- Sander
- Tape measure
Instructions
1. Build the Box Frame
Start by assembling the base of the sandbox. Attach the short sides (46") between the long sides (47 1/2") to create a square frame. You can use pocket holes for a clean look or pre-drill and screw through the long sides using 1 1/4" screws. Make sure everything is square and level.
2. Add the First Layer of Planks
Screw two of the 1 x 4 planks on each side of the box to begin creating the lid/seat. Space them 1/2" apart and countersink your screws to avoid sharp edges.
3. Build the Folding Seat Panels
Next, you'll create the seating panels that fold open and closed. For each side, lay out 4 planks (1/2" apart) and attach them to two 2 x 4 armrests (7 1/2" each). The 2 x 4s should be inset at least 1" from the edge so they fit neatly inside the box when folded down. You’ll make two of these panels.
4. Install Hinges to Seat Base
Position the seat panels next to the two fixed planks already attached to the box. Leave a 1/2" gap between them. Attach the hinges to connect the fixed planks and the foldable seat panels. Once all four hinges are installed, carefully flip the entire sandbox over to make sure the hinges are secure and aligned.
5. Create the Backrests
To make the seat backs, line up four more 1 x 4 planks (again spaced 1/2" apart) and attach two 12 1/2" 2 x 4s to the back, about 4" from each end. Repeat this step to make the second backrest.
6. Attach Backrests with Hinges
Slide each backrest under the bench seats, keeping a 1/2" gap from the seat panel. Attach your second set of hinges (door hinges work well, with the pin side down) between the backrest and the existing seat panel to allow it to fold up and down smoothly.
7. Add Finishing Touches
Once everything is assembled, give the whole sandbox a thorough sanding to remove splinters or rough spots. Paint or stain your sandbox with an exterior-grade finish to protect it from the elements. Add handles to the backrests to make opening and closing the benches easier for little hands.