
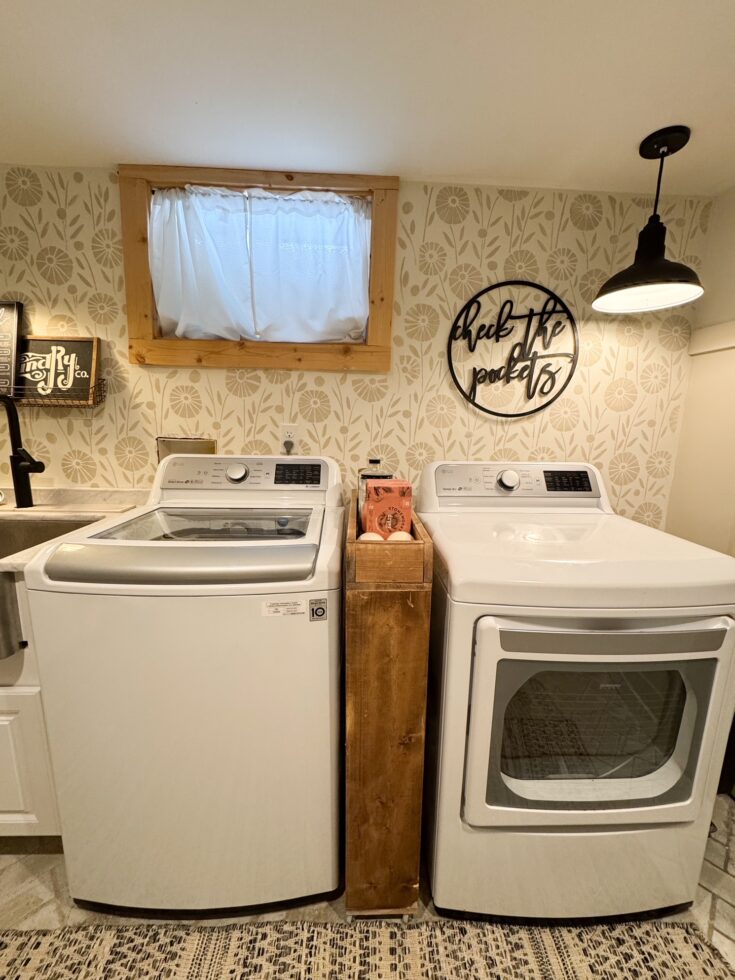
Are you tired of juggling laundry baskets and struggling to keep your laundry room organized? A DIY laundry cart is the perfect solution! This easy-to-build cart is designed to fit in tight spaces, roll effortlessly, and keep your laundry essentials neatly stored.
Materials:
- 1×6 pine boards
- 1×4 pine boards
- Cart wheels
- Wood glue
- Paint or stain of choice
Tools:
- Saw to cut wood
- Pocket hole jig
- 1 1/4 inch pocket hole screws
Instructions:
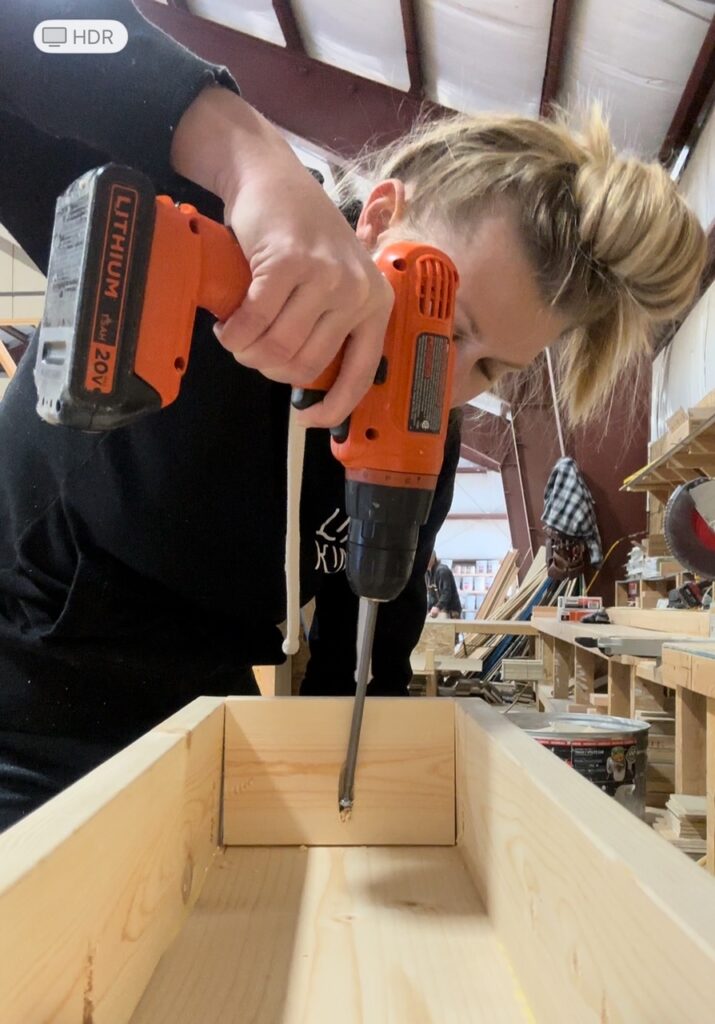
Start by measuring how tall you want your cart to be and I did the width by the length of my washer. Make sure you factor in the wheels as well for this. I cut my 1×6 boards to the length and width I wanted (you’ll need 2 for the width and 2 for the height). Then I drilled 2 pocket holes on both ends of one side of the boards, added wood glue and my pocket hole screws to build a box (see example picture).
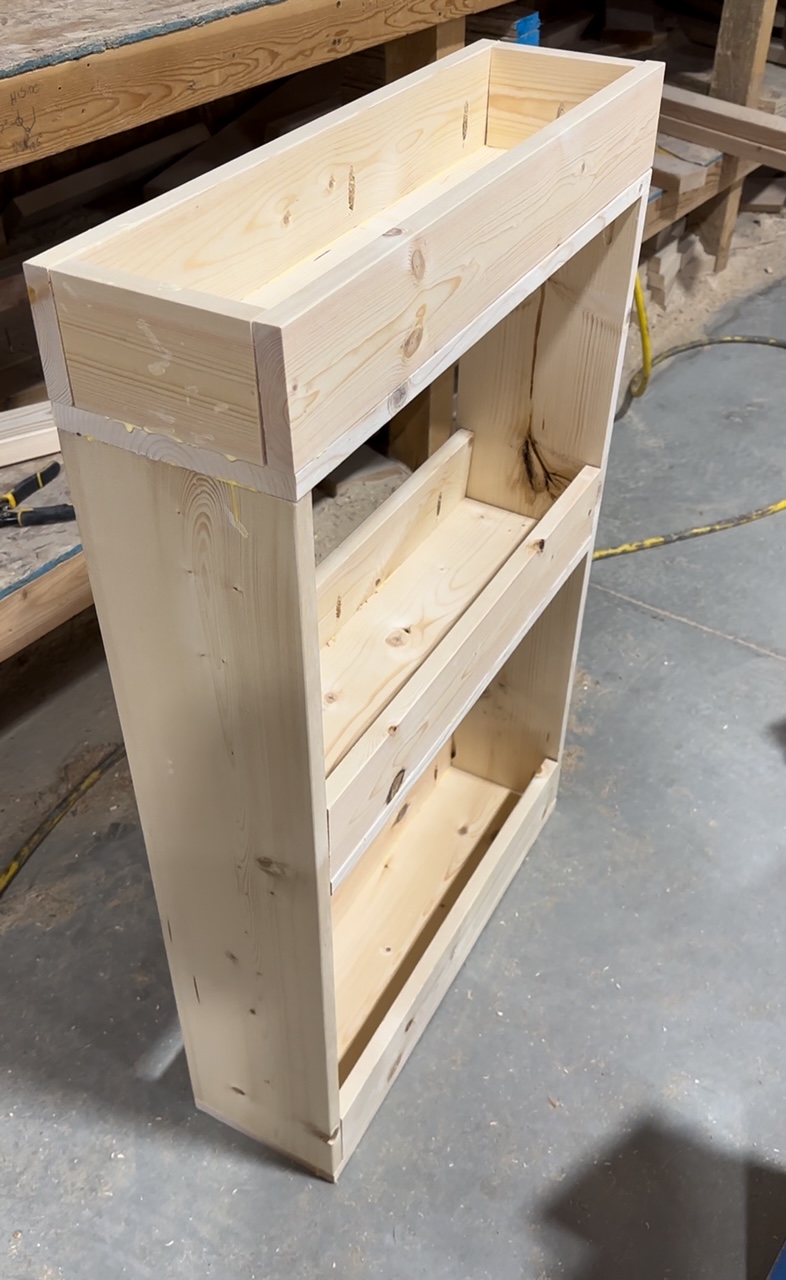
Next I took my 1×4 boards and cut 4 pieces to the length needed to make my sides for the top and the bottom (this will build a complete box (see example). For the top piece I cut two more pieces to close the ends, I secured all boards with pocket holes and glue.
For the middle shelf I used a 1×6 as the base and cut it to length and then cut my 1×4 for the sides. Attached with pocket holes and secured to the middle using pocket holes on the bottom of the 1×6 to attach to the sides of the cart.

Once the cart was built I stained using special walnut, let it dry and then added my wheels to the bottom, I made sure the wheels were lined up on all 4 corners to keep it stable.
DIY Laundry Cart
Are you tired of juggling laundry baskets and struggling to keep your laundry room organized? A DIY laundry cart is the perfect solution! This easy-to-build cart is designed to fit in tight spaces, roll effortlessly, and keep your laundry essentials neatly stored.
Materials
- 1x6 pine boards
- 1x4 pine boards
- Cart wheels
- Wood glue
- Paint or stain of choice
Tools
- Saw to cut wood
- Pocket hole jig
- 1 1/4 inch pocket hole screws
Instructions
Start by measuring how tall you want your cart to be and I did the width by the length of my washer. Make sure you factor in the wheels as well for this. I cut my 1x6 boards to the length and width I wanted (you’ll need 2 for the width and 2 for the height). Then I drilled 2 pocket holes on both ends of one side of the boards, added wood glue and my pocket hole screws to build a box (see example picture).

Next I took my 1x4 boards and cut 4 pieces to the length needed to make my sides for the top and the bottom (this will build a complete box (see example). For the top piece I cut two more pieces to close the ends, I secured all boards with pocket holes and glue.
For the middle shelf I used a 1x6 as the base and cut it to length and then cut my 1x4 for the sides. Attached with pocket holes and secured to the middle using pocket holes on the bottom of the 1x6 to attach to the sides of the cart.
Once the cart was built I stained using special walnut, let it dry and then added my wheels to the bottom, I made sure the wheels were lined up on all 4 corners to keep it stable.