Skip to content
Want recipes direct to your inbox? →

The Sassy Barn

  • Home
  • About
  • RecipesExpand
    • Breakfast
    • Lunch
    • Dinner
    • Appetizers
    • Side Dishes
  • Favorites
  • Collaborate
  • Shop
  • Contact
  • Blog

The Sassy Barn

Dessert Recipes

Pull Apart Apple Pie Bread

September 27, 2024
98 shares
  • Facebook
  • Email
Jump to Recipe Jump to Video Print Recipe

If you’re craving a cozy, sweet treat that combines the best of apple pie and bread, this Pull-Apart Apple Pie Bread is the ultimate comfort food! It’s perfect for brunch, dessert, or even a delightful snack with a hot cup of coffee. The best part? It’s easier to make than a traditional apple pie and just as delicious.

Let’s get started!

If you’re craving a cozy, sweet treat that combines the best of apple pie and bread, this Pull-Apart Apple Pie Bread is the ultimate comfort food! It’s perfect for brunch, dessert, or even a delightful snack with a hot cup of coffee. The best part? It’s easier to make than a traditional apple pie and just as delicious.

Ingredients:

  • 1 can Grands Flaky Biscuits 8 count
  • 3 Apples peeled and diced
  • 1/4 cup of butter
  • 1/3 cup Brown sugar
  • 2 tbsp. Granulated sugar
  • 1 teaspoon Allspice
  • 1/2 cup powdered sugar
  • 3 tbsp milk

Instructions:

Preheat oven to 350°F and line a 9×5 inch loaf pan with parchment paper. Parchment paper makes it easier to pull out once it’s baked.


Combine diced apples, butter, both sugars, and allspice in a medium saucepan. Cook until apples have browned and softened and sauce is thick. Set aside to cool.


Remove biscuits from can and peel apart layers until you have 16 biscuit halves. Spoon about a tablespoon of cooked apple filling onto each biscuit piece.


As you add the apple filling, stack the biscuits on top of one another, forming stacks 4-5 biscuits high. 


Arrange biscuits in the loaf pan, carefully turning stacks on their sides as you do so. Make sure that plain biscuit is on each end of the loaf and that filling does not touch the pan. Any extra apple mixture that you have, pour on.


Cover with foil and bake for 30 minutes at 350°F. Remove the foil and continue baking for another 30 minutes, until golden brown on top and the biscuits are cooked in the middle.

Add the powdered sugar and milk to a medium mixing bowl and whisk until combined and smooth. Drizzle on top and enjoy!
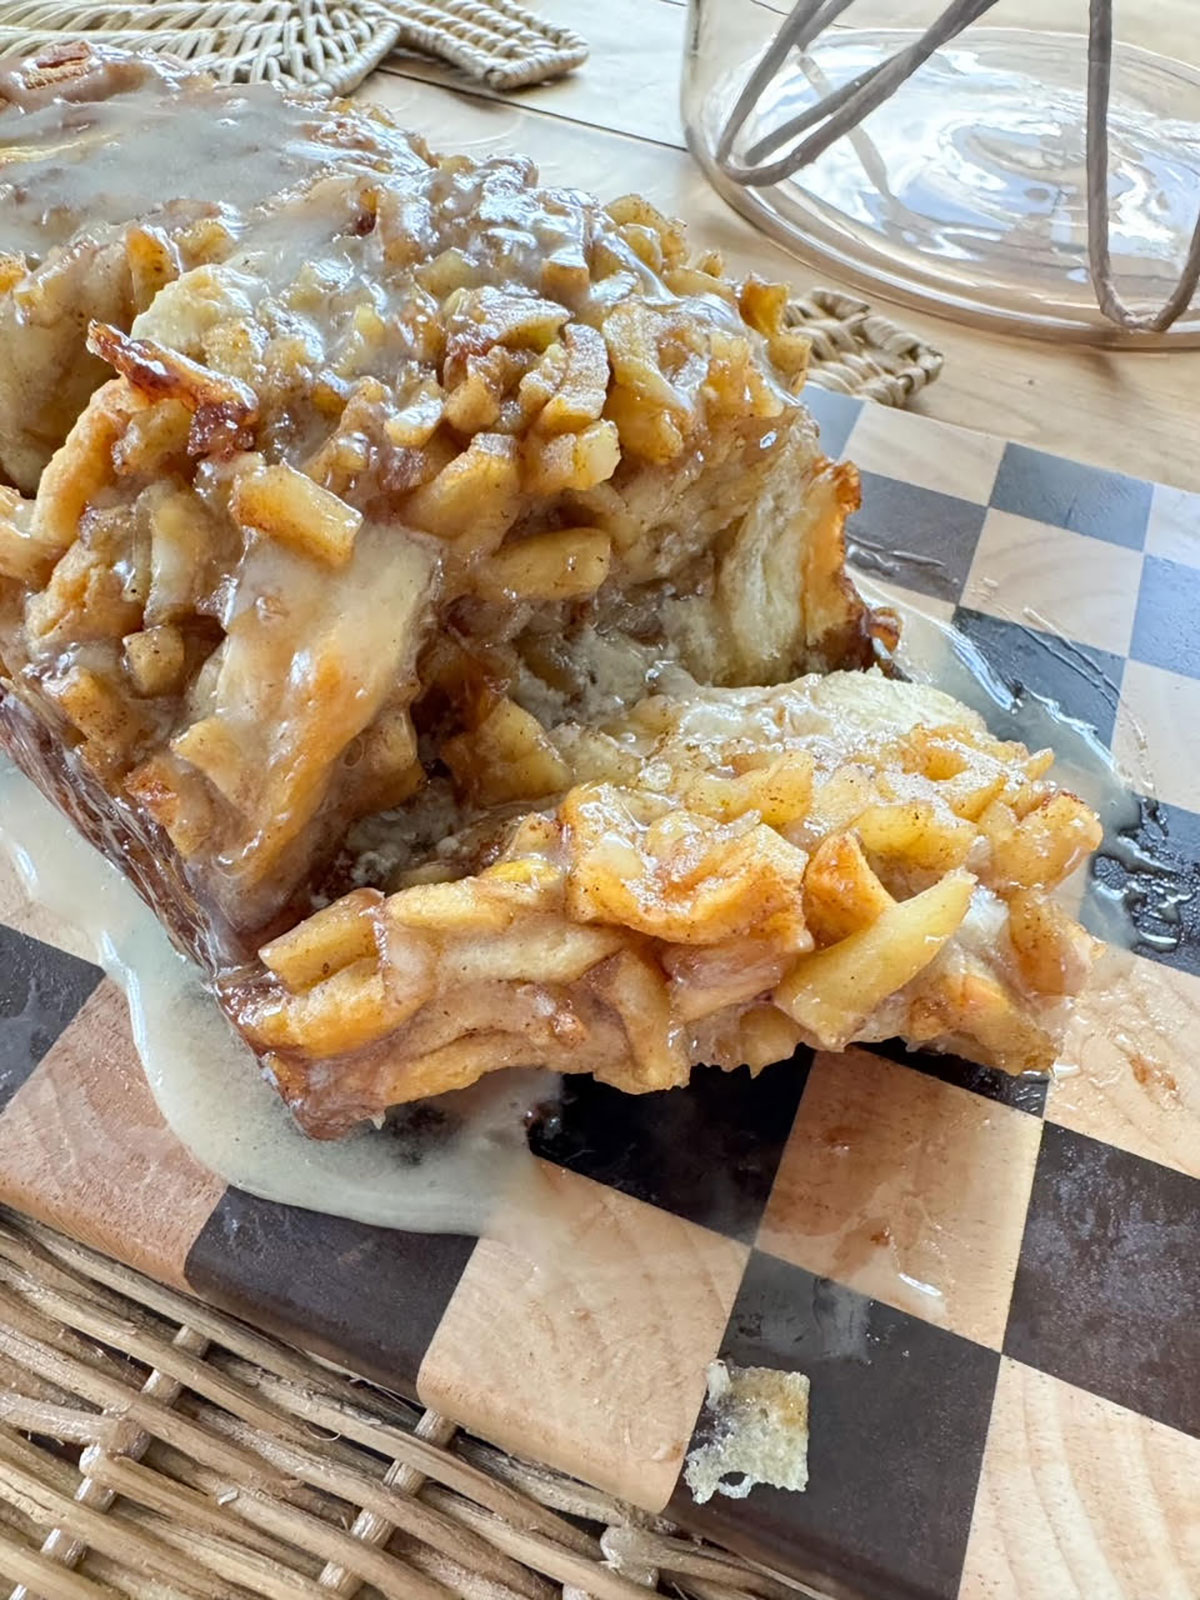
apple pie bread topped with glaze on checkered board with a slice cut into it

Pull Apart Apple Pie Bread

This easy Pull Apart Apple Pie Bread is buttery, flaky and layered with warm spiced apples for the ultimate cozy treat for fall gatherings, the holiday season, or a sweet treat with family and friends.
Print Recipe Pin Recipe
Prep Time 10 minutes mins
Cook Time 1 hour hr 5 minutes mins
Total Time 1 hour hr 15 minutes mins
Servings: 4 servings
Course: Dessert
Cuisine: American
Ingredients Method Video Notes

Ingredients
  

  • 1 can Grands Flaky Biscuits 8 count
  • 3 Apples peeled and diced
  • 1/4 cup of butter
  • 1/3 cup Brown sugar
  • 2 tbsp. Granulated sugar
  • 1 teaspoon Allspice
  • 1/2 cup powdered sugar
  • 3 tbsp milk

Method
 

  1. Preheat oven to 350°F and line a 9×5-inch loaf pan with parchment paper. Parchment paper makes it easier to pull out once it’s baked.
  2. Combine diced apples, butter, both sugars, and allspice in a medium saucepan. Cook until apples have browned and softened and sauce is thick. Set aside to cool.
  3. Remove biscuits from can and peel apart layers until you have 16 biscuit halves. Spoon about a tablespoon of cooked apple filling onto each biscuit piece.
  4. As you add the apple filling, stack the biscuits on top of one another, forming stacks 4-5 biscuits high.
  5. Arrange biscuits in the loaf pan, carefully turning stacks on their sides as you do so. Make sure that plain biscuit is on each end of the loaf and that filling does not touch the pan. Any extra apple mixture that you have, pour on.
  6. Cover with foil and bake for 30 minutes at 350°F. Remove the foil and continue baking for another 30 minutes, until golden brown on top and the biscuits are cooked in the middle.
  7. Add the powdered sugar and milk to a medium mixing bowl and whisk until combined and smooth. Drizzle on top and enjoy!

Video

Notes

Storage:
  • Store leftover bread at room temperature wrapped tightly on the counter for up to 2 days and in the fridge for up to 4 days. Reheat in the oven or toaster oven until warmed through.
  • Store bread wrapped tightly or in an airtight container in the freezer for up to 3 months. Thaw in the fridge or at room temperature, then reheat in the oven or toaster oven before serving again.
  • You can prep and assemble the filling and loaf up to a day in advance, then cover and refrigerate until you’re ready to bake and serve the next day.

I'm Ashlee

I hope you've got a coffee or tea in hand and you're ready to settle in. This is a space for easy comfort food recipes, everyday home ideas, and the occasional DIY, plus updates on new handmade shop items along the way.

Categories

  • DIY

Previous Blog Post
|
Newer Blog Post

Like food, DIY's and everyday tips?!
Sign up and let's be friends!

#Policygeniuspartner Honest thoughts? The projects #Policygeniuspartner Honest thoughts? The projects have really made our house a home, but it something were to happen to myself or Austin, I want our children to be protected. We’ve worked so hard to make sure they are safe and we want to make sure they don’t have to worry about the future.
@policygenius makes it easy to compare life insurance quotes from top companies side-by-side for free, with licensed agents there to help along the way.
With Policygenius, you can find 20-year life insurance policies starting at just $276 a year for $1 million in coverage.
Take one thing off your to-do list. Head to policygenius.com/thesassybarn
@Policygenius #lifeinsurance #parents #family #ad
The evolution of this porch and it had its grand f The evolution of this porch and it had its grand finale of transformation with a 50ft addition added onto it. The only way to really complete it though was with a custom @viewrail and I couldn’t be more in love with how it turned out.
.
.
I went with their Onyx Rod System and I was able to use their “DriveTite” system to anchor into our large posts. It’s so perfect for this porch!
.
#porch #construction #porchdecor #beforeandafter #renovation
Some before and after stills of the arched built-i Some before and after stills of the arched built-ins ✨
.
.
#home #interior #remodel #beforeandafter
The built-ins of my dreams 😍 these were on my visi The built-ins of my dreams 😍 these were on my vision board for so long and when we designed the addition I knew exactly where I wanted them to go. 
.
I used @rtacabinetstore for the cabinet and the floating shelves and when I first saw these timber coffee collection, I knew that was what I wanted for this space. From designing, to building and placing in this space, I couldn’t love it anymore! #RTACabinetStorePartner
.
.
#homedesign #home #homeimprovement
Did I DIY my own maternity photos? Yes, yes I did Did I DIY my own maternity photos? Yes, yes I did 😂 might delete later, but truthfully? This pregnancy, that has been high risk, touch and go and a rollercoaster since 20 weeks had me in some rough spots at times. This was the first day I actually wanted to get myself together and I knew I’d regret it if I didn’t capture my bump at 34 weeks. We’re hanging on for as long as possible but I have a feeling she’ll be here soon❤️ 
.
.
#pregnancy #highriskpregnancy #babygirl #maternityphotos
HOUSE ADDITION- The lighting ✨ I wanted simple but HOUSE ADDITION- The lighting ✨ I wanted simple but also timeless pieces for our new addition and found these pieces from @progressltg and love the gold finishes. 
.
Comment LIGHTS for all the selections. 
.
.
#home #renovation #construction #bathroom

  • Instagram
  • Pinterest
  • Facebook

Copyright © 2026 the sassy barn | Privacy Policy | Designed by Gillian Sarah

Scroll to top
98 shares
  • Home
  • About
  • Recipes
    • Breakfast
    • Lunch
    • Dinner
    • Appetizers
    • Side Dishes
  • Favorites
  • Collaborate
  • Shop
  • Contact
  • Blog
Search