If you’re looking for a beautiful handmade Christmas craft that brings charm, texture, and cozy cottage-style magic to your tree, these DIY handmade ribbon ornaments are the perfect festive project. Using simple materials like wood slices, ribbon, paint, and hot glue, you can create stunning rustic Christmas ornaments shaped like ribbon trees or candy canes. These custom ornaments make thoughtful gifts, adorable stocking stuffers, and eye-catching holiday décor you’ll treasure year after year.
In this step-by-step tutorial, I’ll show you exactly how to make ribbon Christmas ornaments using inexpensive craft supplies—plus a few optional extras like cinnamon sticks, glitter, and star anise for added charm. Let’s get crafting!
Materials You Need
- Wood slices (3–4 inch round)
- 3/8” ribbon (striped, solid, or festive patterns)
- White & black acrylic paint
- Hot glue gun + glue sticks
- Sharp scissors
- Optional: cinnamon sticks, glitter, star anise, twine for hanging
These simple materials make it easy to create ornaments in any color palette—neutral, farmhouse, Scandinavian, or classic red-and-white.
Step 1: Paint and Prep Your Wood Slice Bases
Begin by painting your wood slices with your chosen background color. White paint gives a clean snowy look, while black paint creates dramatic contrast and a modern farmhouse aesthetic.
If you want a little holiday sparkle, sprinkle glitter onto the wet paint so it sticks beautifully without needing additional glue. Allow the paint to dry completely before moving to the next step.
While your bases are drying, use your scissors to cut multiple 2-inch ribbon strips. These small pieces will become the folded teardrop shapes that make up your tree or candy cane design.
Step 2: Fold Ribbon Into Teardrop Shapes
This is where your ornament begins to come to life! Take each 2-inch ribbon strip and fold it into a teardrop shape by bringing the ends together. Add a small dot of hot glue to one end and gently press the opposite end on top to secure it.
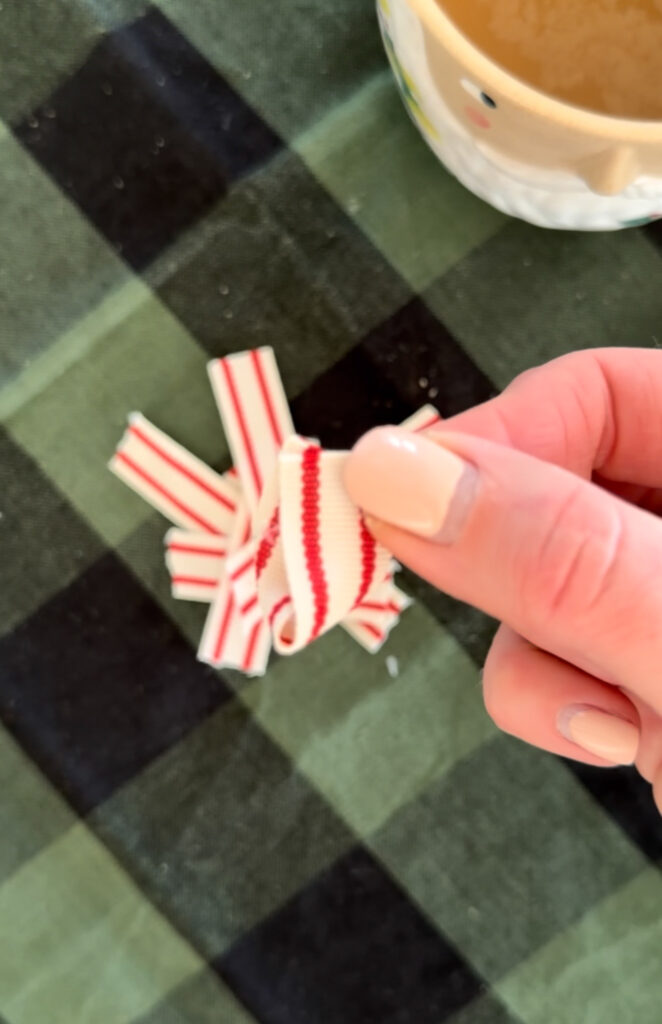
You’ll want to make several of these teardrop loops depending on the size and style of your ornament. These little 3D loops create gorgeous texture and dimension, making the ornaments look handmade and high-quality.
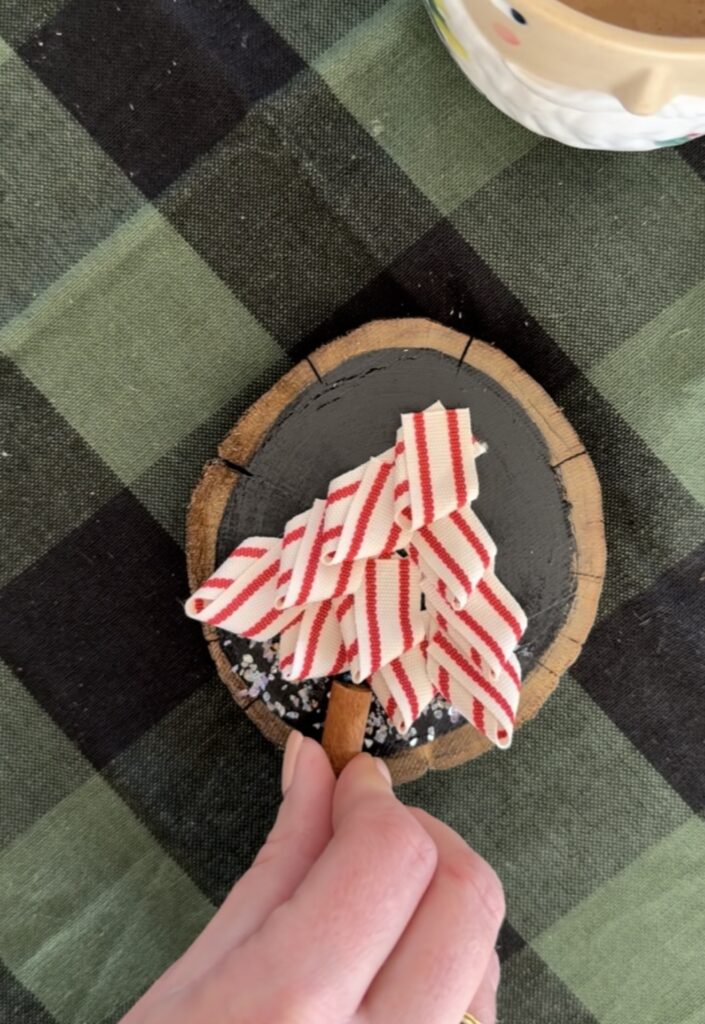
Step 3: Create Your Ribbon Tree Ornament
To make a ribbon Christmas tree ornament, begin assembling your teardrops in horizontal rows.
- Start with a bottom row of 4–5 teardrop pieces.
- Add a slightly smaller row on top.
- Continue layering upward until your tree shape forms into a point.
For added rustic charm, glue a cinnamon stick at the base as a tree trunk. Then finish with a star anise at the top for a natural, aromatic holiday star.
This simple technique creates a beautiful handmade ornament perfect for farmhouse, vintage, or woodland-themed Christmas décor.
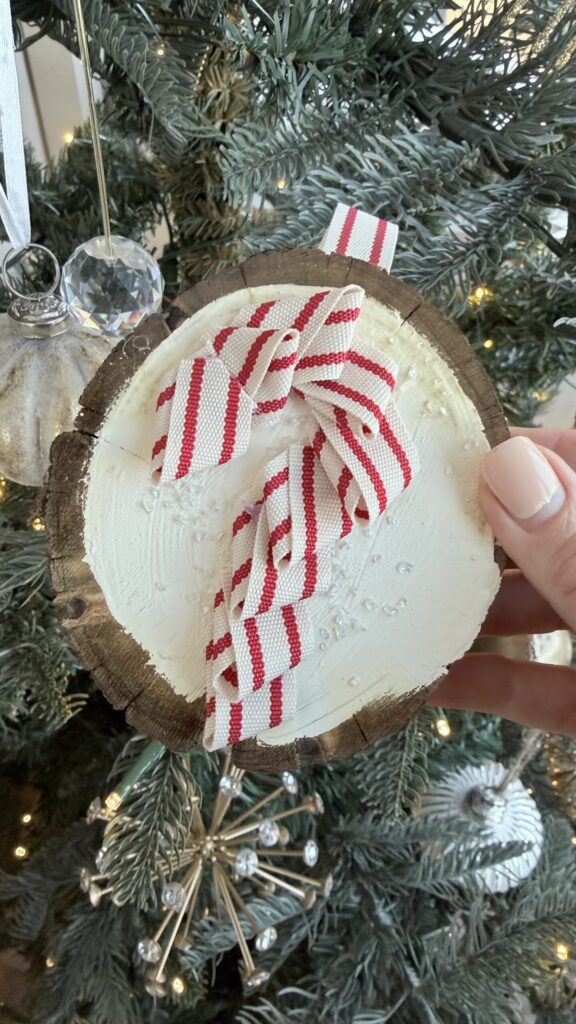
Step 4: Create a Ribbon Candy Cane Ornament
If you’d like to make a ribbon candy cane ornament, simply glue your ribbon loops in a curved line following the shape of a traditional candy cane. This method is quick and looks adorable on the tree—especially when using red-and-white striped ribbon.
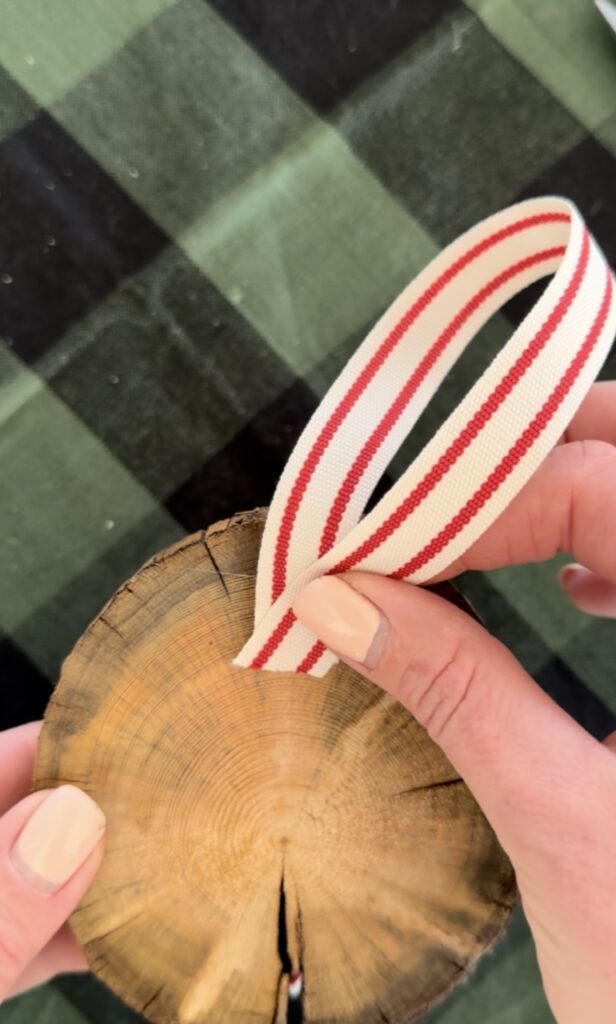
Step 5: Add a Hanger & Display
To finish your ornament, cut a small piece of ribbon or twine and glue it to the back of the wood slice to create a hanger. Once it’s secure, your custom handmade ribbon ornament is ready to hang!
These ornaments also make great teacher gifts, neighbor gifts, or additions to a stocking or wrapped present.
Variations
- Use different colored ribbon
- Paint the background different colors and use glitter!
- Personalize them with names at the bottom!
The Perfect Cozy Christmas Craft
These DIY handmade ribbon ornaments are easy, budget-friendly, and incredibly charming. Whether you create ribbon trees or candy canes, each ornament adds a touch of coziness and handcrafted magic to your Christmas décor.
If you love rustic crafts, textured ornaments, farmhouse Christmas décor, or simple handmade projects, this craft will quickly become one of your favorites for the holidays.
Happy crafting and Merry Christmas!