DIY Needle Felt Cookie Cutter Ornaments — The Cutest Holiday Craft for Beginners
If you’re looking for a fun, cozy, and beginner-friendly holiday craft, Needle Felt Cookie Cutter Ornaments are about to become your new favorite project. Seriously, I am addicted to this now and it has become such a fun hobby! Using just a few simple supplies—cookie cutters, roving wool, and a felting needle—you can create adorable handmade ornaments perfect for decorating your tree, adding to wrapped gifts, or even turning into festive wine tags. This easy Christmas craft is ideal for kids, adults, and anyone who loves unique handmade holiday décor. Plus, needle felting is surprisingly relaxing once you get the hang of it!
Supplies Needed
- Cookie cutters (any shapes!)
- Roving wool in your favorite colors
- Felting needle
- Foam pad or felting mat
- Ribbon or jute string for hanging
- Optional: mini bows, extra felt pieces for embellishing
This is the needle felt kit that I bought!
How to Make Needle Felt Cookie Cutter Ornaments
1. Prepare Your Roving Wool
To begin your needle felt cookie cutter ornaments, gather your roving wool and gently pull apart the amount you need for your shape. You don’t have to be precise—needle felting is very forgiving. Fluff the wool slightly so it fills the cookie cutter evenly once it’s placed inside.
Choose any cookie cutter shape you like: stars, trees, gingerbread men, snowflakes, hearts—you can even make a full set that matches your holiday theme.
2. Fill Your Cookie Cutter
Place your cookie cutter onto a foam pad or felting mat. This protective surface is essential because it keeps your needle from breaking and gives you a comfortable workspace.
Gently place the wool inside the cookie cutter, spreading it evenly. If you want thicker, sturdier ornaments, add a bit more wool than you think you need. The wool will compress significantly as you felt it.
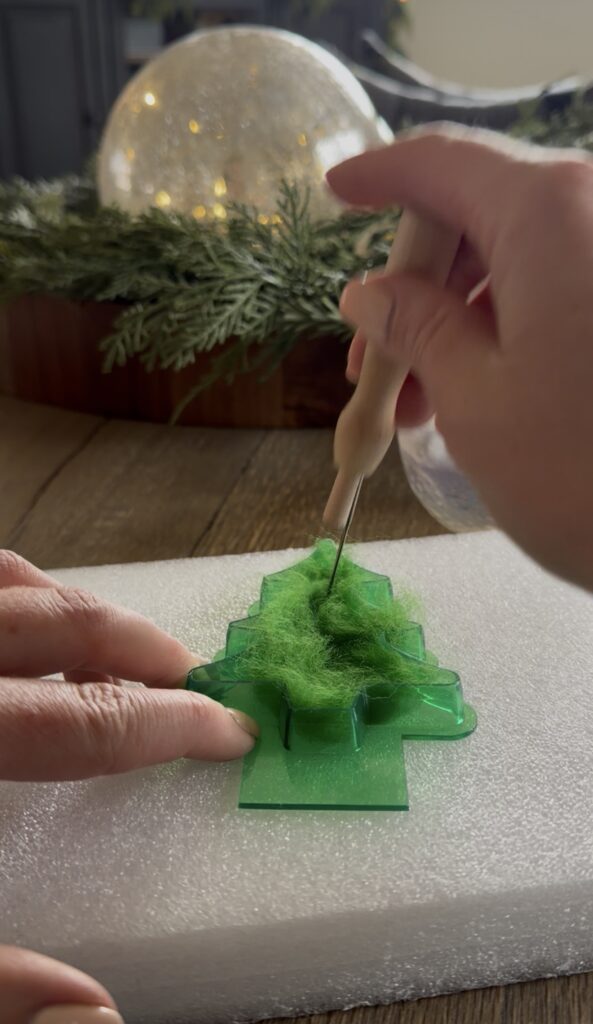
3. Start Needle Felting
Now the fun part begins! With your felting needle, gently press the needle into the wool. Think of it more as “tapping” rather than poking. Avoid jabbing or stabbing—the needle is sharp and fragile, so slow, steady motions work best.
Continue needling around the shape, working the wool toward the edges so it fills the cutter completely. The wool fibers will begin to bind and tighten into a firm shape. Once the top side looks compact and even, carefully flip the cookie cutter over on your foam pad and felt the other side. This step helps the ornament stay tight, durable, and well-shaped.
4. Remove and Shape
When the wool feels dense and uniform, gently remove it from the cookie cutter. You should have a solid felt cut-out that resembles the shape perfectly!
Now is the time to clean up the edges. Use your needle to smooth and tighten any loose fibers or uneven spots. Be mindful of your fingers—this is where most accidental pokes happen.
5. Add Embellishments
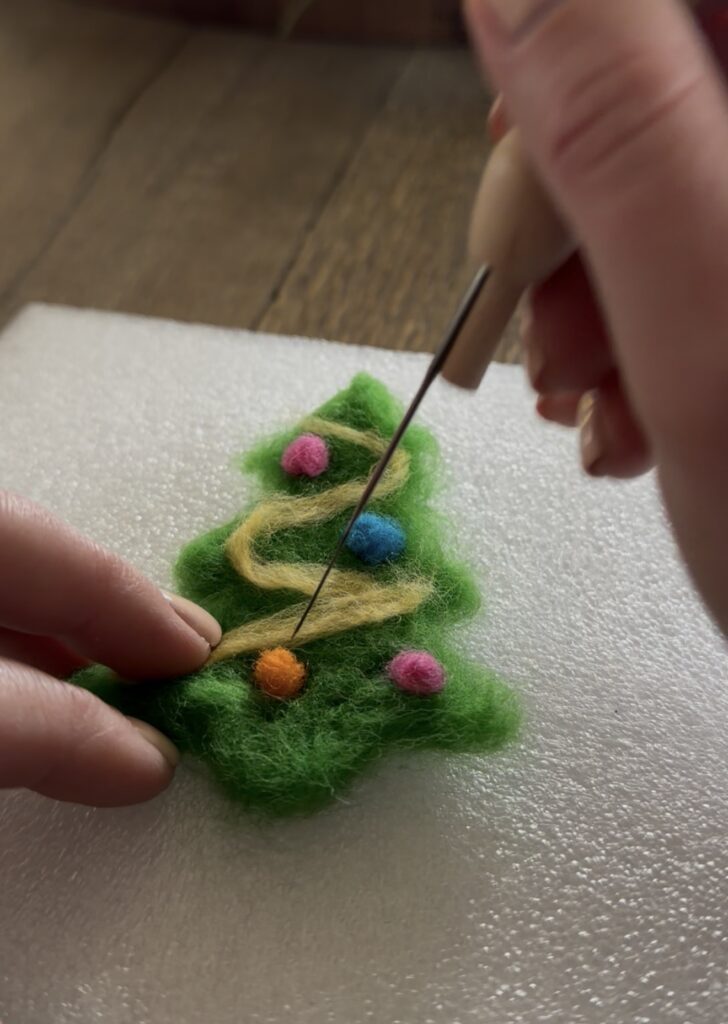
One of the best parts of making DIY felt ornaments is customizing them. Leave them simple and rustic, or add decorations like:
- Mini bows
- Extra felt shapes
- Embroidery thread details
- Sequins or beads
- Tiny pom-poms
You can keep your ornaments minimalist or dress them up as much as your creativity inspires.
6. Add a String for Hanging
To turn your felt shape into an ornament, create a small hole at the top using your felting needle. Gently work the fibers apart until you can slide a piece of ribbon or jute string through. Tweezers help a lot here!
Tie a small knot, and your handmade ornament is ready to hang.
These needle felt cookie cutter ornaments also make adorable gift tags, stocking stuffers, or wine bottle tags—perfect for holiday parties and handmade gifting.

