DIY Round Table
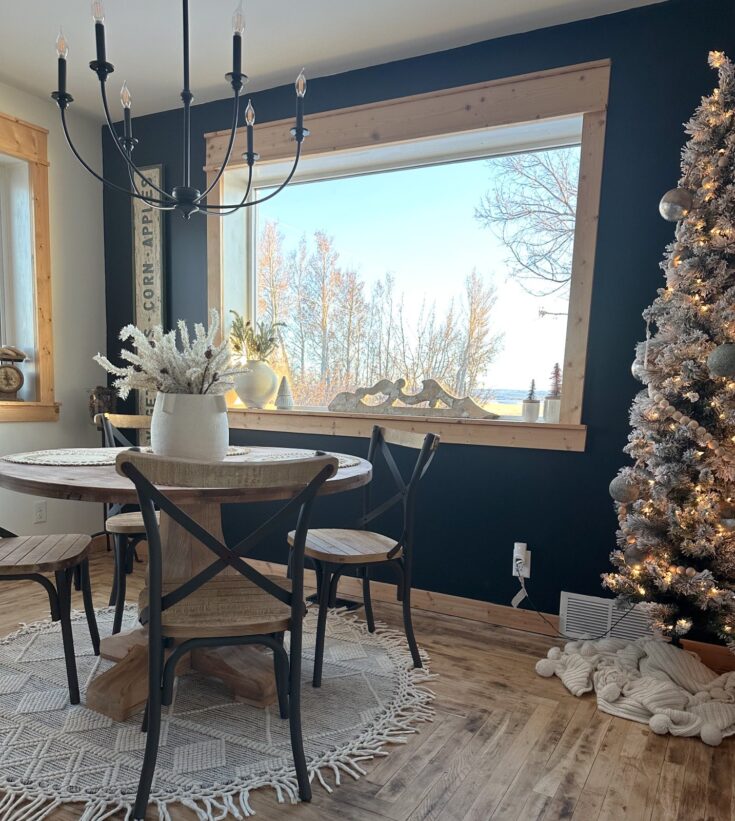
I saw this beautiful rustic round table for sale and fell in love with the look, but the price tag had me running the other way! So I decided to DIY it, and it turned out even better than I could have imagined! I love the rustic look, and it was overall not too challenging to complete. This can be used as a dining table or entryway table, and is adjustable for your preference! I used the @carolinalegco base as a pedestal for this piece, which makes the project so much easier and beautiful! Be sure to follow along with me for this build on Instagram @thesassybarn. Watch the highlight reel “DIY Round Table” for a visual of the process as you read through this blog post!
Materials
- 11 (1x6 or 1x8) depending on your size preference
- @carolinalegco pedestal table base
- Stain
- Sealer
Tools
- Router
- Saw
- Kreg jig/screws
Instructions
- I started by gathering 11 (1x6) boards I planned to use for the table top. They were all relatively the same length.
- To combine them, I used mybiscuit joining tool and pocket holes with screws with my Kreg Jig.A long clamp would work as well to combine the boards, but mine did not arrive on time for this project! I used both methods to suck the boards together, to ensure extra stability
- After I drilled the pocket holes and used the biscuit joiner, I added wood glue to the edges and combined the boards. It took about 10 minutes per board to prepare it and combine it with the next one!
- Next we created an octagon shape with pieces of wood to attach to the bottom of the table top. This helped to create a sturdier top.
- Since my table is 48 inches in diameter- my boards for the support system were 20 and 3/16 inches long and cut to a 22.5 degree angle. I attached the octagon to the bottom of the table top with pocket holes.
- It got a little tricky when I had to figure out how to cut a perfect circle out of the table top. I commissioned some help, and together we figured out how to create a “jig” piece to attach to the center of the table which rotated around with the router on the end to cut out the table.- TIP: watch my highlight reel to see how the jig and router worked!
- We ended up having to do ¼ inch passes with the router to cut the circle out fully, but it worked!
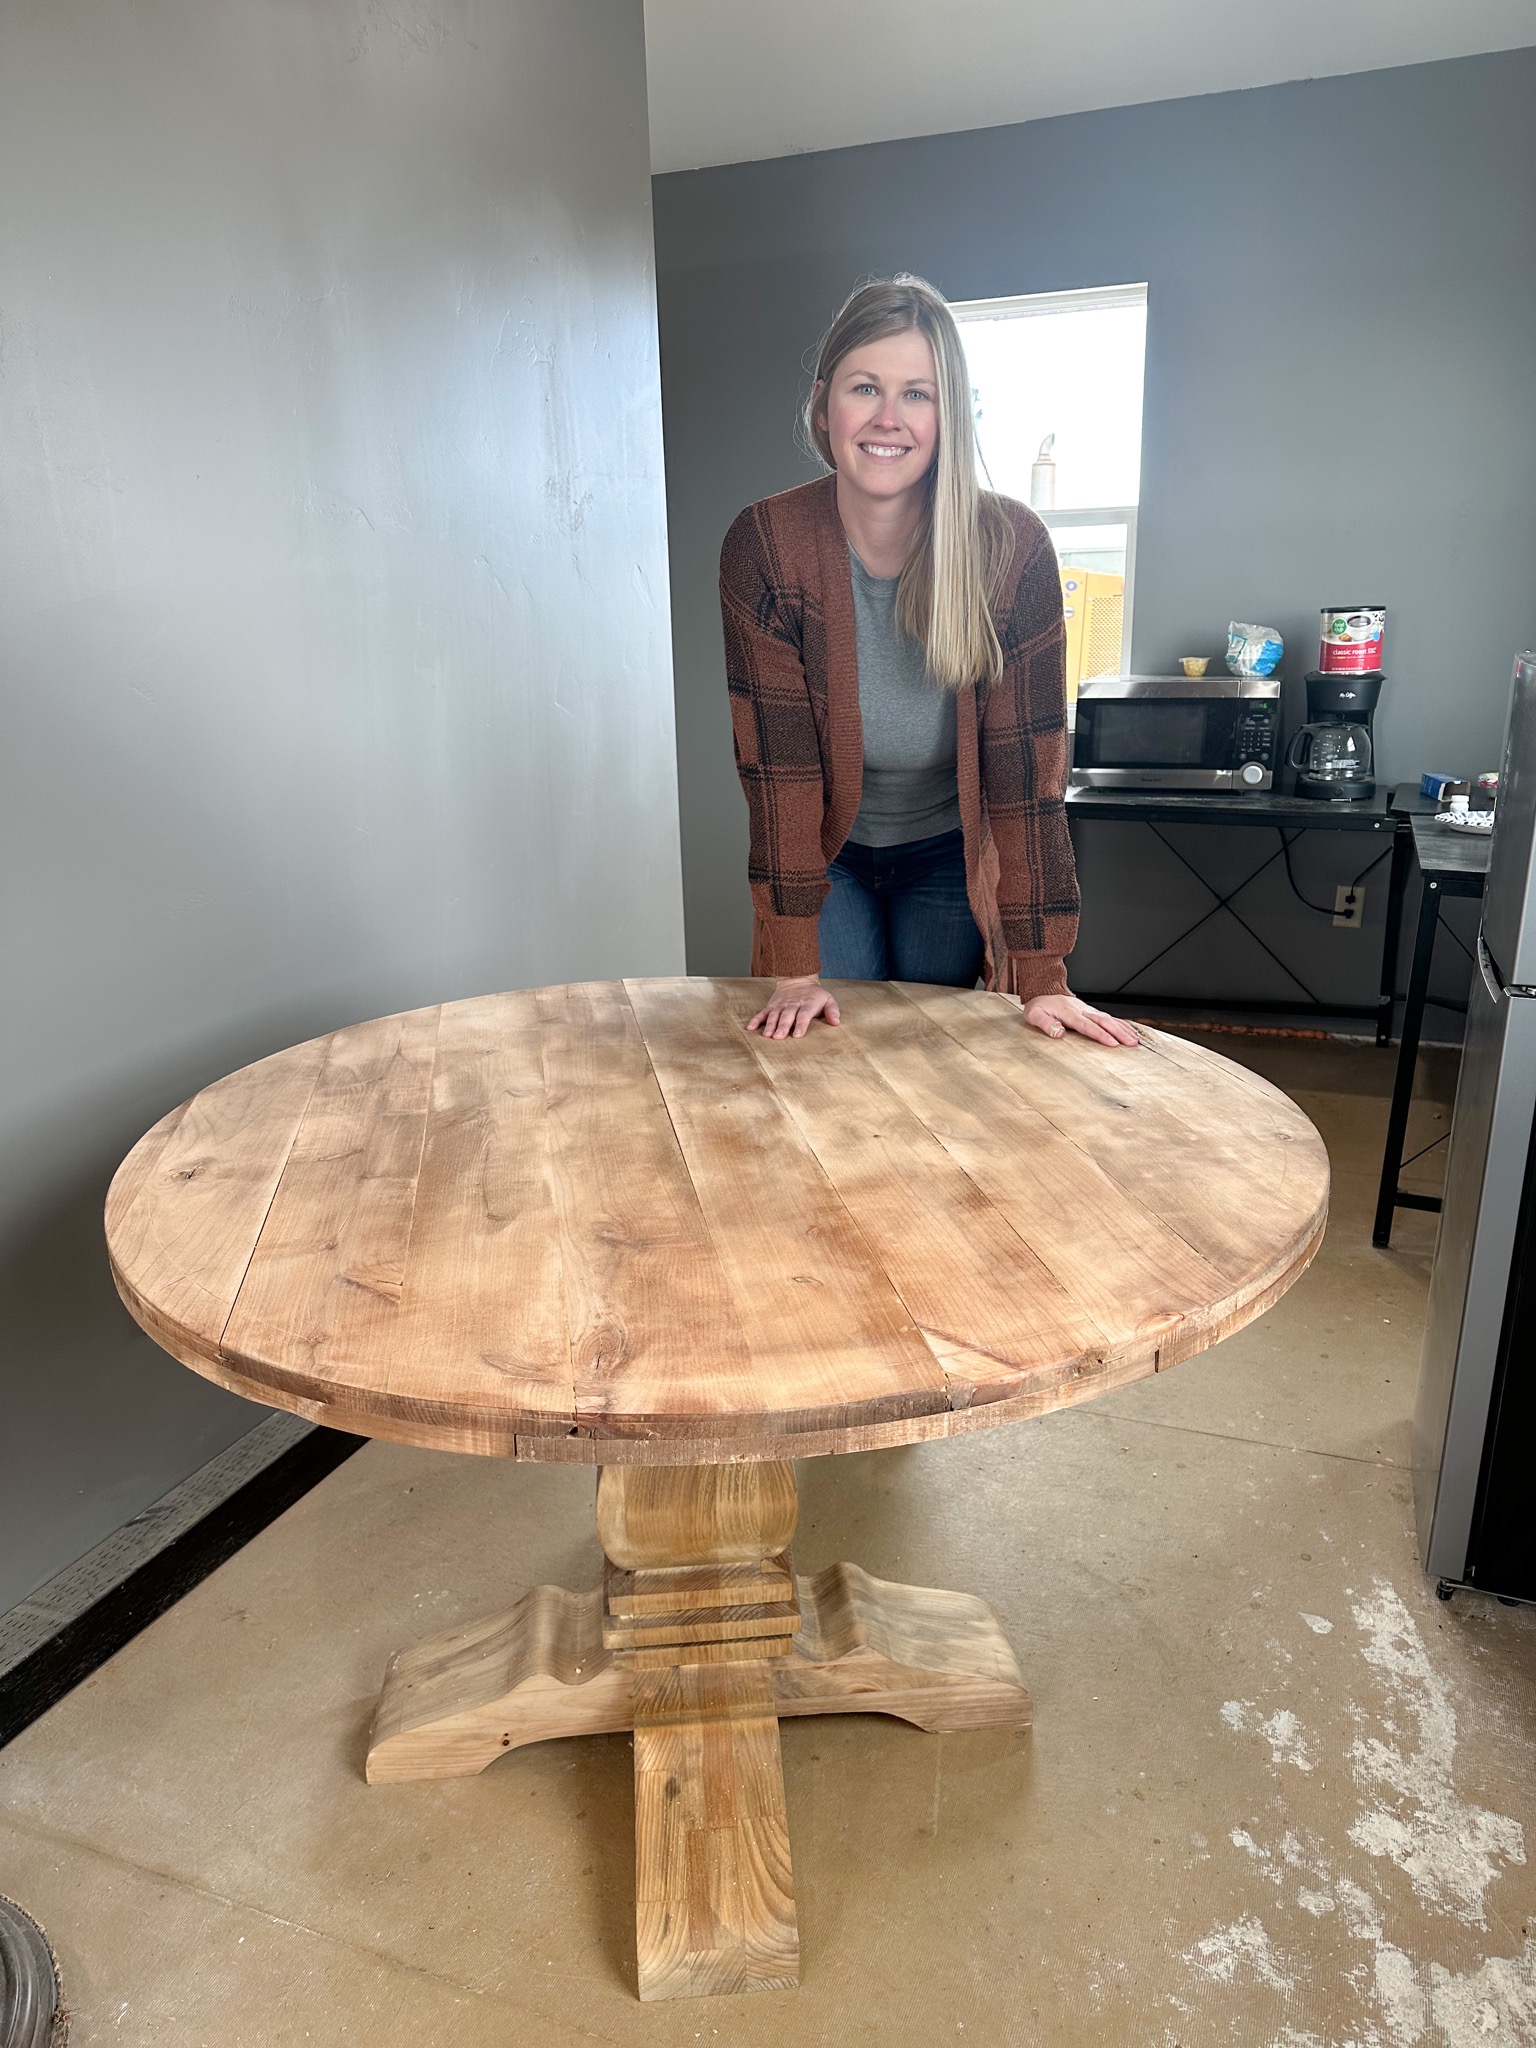
- After we got the tabletop assembled and cut out, I sanded and stained the beautiful pedestal from @carolinalegco. If you use my discount code SASSYBARN10 you get 10% off your purchase online!
- Then I used my signature stain combo Weathered Oak and Special Walnut with my favorite staining pad! There is no special ratio for these stains, I just dip from each can until I achieve the color I like.
- Next, I sanded and stained the table top with the same stain combination and then I actually sanded the top a second time to warm it up a bit!
- Finally, I attached a sturdy piece of plywood to the pedestal to screw the table top into for added stability
- Once I screwed the table top on, this project was completed and it turned out amazing! I love the rustic look, warm stain color and functionality of this piece!
Notes
Be sure to tag me @thesassybarn if you try out this project and follow along with my Instagram reel “DIY Round Table”!