DIY Hanging Planter
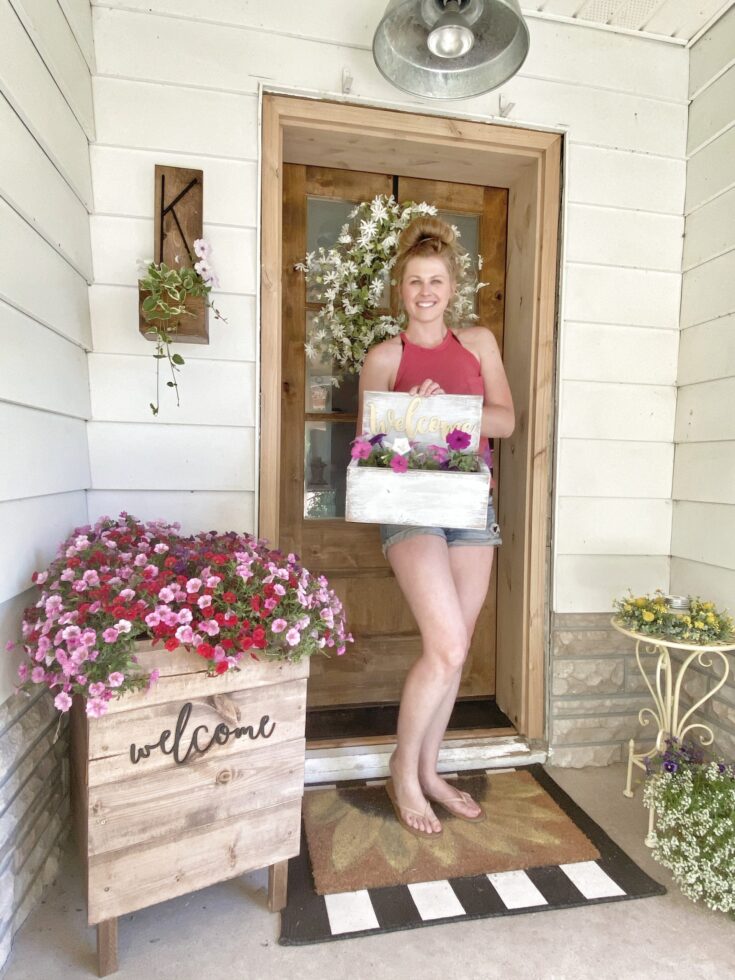
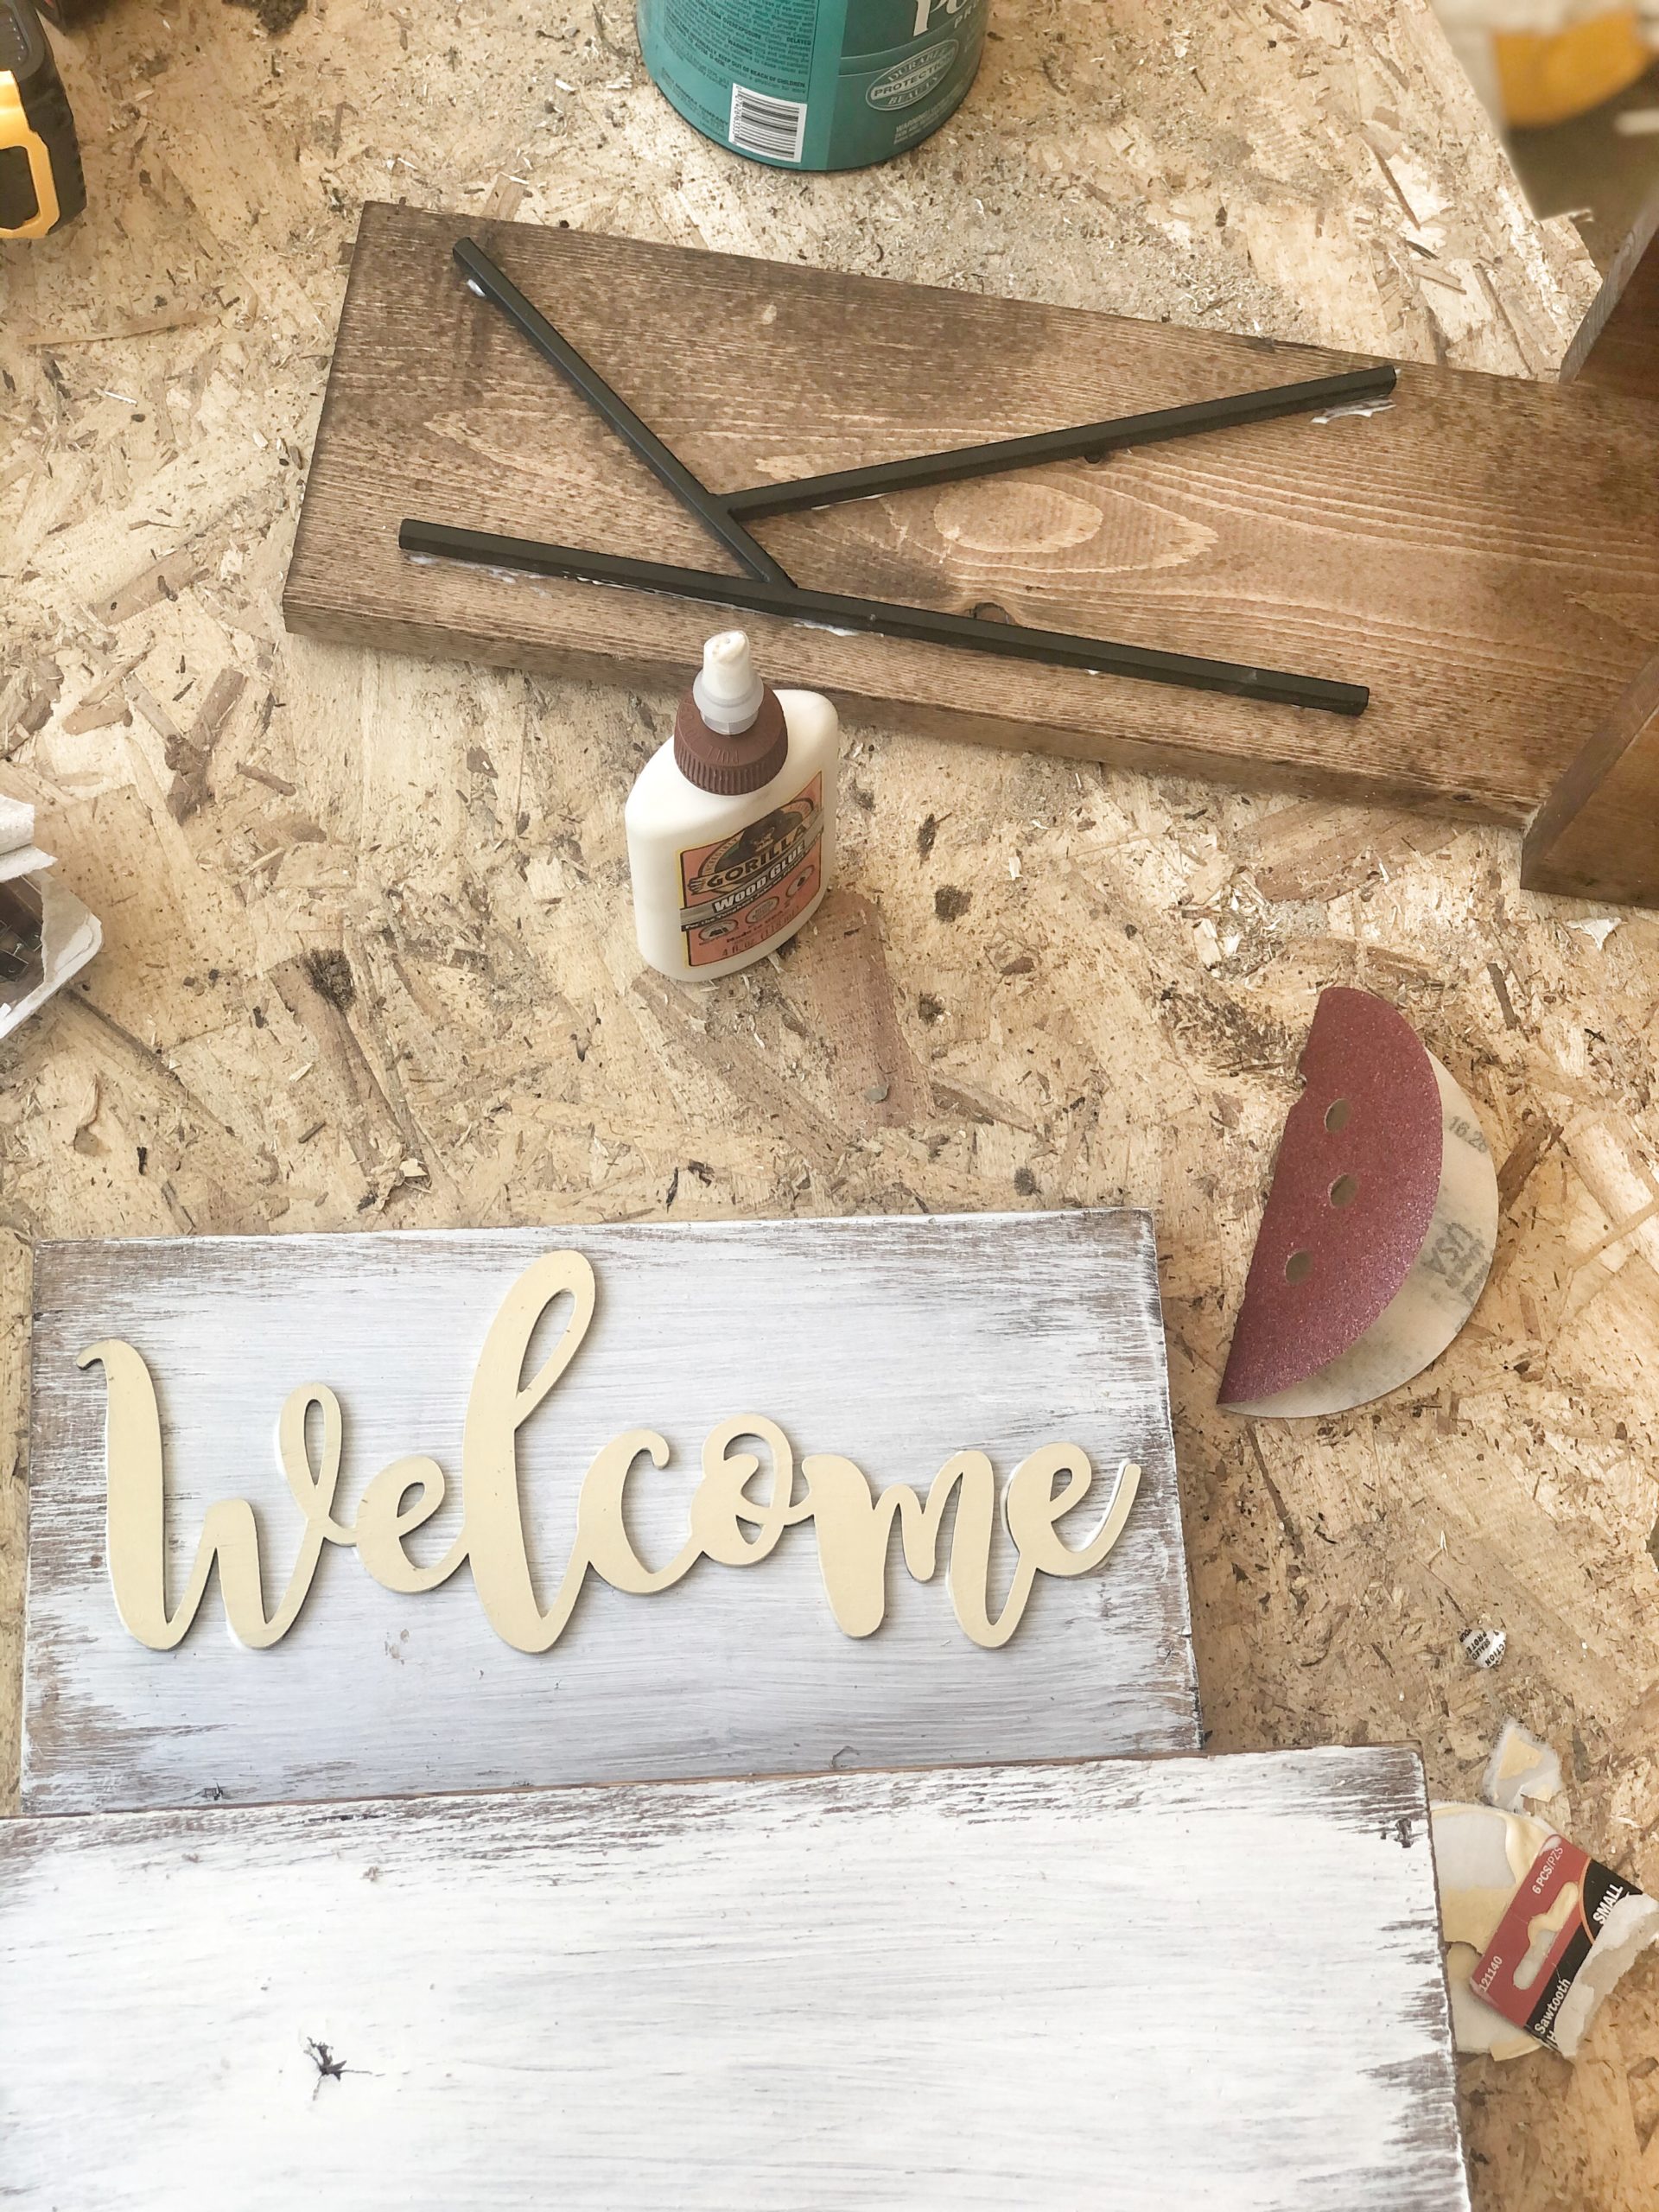
I've been on a planter building kick lately and am having so much fun making a variety of styles! I have been wanting to make these hanging planters for some time now and they would make great gifts! You can use metal or wood numbers or letters to personalize your hanger. I have a metal K from Hobby Lobby that I used and a welcome sign from Carpenter Farmhouse
Prep Time
30 minutes 20 seconds
Active Time
30 minutes
Total Time
1 hour 20 seconds
Difficulty
Beginner
Materials
- 1 1x6x8 (for long planter) 1 1x10 piece (for wide planter)
- Wood Stain
- Wood Screws Or Galvanized Brad Nails ( 1 1/4 inch nails)
- Wood Glue
- Sawtooth Picture Hanger
- Metal or Wood letters/ numbers/ word
- Poly (Sealer)
Tools
- Miter Saw
- Drill/ Driver or Nail Gun
- Measuring Tape
Instructions
- I built two different style, both with the same concept. Once you get started it's very easy! Start with your back piece. If you are going for a long planter, line your letter or numbers downward to determine where you want your bottom. If you want a wide piece, place your word (s) across the top and determine where you want your bottom to be. Make sure to give yourself space between your letters/ words from where the box will begin to the bottom. I like to place a piece of 1x6 on the side so I can see where the box will start and the bottom will be and adjust my letters/ words from there. Mark your bottom with a pencil and cut.
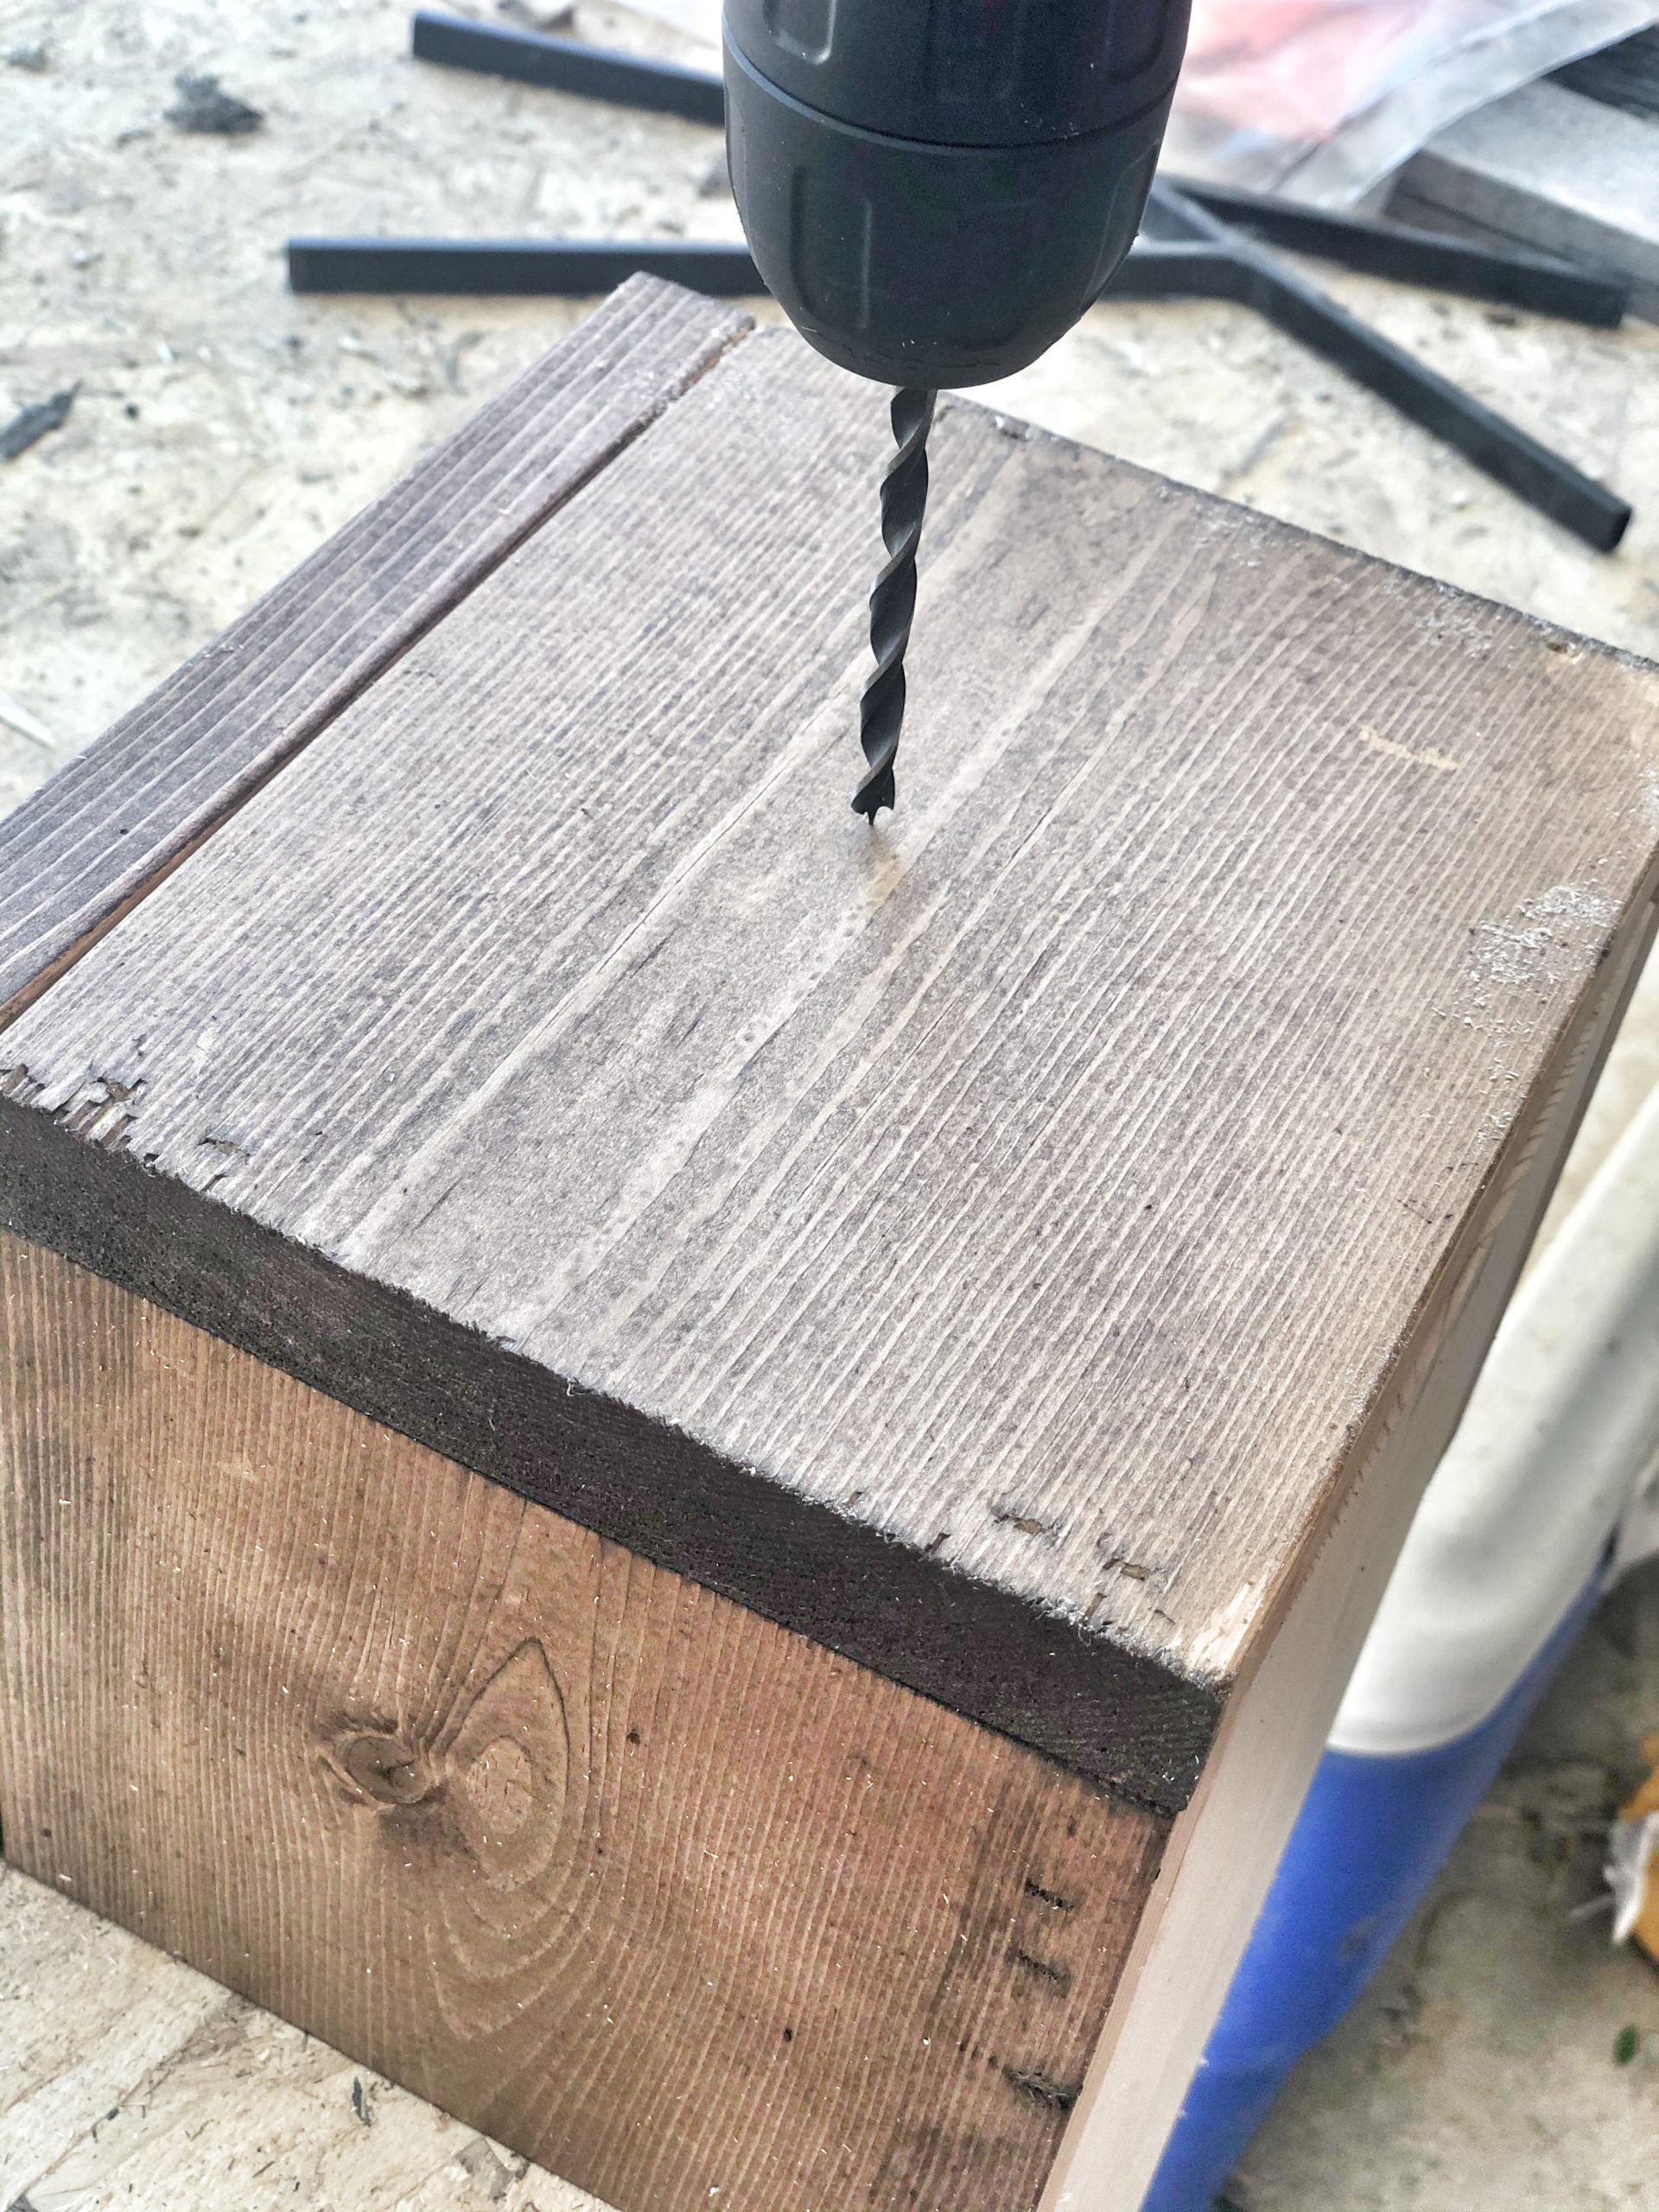
- Now that you have your back cut, add the saw tooth hanger to the back so you don't have to try and get it attached later for hanging.
- Next start on the sides! You will cut your pieces for the sides 4 3/4 inches. Take your wood glue, start with the one side, add glue, attach side piece, either use your nail gun or drill a hole and add wood screw. Repeat with other side.
- Now measure your bottom, which should be 6 7/8 inches for the long planter and 13 4/16 inches for the wide planter and cut it. Always double check your measurements before making your cut! Again, add wood glue and either use nails or screws to attach.
- Now measure the front piece (Should also be 6 7/8 inches for long planter and for wide planter it will be 13 4/16 inches), cut and attach. Make sure everything is flush! I attach the one side first and them make sure everything is flush on the other side and add my nails. You've built a planter box!
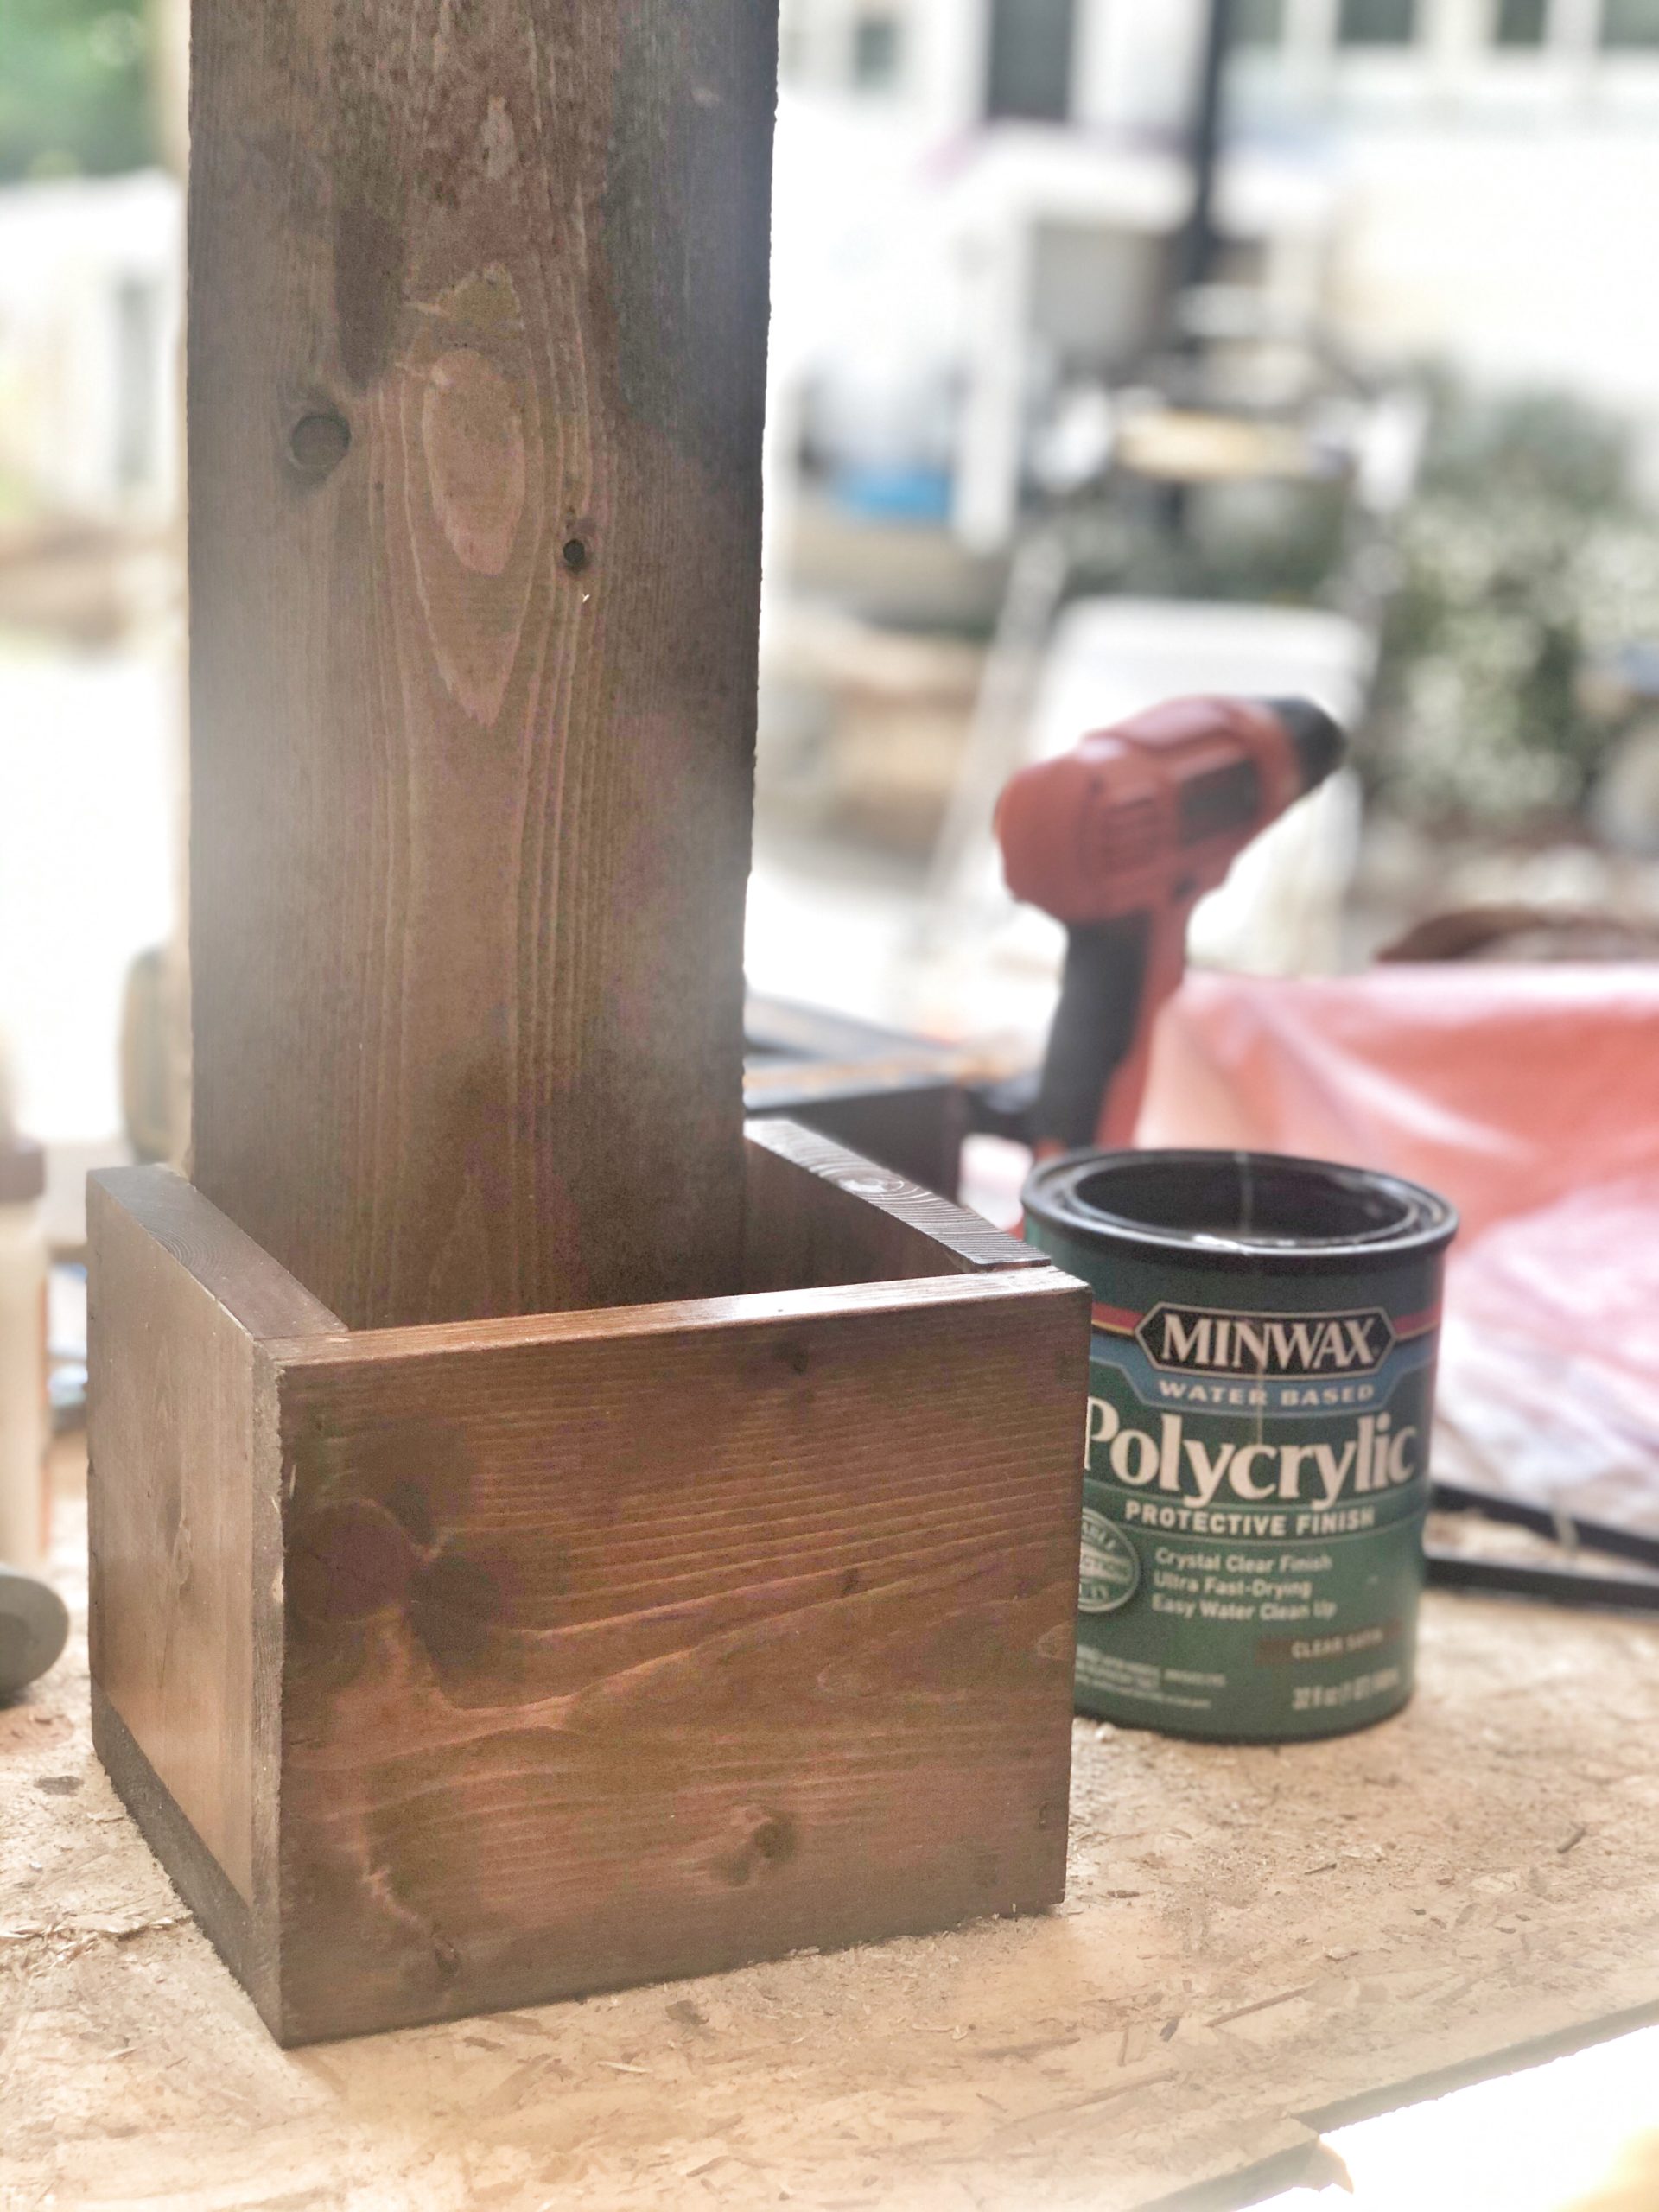
- Now drill some holes in the bottom for drainage and stain your planter or paint it!
 If you are using wood letters, get those painted too!
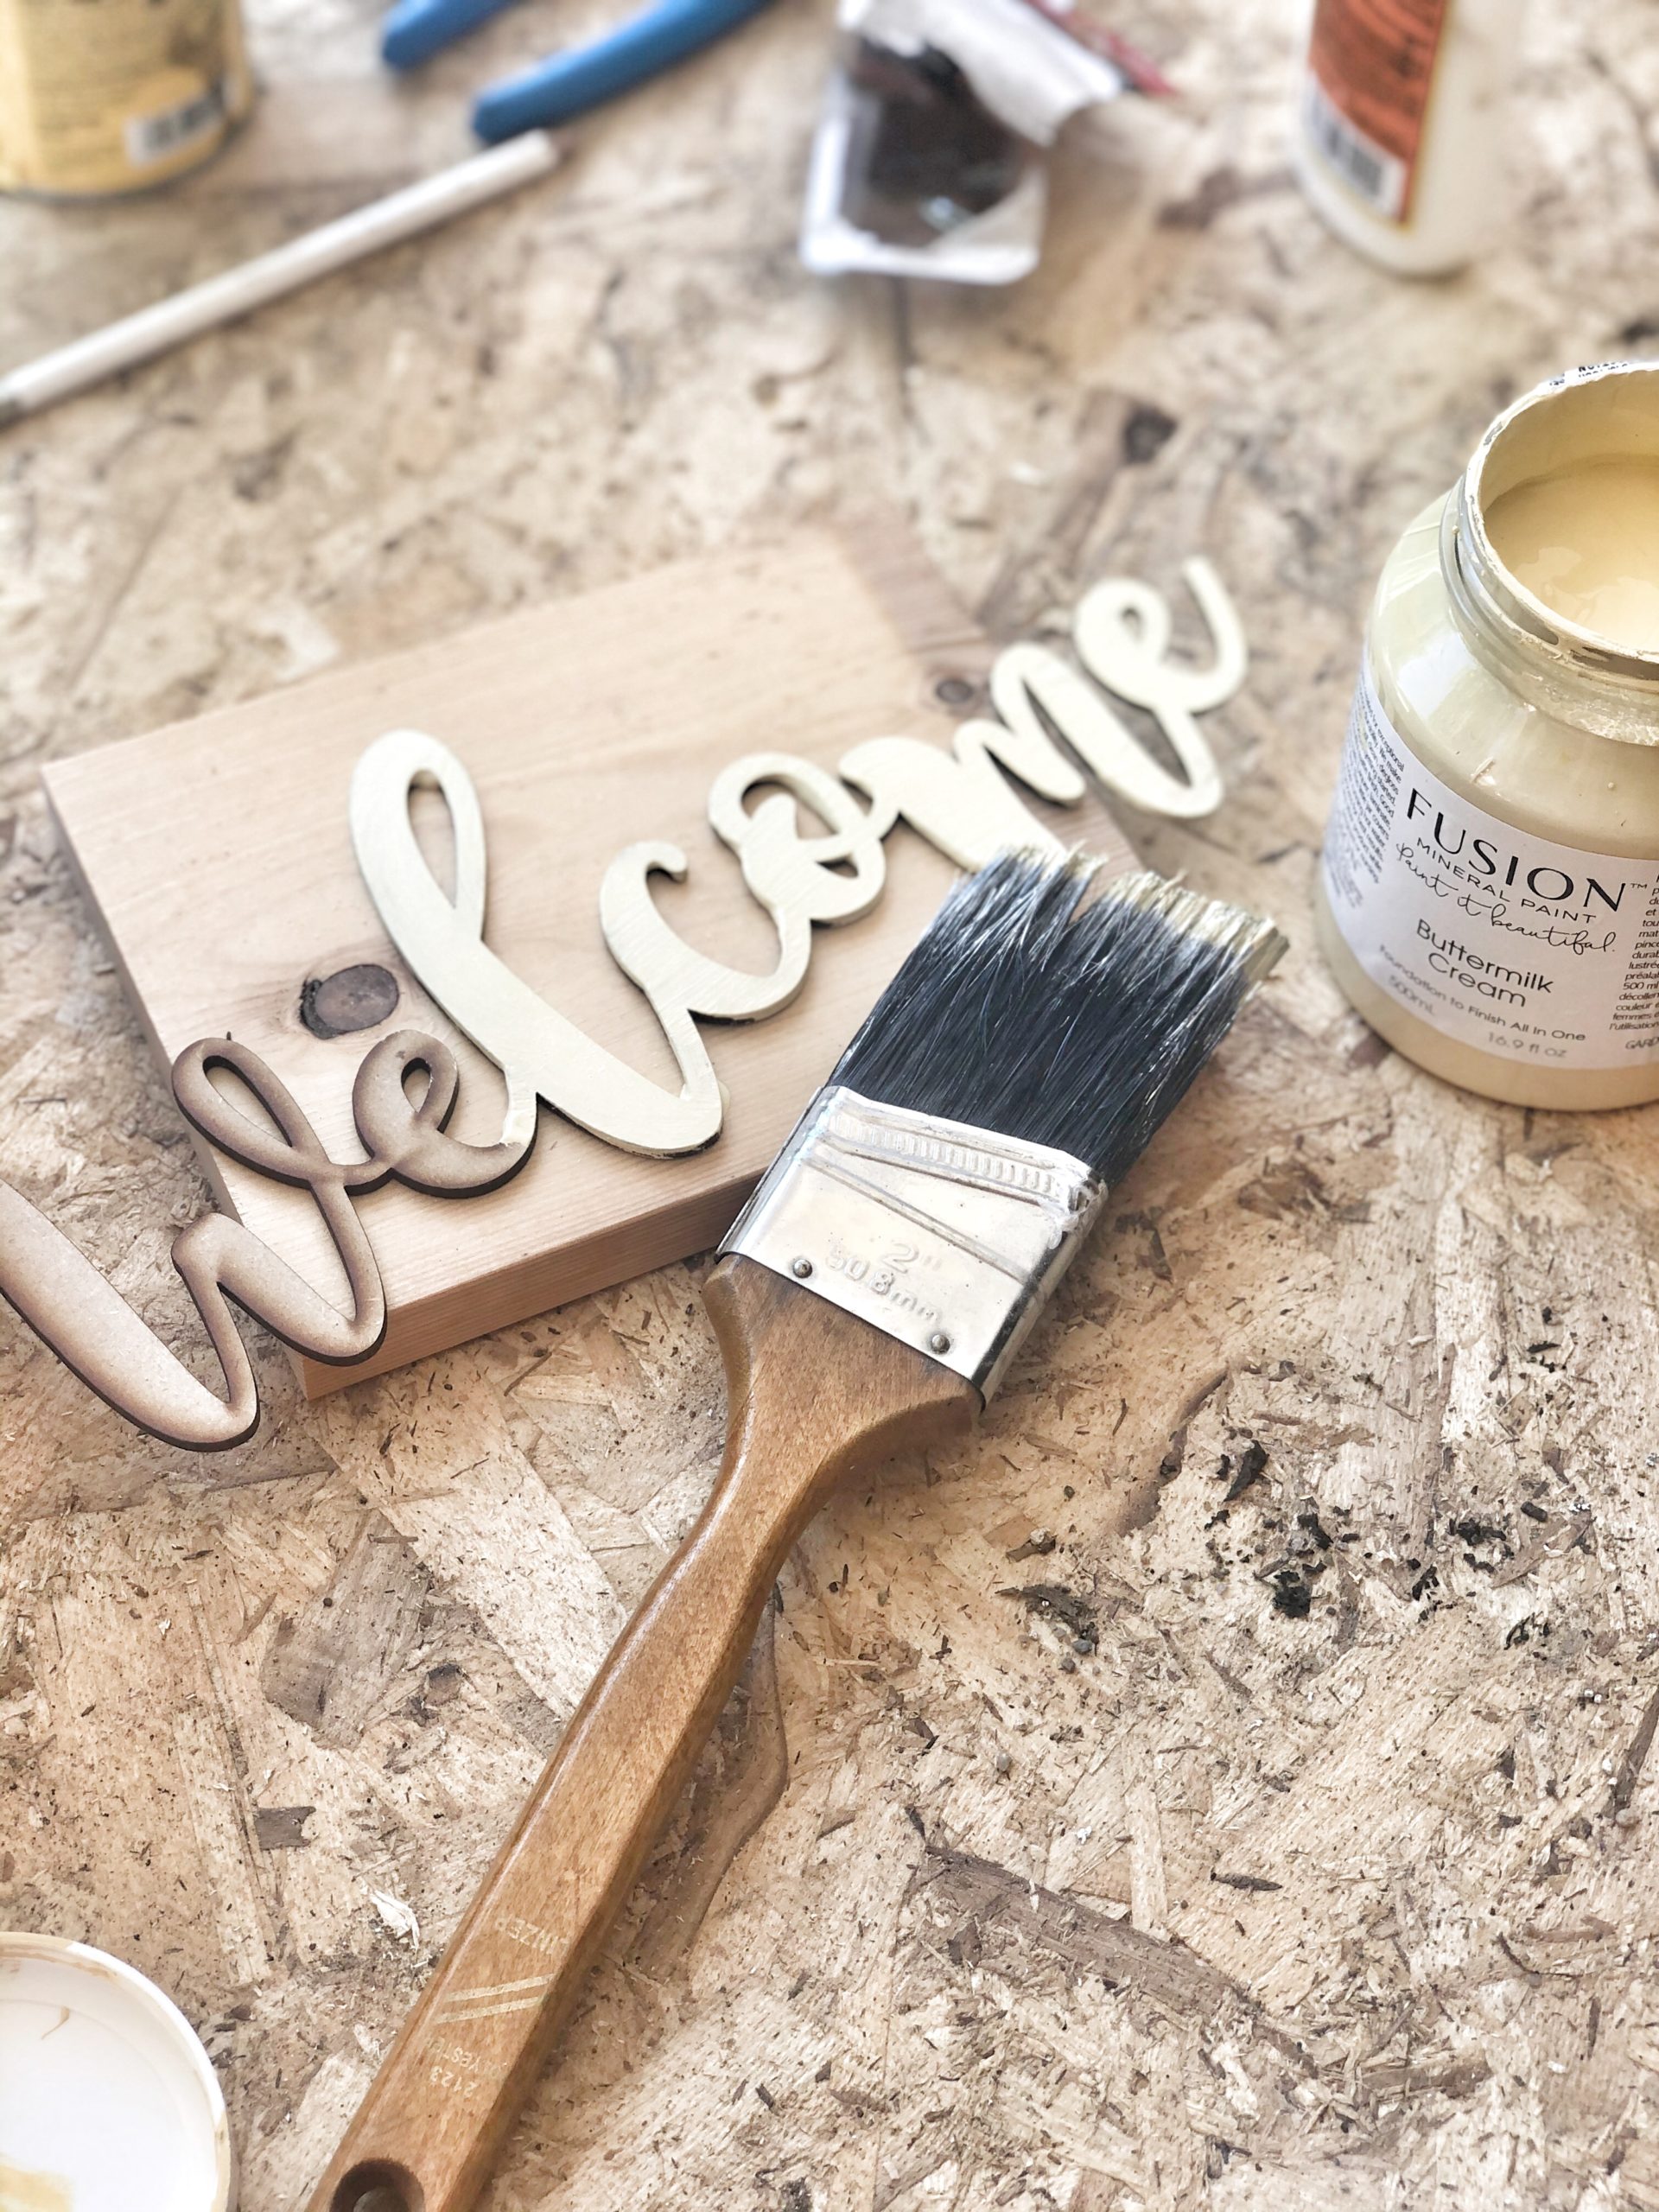
- Once your planter is stained or painted, I like to use minwax poly to seal it. Once dry, I take my letter, number or word, apply wood glue on the backside and attach above the box and let dry.
- Now the fun part! Fill with dirt, your favorite flowers and get that beautiful planter box hung!
Notes
The length of your back piece will vary based on what you want to use for letters, numbers or words. The sides should all stay the same but the bottom and front piece will be a different measurement.
The cost will also vary based on your area and prices of lumber and the type of lumber you use!