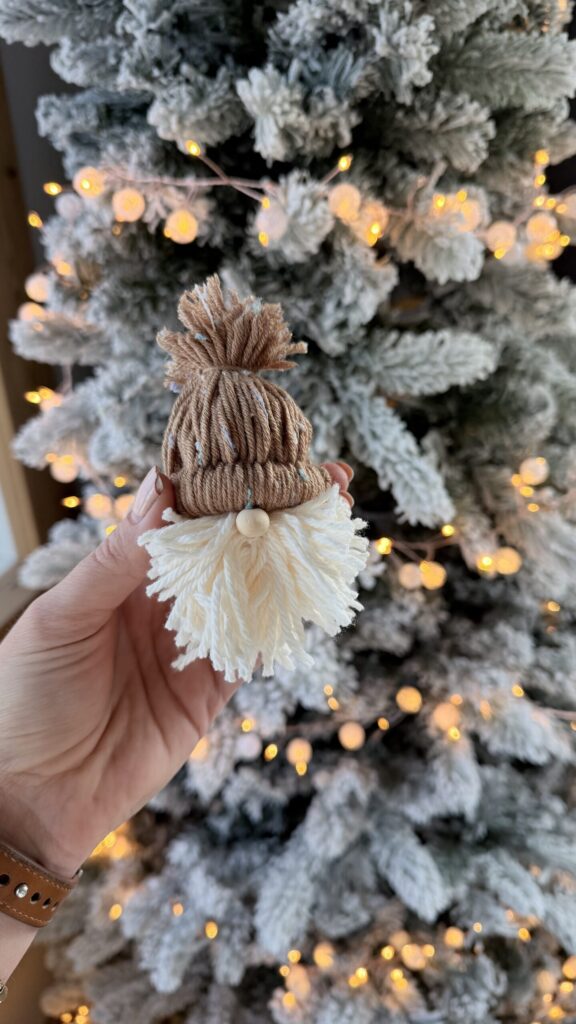
These tiny DIY yarn gnomes are quick, inexpensive, and insanely cute — perfect as Christmas ornaments, wine bottle toppers, gift toppers, or little shelf friends. This easy yarn gnome tutorial uses a wood ring, yarn, wood beads and a hot glue gun. No sewing required! Here’s a link to everything I used!
You can also do this with a toilet paper roll instead of a wooden ring for the hat. You’ll cut the toilet paper about 1.5 inches to make a small ring for your hat.

Primary SEO keywords to use naturally in the post: DIY yarn gnomes, easy yarn gnome tutorial, yarn gnome ornament, handmade gnome, yarn beard gnome, gnome gift topper, holiday craft.
Materials To Make These
- Wood ring (2–3 inches)
- Wood beads (for nose)
- Yarn of choice
- Beard: white or grey recommended
- Hat: any color
- Hot glue gun + glue sticks
- Small scissors
- Cardboard tube or small cylinder (optional, to help shape hat)
- Cotton balls or polyfill (for stuffing)
- Small length of string (if making ornaments)
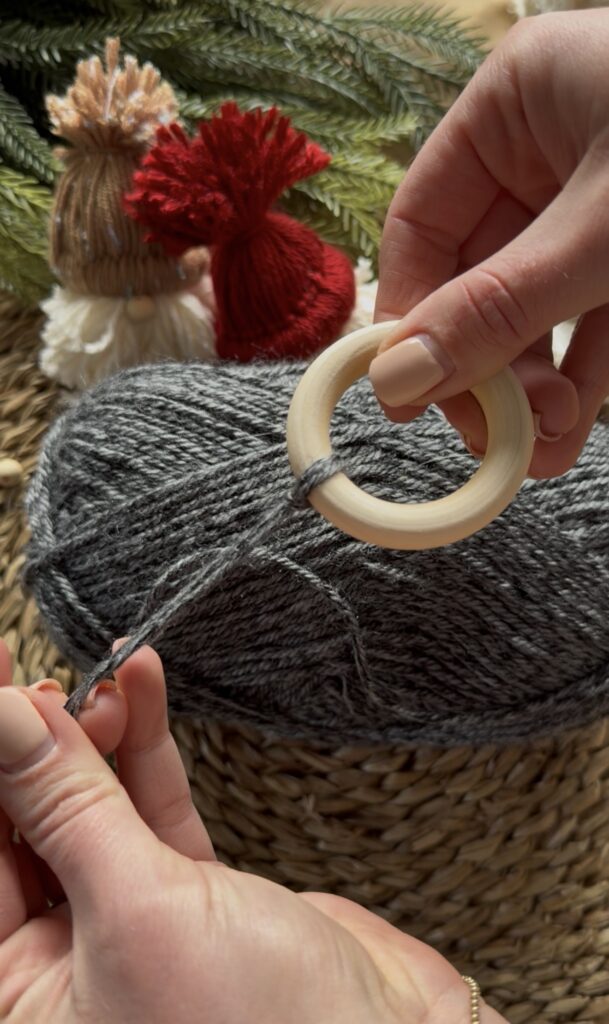
Step 1: Create the Yarn Hat Fringe
To begin building your yarn gnome’s hat, choose any color yarn you love. Cut 35–40 pieces of yarn, each about 6 inches long, depending on the thickness of your yarn.
Fold each yarn strand in half. Push the folded loop through the wood ring, then pull the two loose ends through that loop to create a secure knot (a simple lark’s head knot). Continue knotting yarn pieces all around the ring until it’s completely covered. This step creates the soft, fringed base of your yarn gnome hat.
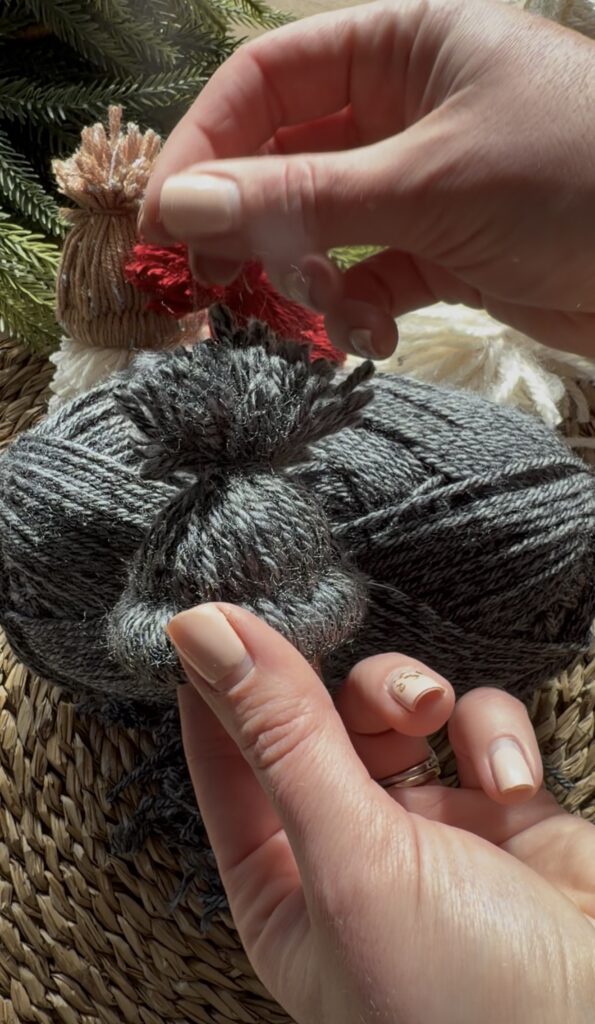
Step 2: Shape and Finish the Hat
Once the entire wood ring is filled with yarn strands, push all the loose yarn ends upward through a small cardboard tube or gently bunch them together to form a pointy hat shape.
Tie these yarn ends tightly with a small scrap of yarn to secure the top of the hat. For a sturdy and full hat, stuff two cotton balls or a bit of polyfill inside. Trim the very top of the hat to make the ends uniform and neat. Your yarn gnome hat is now fluffy, shaped, and ready for assembly.
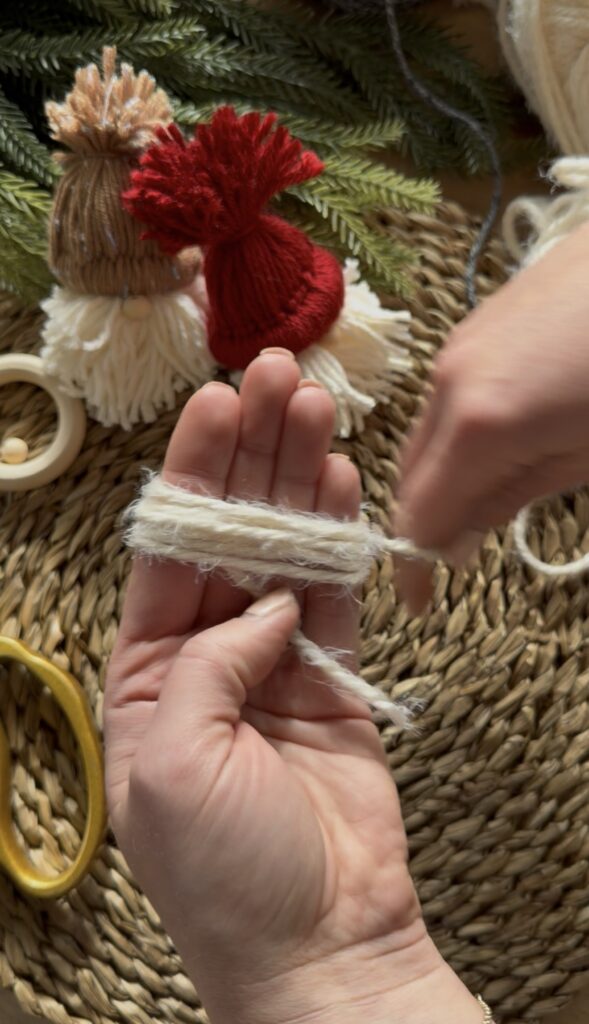
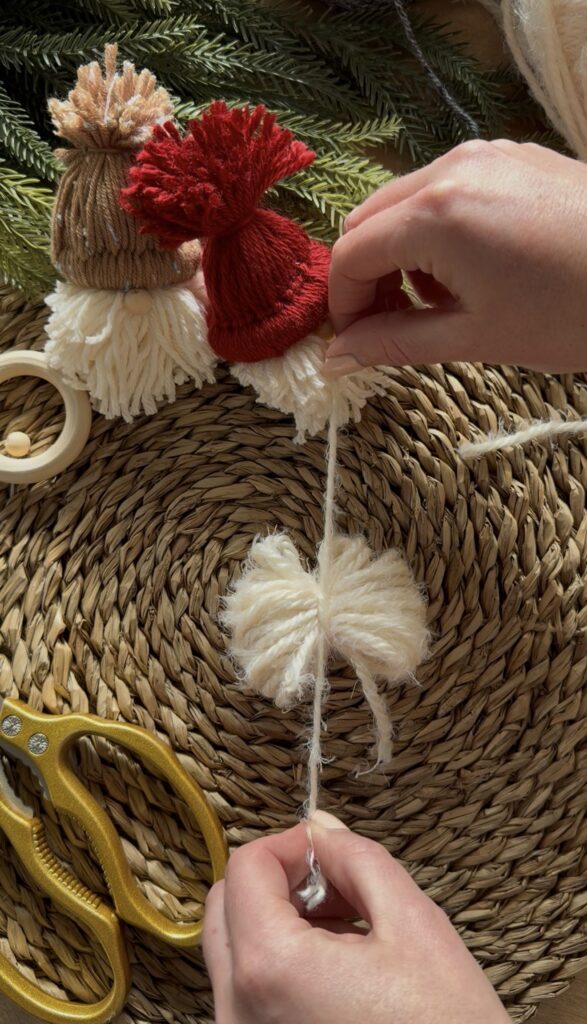
Step 3: Make the Yarn Beard
To create the perfect fluffy beard, take white or grey yarn and wrap it around four fingers several times until thick. Carefully slide the wrapped bundle off your fingers without losing its shape.
Tie a small piece of yarn tightly around the middle of the looped bundle. This forms the center of your beard. Use scissors to cut the loops on both ends, creating a fringed, pom-pom-style beard. Trim the beard into a round or oval shape—whatever style you prefer.
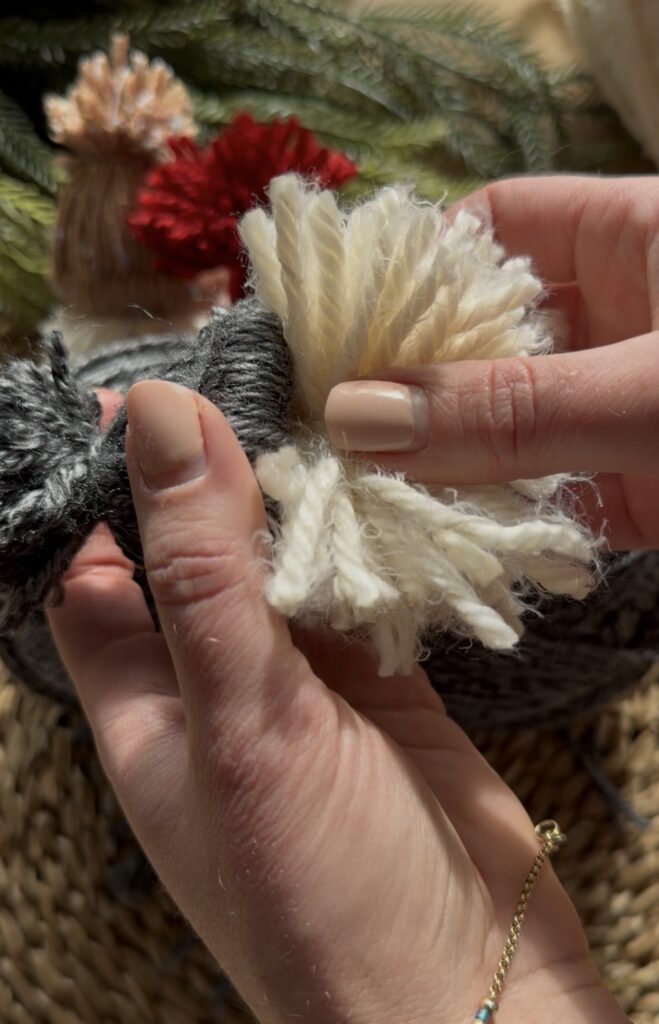
Step 4: Assemble the Gnome
Add a small dot of hot glue to the inside rim of the hat and press the beard firmly into place underneath the hat edge. Next, glue a wood bead right at the bottom edge of the hat, centered above the beard. This creates the classic gnome nose. Hold it in place for a few seconds until secure. Your DIY yarn gnome is done!
Optional: Turn Your Yarn Gnome Into an Ornament or Topper
Want to use your gnome as an ornament? Simply thread a small string or loop through the back of the hat so it hangs straight on the tree. For wine bottle toppers or gift toppers, just nestle the gnome onto the top of the bottle or attach it to a wrapped present. These little cuties instantly elevate your holiday gift-giving.
Tips & Variations
- Use chunky yarn for a fuller hat or beard.
- Make mini gnomes by using smaller wood rings.
- Try seasonal color themes—red and green for Christmas, pastels for spring, or neutrals for year-round décor.
- Add felt hearts, bells, or tiny bows for extra character.
So stink’n cute, Thank you for sharing!
You’re welcome!!
These are so cute. I’m going to make them with my daughter 🩷
Thank you!!