Craving that irresistible crunch of fried pickles but want a healthier alternative? Look no further! Our baked fried pickles recipe offers all the deliciousness without the guilt. Perfect for a snack, appetizer, or even a party treat, these pickles are easy to make and sure to impress. Let’s dive into this delightful recipe!
Let’s get started!
Ingredients:
12 sandwich slice pickles
1-2
Cups panko bread crumbs
1 tsp dried dill
1 cup all purpose flour
1 cup milk
1 tsp baking powder
1 egg
Dash of hot sauce
Instructions:
1. Prep the Pickles:
Start by preheating your oven to 425°F (220°C) and lining a baking sheet with parchment paper. Drain the pickle slices and pat them dry with a paper towel. This step is crucial to ensure they get crispy.
2. Create the Breading Station:
Set up three shallow dishes: one with flour, one with beaten eggs, and one with a mixture of panko breadcrumbs, Parmesan cheese, garlic powder, paprika, and cayenne pepper.
3. Coat the Pickles:
Dredge each pickle slice in flour, shaking off the excess. Next, dip it in the beaten eggs, and finally, coat it evenly with the breadcrumb mixture. Place the coated pickles on the prepared baking sheet.
4. Bake to Perfection:
Lightly spray the pickles with cooking spray to help them crisp up in the oven. Bake for 15-20 minutes or until golden brown and crispy. You can flip them halfway through baking for even crispiness.
5. Serve and Enjoy:
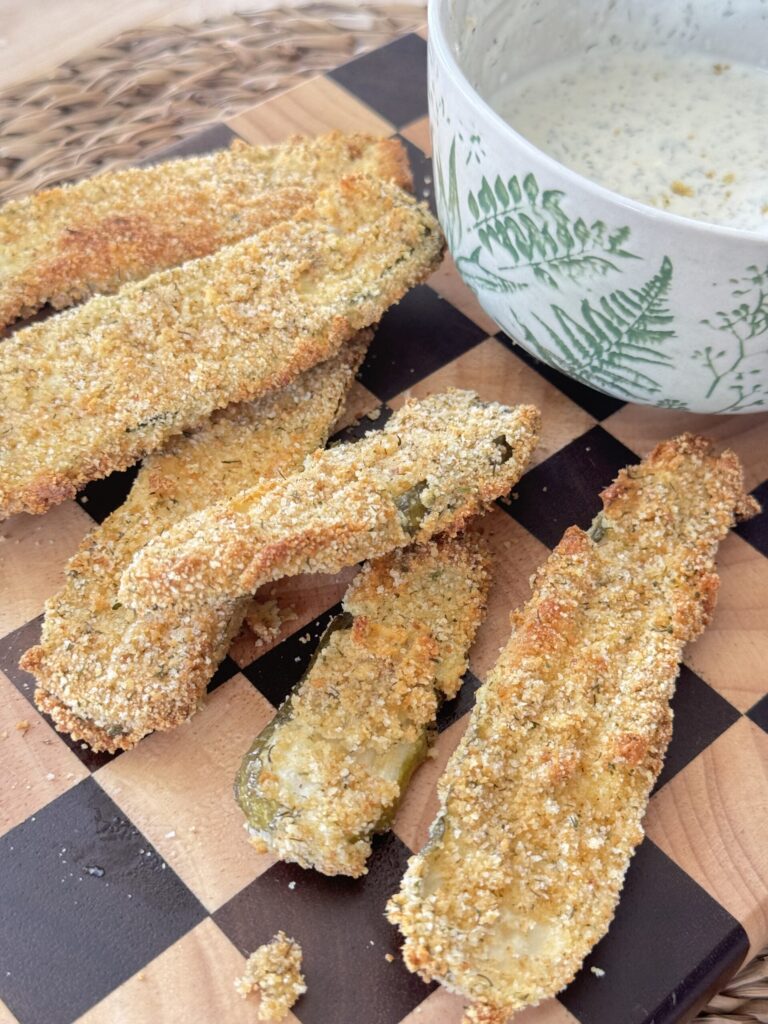
Serve the baked fried pickles hot with your favorite dipping sauce—ranch, spicy mayo, or a tangy mustard dip all work wonderfully. Enjoy the crunchy, tangy goodness guilt-free!
Why Baked Over Fried?
Choosing to bake these pickles instead of frying them not only reduces the calorie count but also makes for a less greasy snack. The panko breadcrumbs provide a satisfying crunch, while the Parmesan adds a delicious savory flavor. Plus, baking is a mess-free option that’s easier on cleanup!
Tips and Variations:
- Spice It Up: Add a pinch of cayenne pepper or chili powder to the breadcrumb mix for extra heat.
- Different Dips: Experiment with different dipping sauces like honey mustard, chipotle aioli, or even blue cheese dressing.
- Pickle Variety: Use spicy pickles, bread and butter pickles, or even pickled jalapeños for a twist.
Ingredients
Method
- Prep the Pickles:
- Start by preheating your oven to 425°F (220°C) and lining a baking sheet with parchment paper. Drain the pickle slices and pat them dry with a paper towel. This step is crucial to ensure they get crispy.
- Create the Breading Station:
- Set up three shallow dishes: one with flour, one with beaten eggs, and one with a mixture of panko breadcrumbs, Parmesan cheese, garlic powder, paprika, and cayenne pepper.
- Coat the Pickles:
- Dredge each pickle slice in flour, shaking off the excess. Next, dip it in the beaten eggs, and finally, coat it evenly with the breadcrumb mixture. Place the coated pickles on the prepared baking sheet.
- Bake to Perfection:
- Lightly spray the pickles with cooking spray to help them crisp up in the oven. Bake for 15-20 minutes or until golden brown and crispy. You can flip them halfway through baking for even crispiness.
- Serve the baked fried pickles hot with your favorite dipping sauce—ranch, spicy mayo, or a tangy mustard dip all work wonderfully. Enjoy the crunchy, tangy goodness guilt-free!