DIY Farmhouse Table
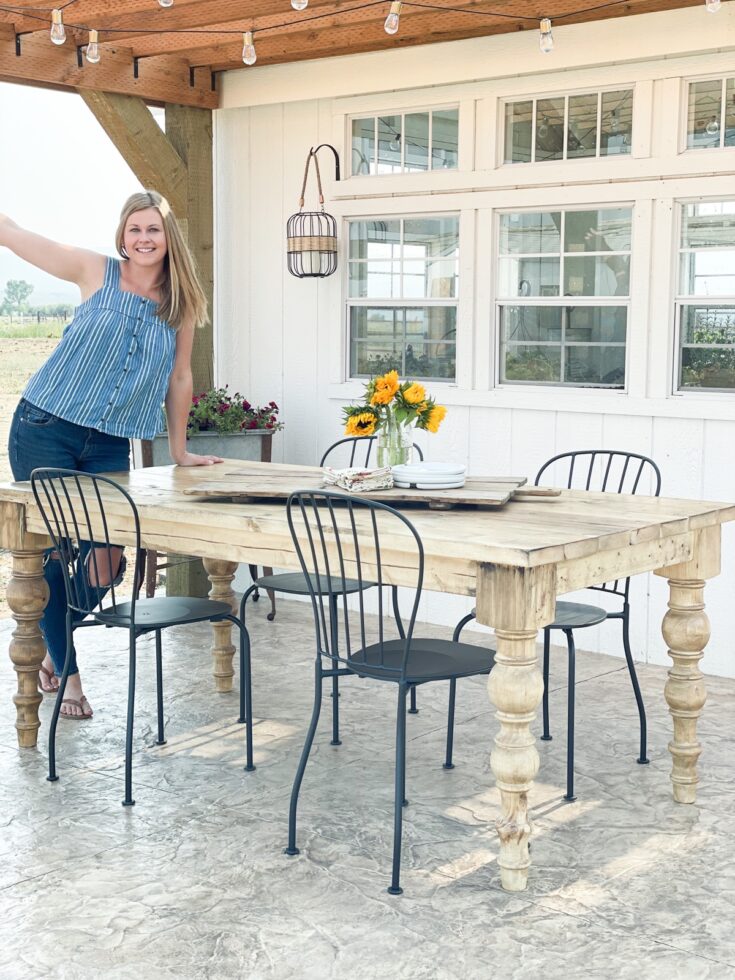
DIY Farmhouse table on a budget! I saw a similar table to this, but the price point was much too high, so I decided to DIY it myself, and it turned out amazing! Follow along on my Instagram highlight reel "DIY Dining Table" for more details!
Materials
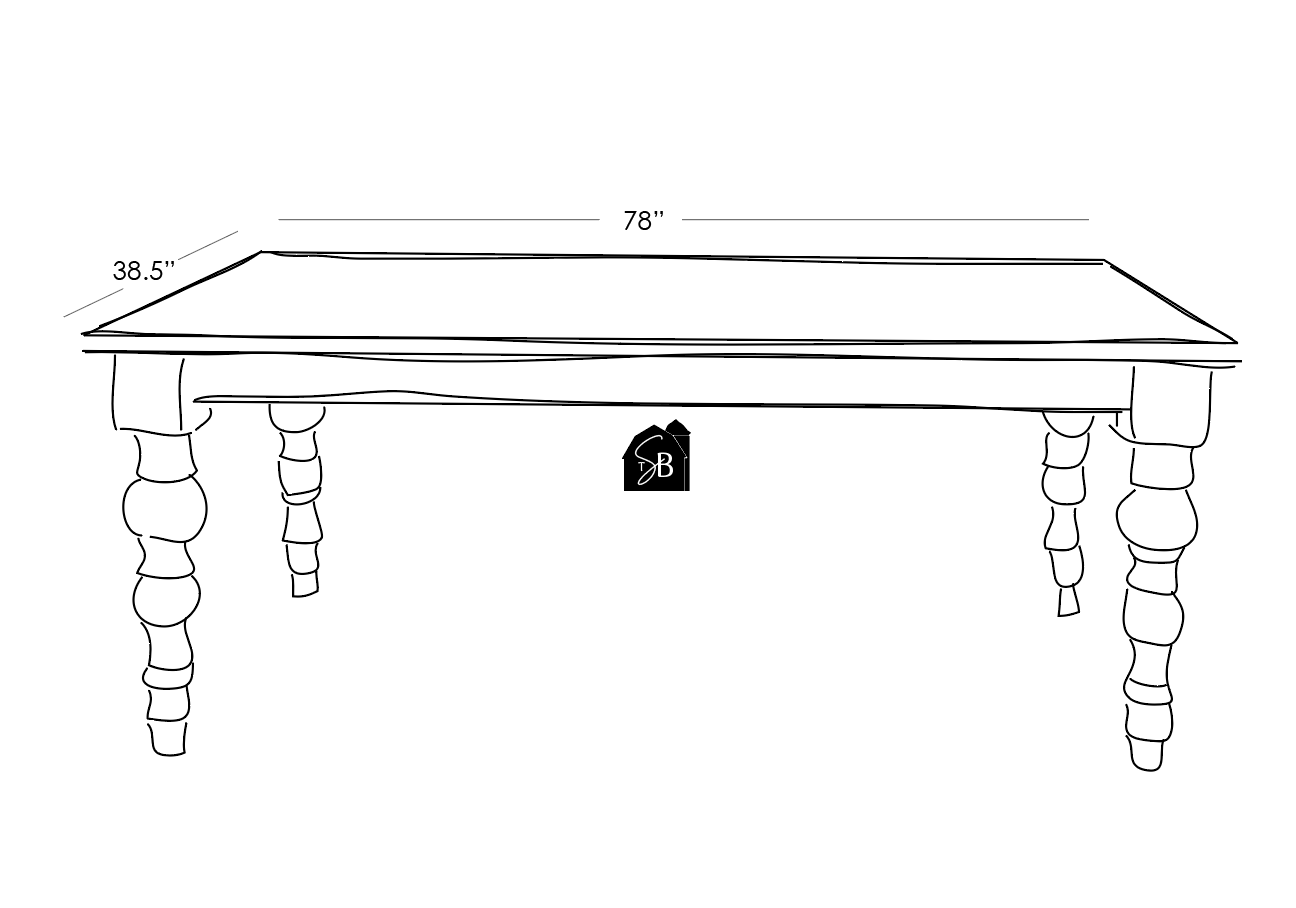
- For a 6.5 ft long x 38.5 inch wide table: adjustable as desired
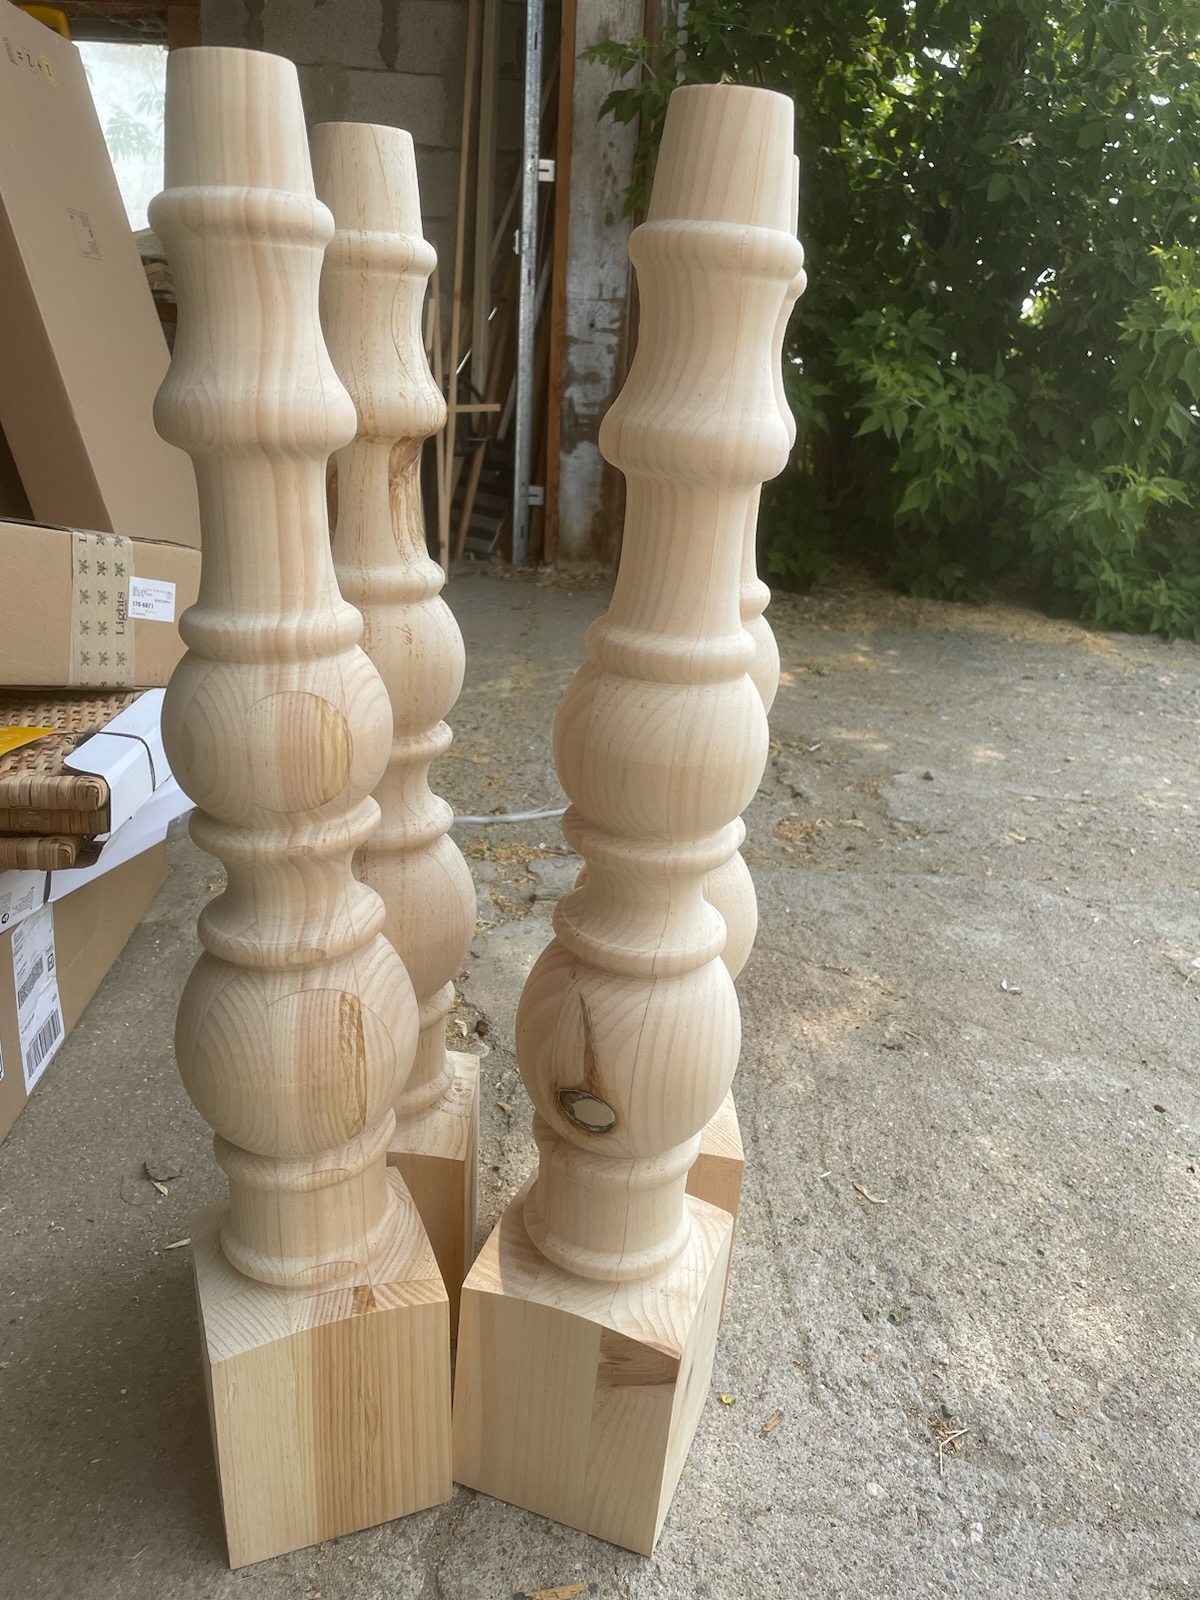
- 4 table legs from Carolina Leg Co
- (7-8) 2x6’s- depending how big you want your table
- (3) 2x4- depending on how big you want your table
- Wood Glue
- Wood Stain or paint (I used Minwax Puritan Pine, Driftwood, and Special Walnut)
- Minwax polycrylic sealer in "clear satin"
Tools
- Kreg jig
- Drill
- Miter Saw
Instructions
 To start, cut your 2x6 boards for the table top to the length you desire with a miter saw
- Next, using your Kreg Jig- drill holes into the sides of your boards to attach them for a seamless finished look TIP: For the two end boards, I used pocket holes going one direction (into the center of the board). For the middle five boards, I drilled pocket holes going both directions for increased stability.
- Next I usedwood glue and 2 ½ inch screws to attach the middle boards
- I did the same with the two end boards to create the entire table top surface!
- After the boards were assembled and the glue had dried, I used 80 grit sandpaper and then 100 grit sandpaper to smooth out the surface and round off the edges of the table.
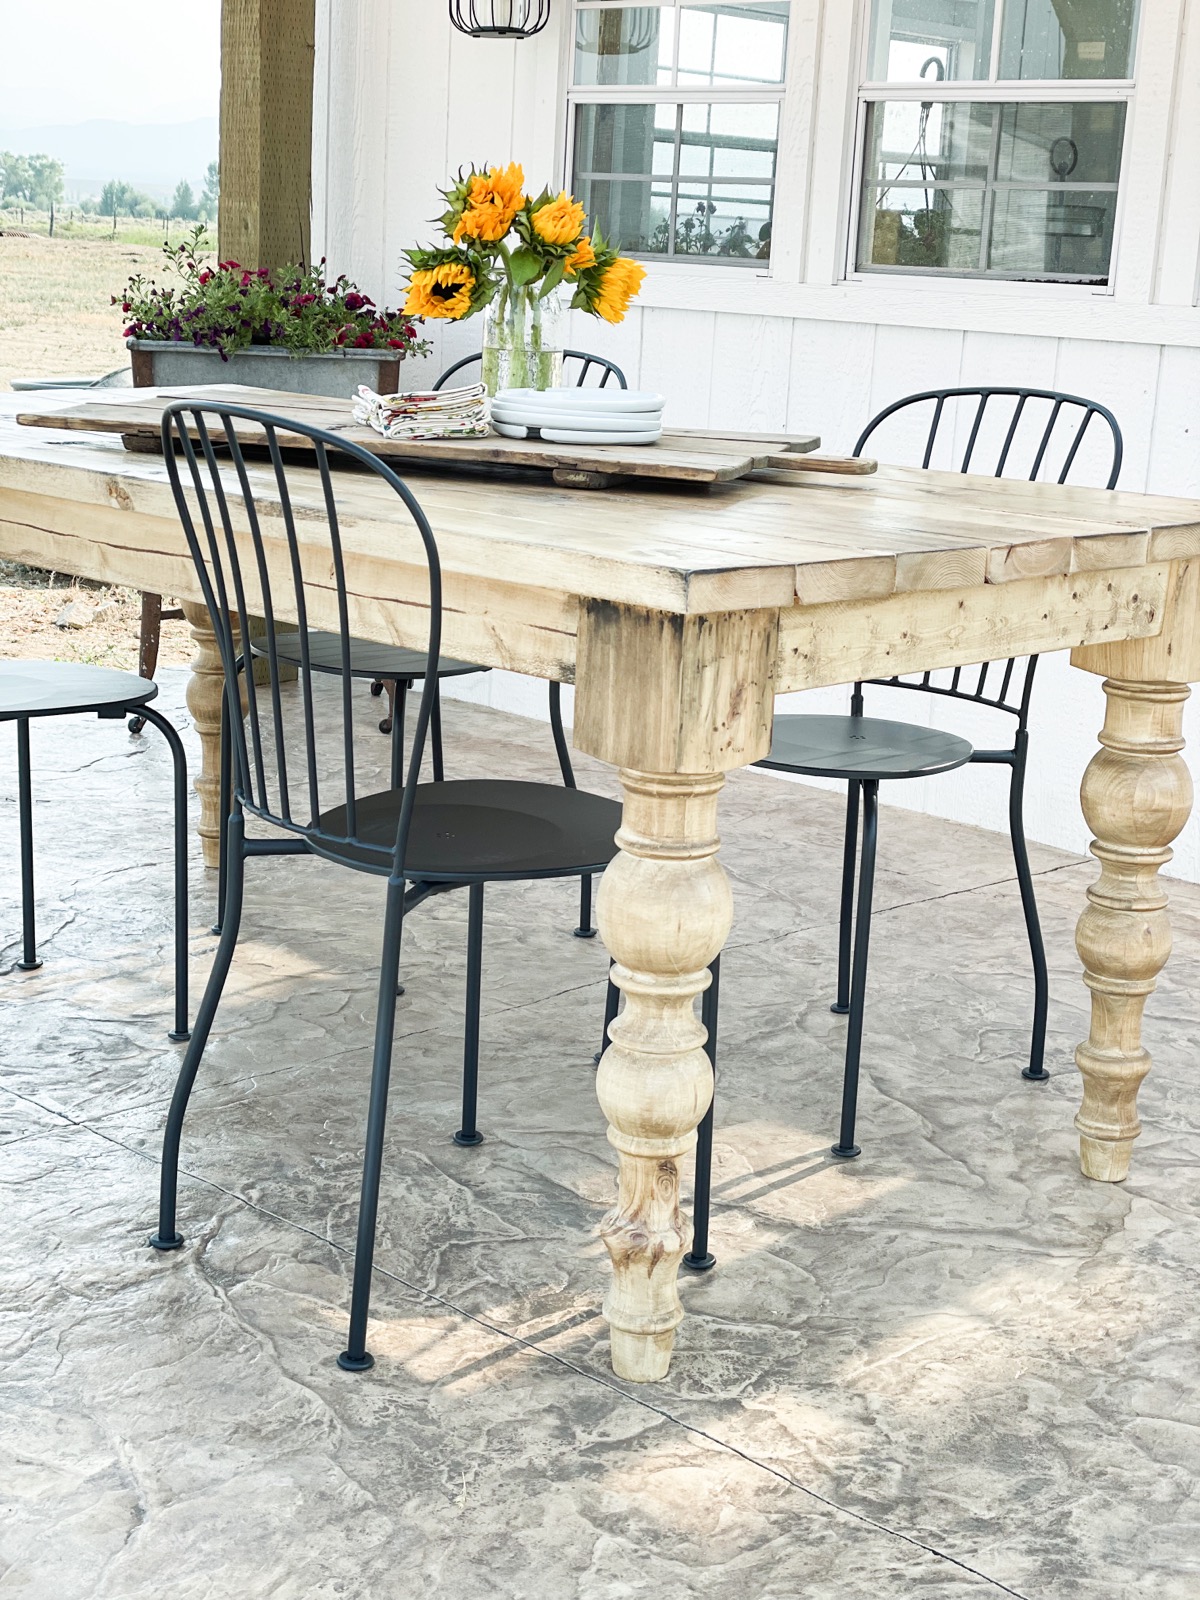
- Next I stained the table top. My go to stain combination is Weathered Oak and Special Walnut, but Weathered Oak was unavailable to me during this time, so I improvised and used Driftwood and Puritan Pine as a new combination and ended up loving it! I just dip my staining pad in the different stains and wipe, there’s no actual mixing of stains!
- After I stained the table top, I took some black paint, mixed it with water and used an old rag to distress the edges of the table for a very rustic look.
- Next I stained the beautiful table Legs from Carolina Leg Co. If you use my discount code SASSYBARN10 you get 10% off your purchase online! These made the project SO much easier because I didn't have to build the legs, and they look amazing! I used the same stain combination as I used on the table top.
- After the legs dried, I attached them to the bottom of the table top 1.5 inches from the corner using pocket holes, but you can use wood screws to attach them as well!
- Next, I measured my 2x4s to make the table skirt. I measured from leg to leg and cut my pieces to size with my saw.
- To attach the table skirt, I used pocket holes and attached the shorter end pieces first. This made it easier to work with the longer side pieces once the ends were securely attached.
- I added two support pieces (2x4's) in a perpendicular fashion on the bottom of the table top for added support
- After the table was assembled, I took it an extra step with the staining to really give it that rustic look I was going for!
- I started with a quick all over coat of Special Walnut stain- then wiped it off
- Next I used 1 part white paint to 4 parts water to create a light white wash. I applied the white wash, then wiped it off.
- After, I took my black paint with my staining pad and antiqued the corners of the table top and legs!
- Once I was satisfied with the stain and antique, I sealed it with Minwax Polycrylic in clear satin. This can be used indoor or outdoor and it does not yellow your wood or paint!
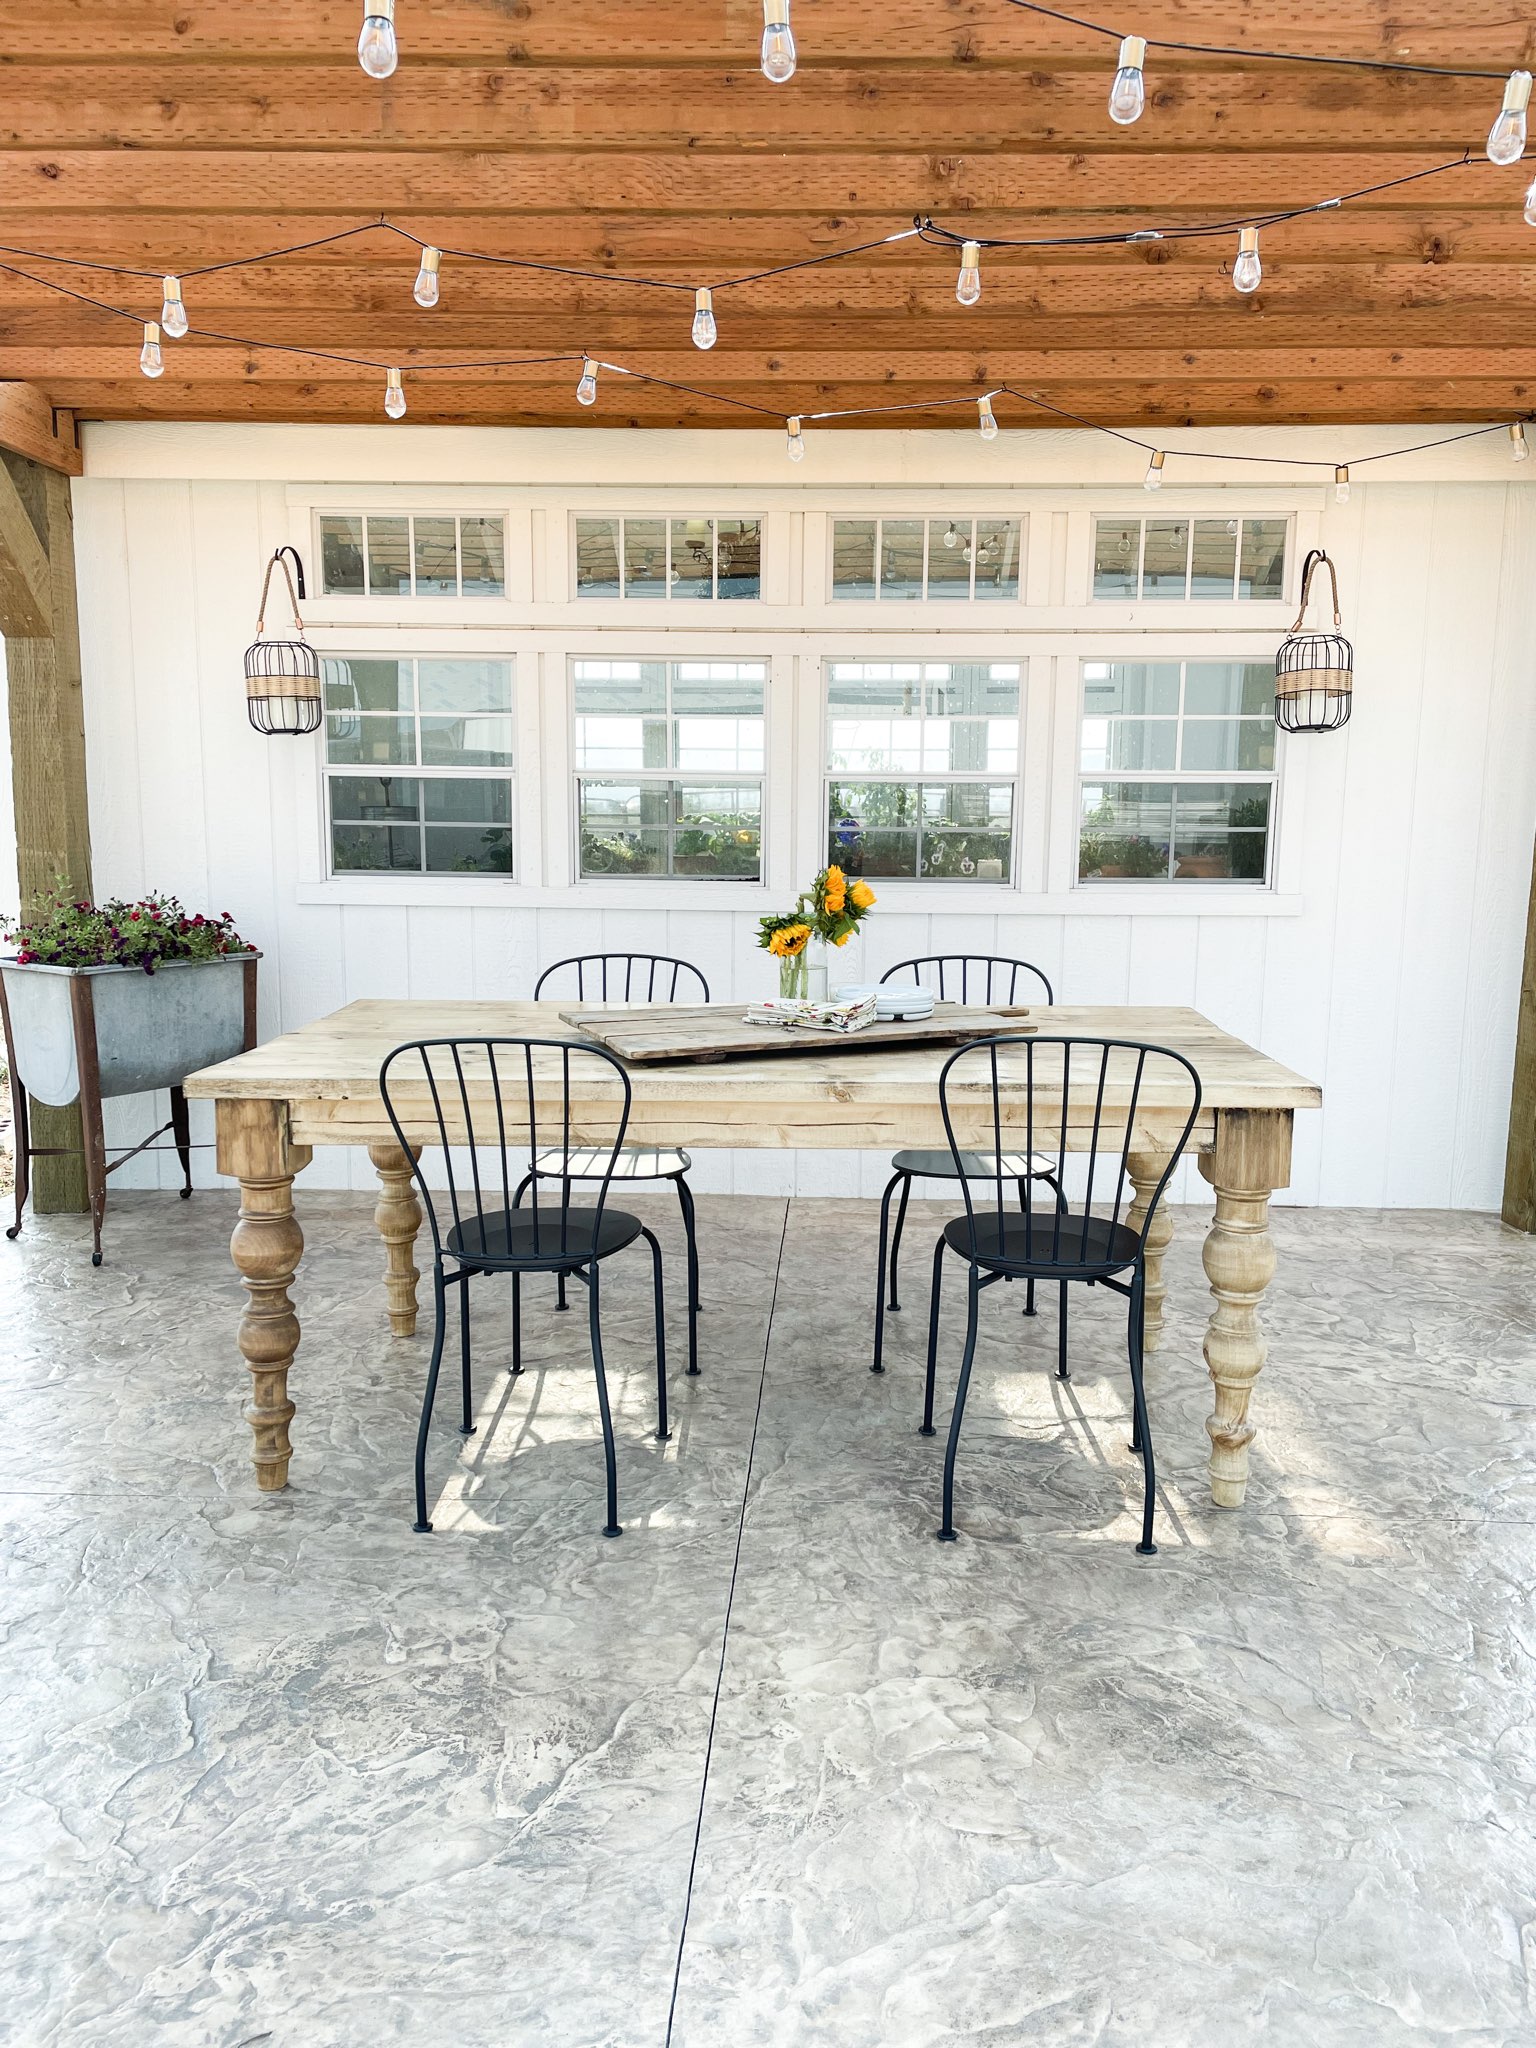
This project was so fun, and it turned into such a beautiful and functional piece! If you try this build out, tag me @thesassybarn so I can see your creations!
Notes
Be sure to watch my Instagram Highlight Reel "DIY Dining Table" to follow along with a visual while going through this blog post!