If you’re looking for a fun, cheesy, and delicious Halloween recipe, these Cheesy Pizza Skulls are going to be a hit! Made with crescent roll dough, pizza sauce, gooey mozzarella cheese, Parmesan, and all your favorite pizza toppings, these little pizza pockets are as fun to make as they are to eat. They’re perfect for Halloween parties, spooky movie nights, school parties, or a fun dinner with the kids!
The best part? You only need a handful of simple ingredients to make them, and they’re ready in about 30 minutes. Using a mini skull baking mold gives these pizza pockets their spooky shape, making them an easy way to add a little Halloween fun to your table without spending hours in the kitchen.
Serve them warm with a side of marinara or pizza sauce for dipping, and watch them disappear! Whether you’re making them for a Halloween party or just want to make dinner a little more exciting, these Cheesy Pizza Skulls are a festive twist on everyone’s favorite comfort food.
Why You’ll Love These Cheesy Pizza Skulls
- Easy to make: With refrigerated crescent roll dough or pizza dough, there’s no need to make dough from scratch.
- Perfect for Halloween: The skull shape makes these pizza pockets a fun addition to any spooky celebration.
- Customizable: Use your favorite pizza toppings to make each skull exactly how you like it.
- Kid-friendly: Let the kids help choose the toppings and fill the skulls for a fun Halloween cooking activity.
- Great for parties: These individual pizza pockets are easy to serve as a Halloween appetizer, snack, or dinner.
Ingredients
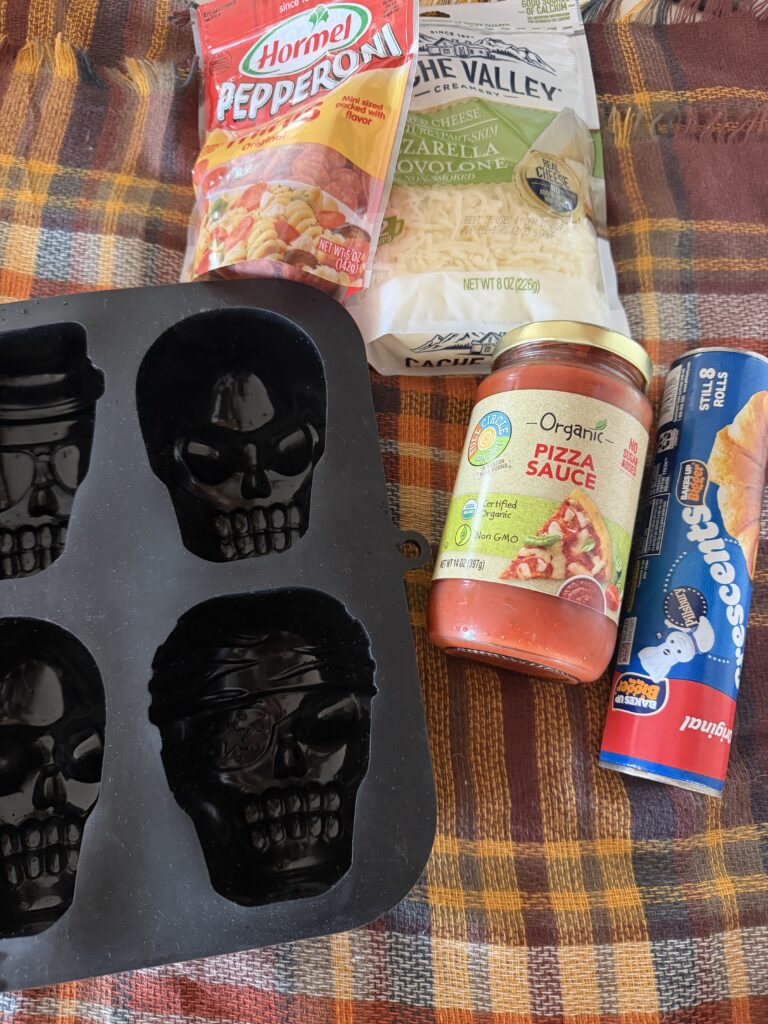
- Crescent Roll Dough or Pizza Dough-One can of refrigerated crescent roll dough or pizza dough forms the outside of the pizza skulls. Crescent roll dough creates a soft, buttery crust, while pizza dough gives you a more traditional pizza texture. If using crescent rolls, pinch the seams together before cutting the dough into pieces.
- Pizza Sauce– You’ll need about 3/4 to 1 cup of pizza sauce to fill the skulls, plus extra for dipping. Pizza sauce adds that classic pizza flavor and helps keep the filling delicious and saucy. Be careful not to add too much, as excess sauce can make the dough difficult to seal.
- Shredded Mozzarella Cheese– Two cups of shredded mozzarella give these pizza skulls their gooey, cheesy center. Mozzarella melts beautifully and pairs perfectly with pizza sauce and your favorite toppings. I recommend shredding your own cheese if you have time, but pre-shredded mozzarella works great for an easy shortcut.
- Parmesan Cheese– About 1/4 cup of Parmesan adds a little extra cheesy, savory flavor. Sprinkle it over the mozzarella and toppings before sealing the dough.
- Your Favorite Pizza Toppings– This is where you can get creative! Use mini pepperoni, cooked sausage, diced bell peppers, sliced olives, mushrooms, or any other favorite pizza toppings. Just be sure to chop your toppings into small pieces so they fit inside the skull cavities and the dough can seal properly.
How to Make Cheesy Pizza Skulls
These Halloween pizza pockets come together with just a few simple steps.
Step 1: Prepare the Skull Mold
Spray your mini skull baking tin with cooking spray. I use a silicone skull mold, which makes it easier to release the finished pizza skulls after baking.
Step 2: Prepare the Dough
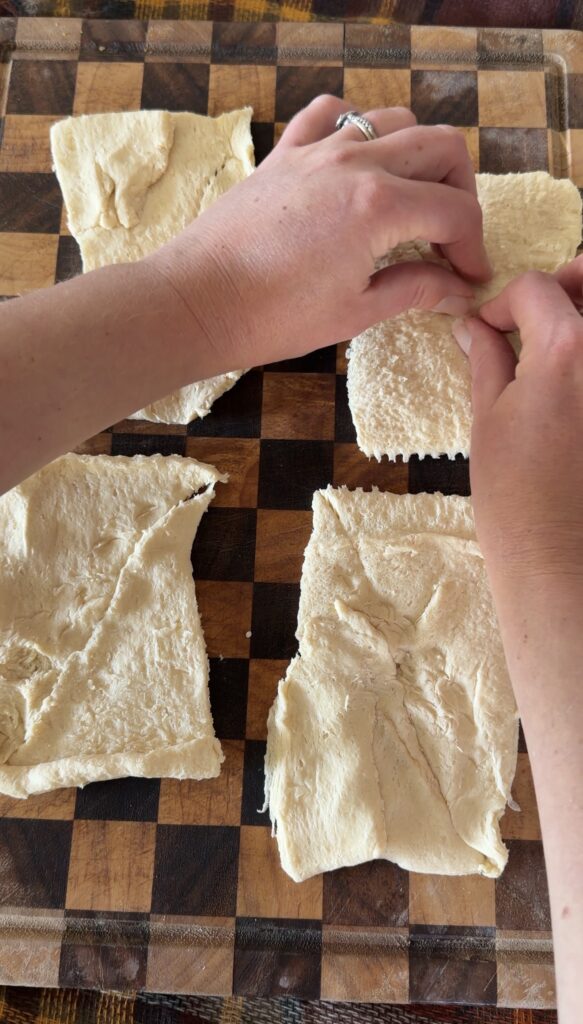
Lightly flour your work surface and roll out the crescent roll dough. If you’re using crescent rolls, pinch the seams together to create one solid sheet of dough. Cut the dough into six rectangles large enough to fit into your skull cavities with enough extra dough to fold over the filling.
Step 3: Fill the Skull Cavities
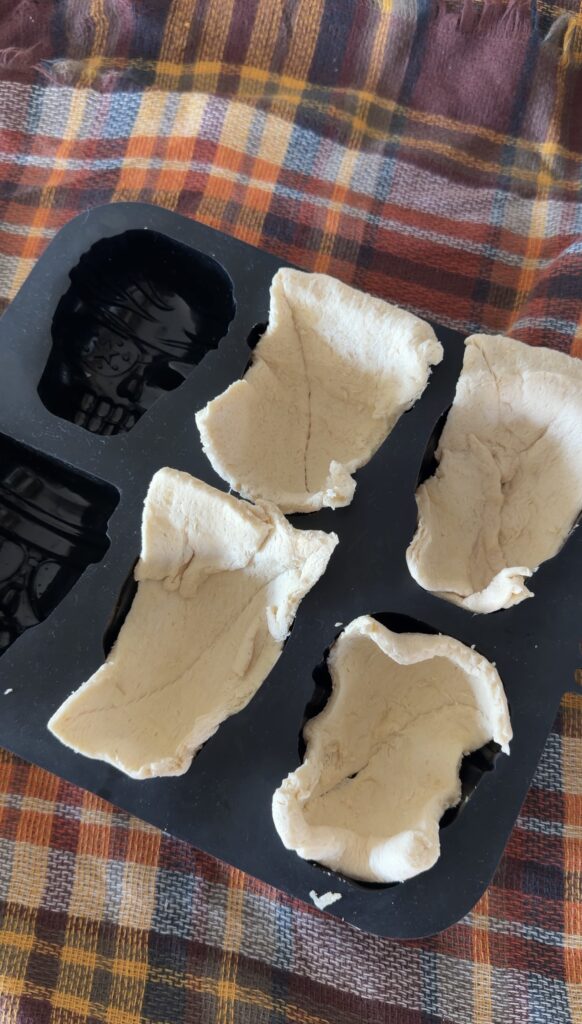
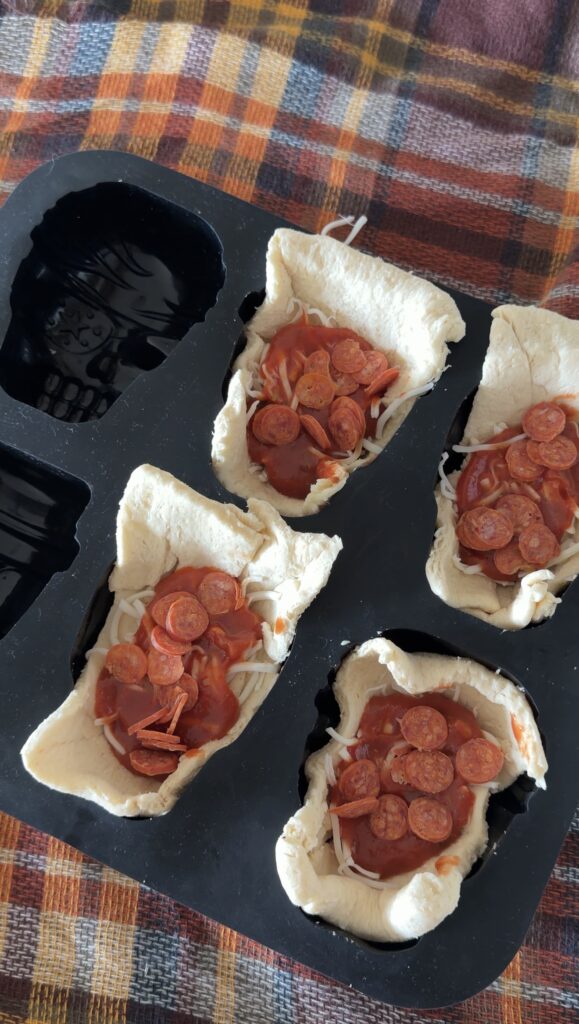
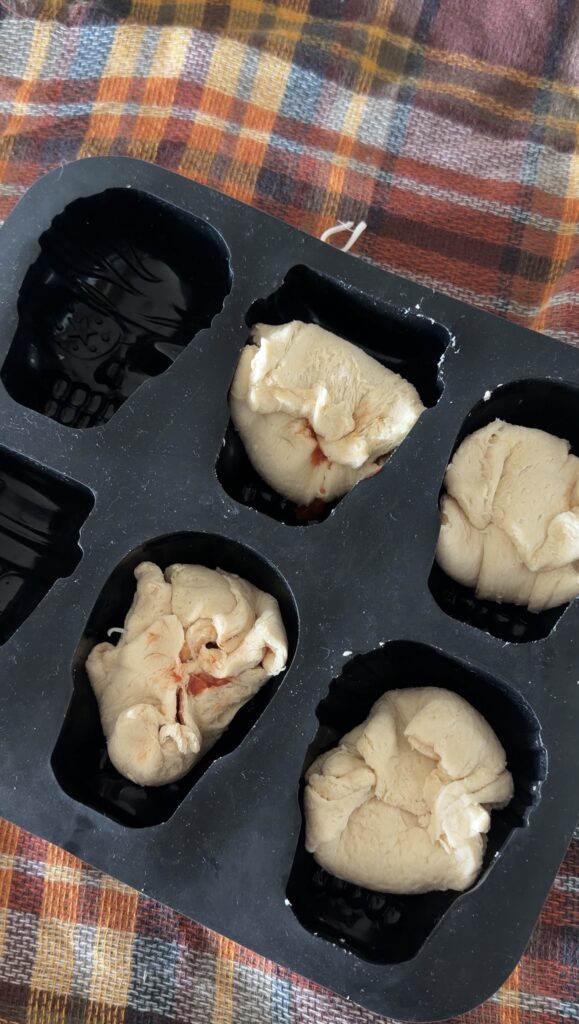
Place one piece of dough into each skull cavity, gently pressing it into the shape. Add pizza sauce, shredded mozzarella, a sprinkle of Parmesan, and your desired pizza toppings.
Add a small amount of additional pizza sauce over the filling, using no more than about one tablespoon per skull. This helps keep the filling flavorful without adding so much moisture that the dough becomes difficult to seal.
Step 4: Seal the Pizza Skulls
Fold the extra dough over the filling and pinch the edges together to seal each skull completely, similar to making a small stuffed pizza pocket. Make sure there are no gaps where the cheese or sauce can escape during baking.
Repeat until all six skull cavities are filled and sealed.
Step 5: Refrigerate While the Oven Preheats
Place the filled skull mold in the refrigerator while you preheat the oven to 400°F. Chilling the dough briefly helps it stay easier to handle and can help the skulls hold their shape while baking.
Step 6: Bake Until Golden
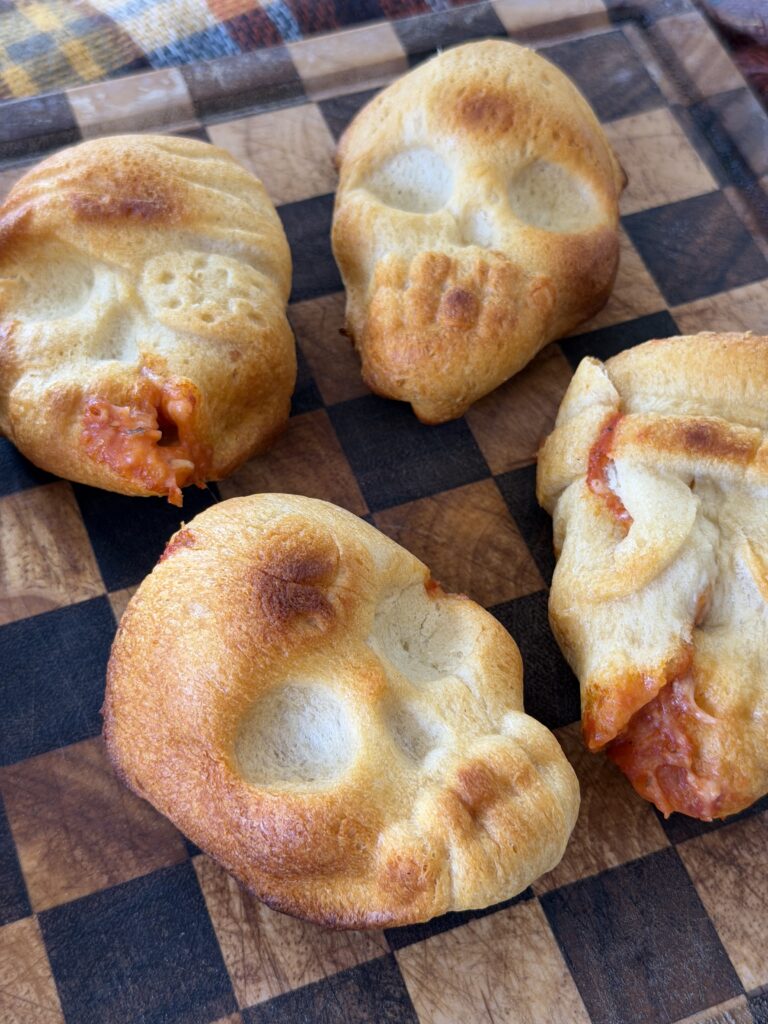
Remove the mold from the refrigerator and bake for 16–20 minutes, or until the dough is lightly golden brown and cooked through. Baking times can vary depending on the dough you use and your particular mold, so keep an eye on them toward the end.
Step 7: Cool and Serve
Remove the skulls from the oven and allow them to cool for about five minutes before unmolding. Carefully remove each pizza skull from the silicone mold.
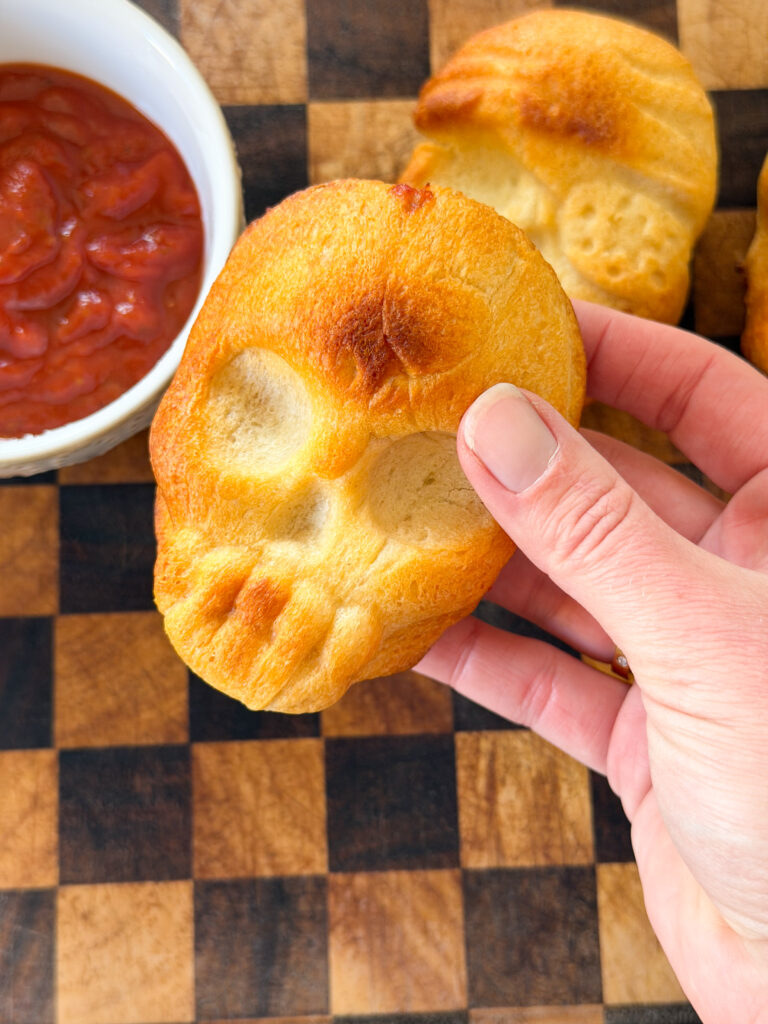
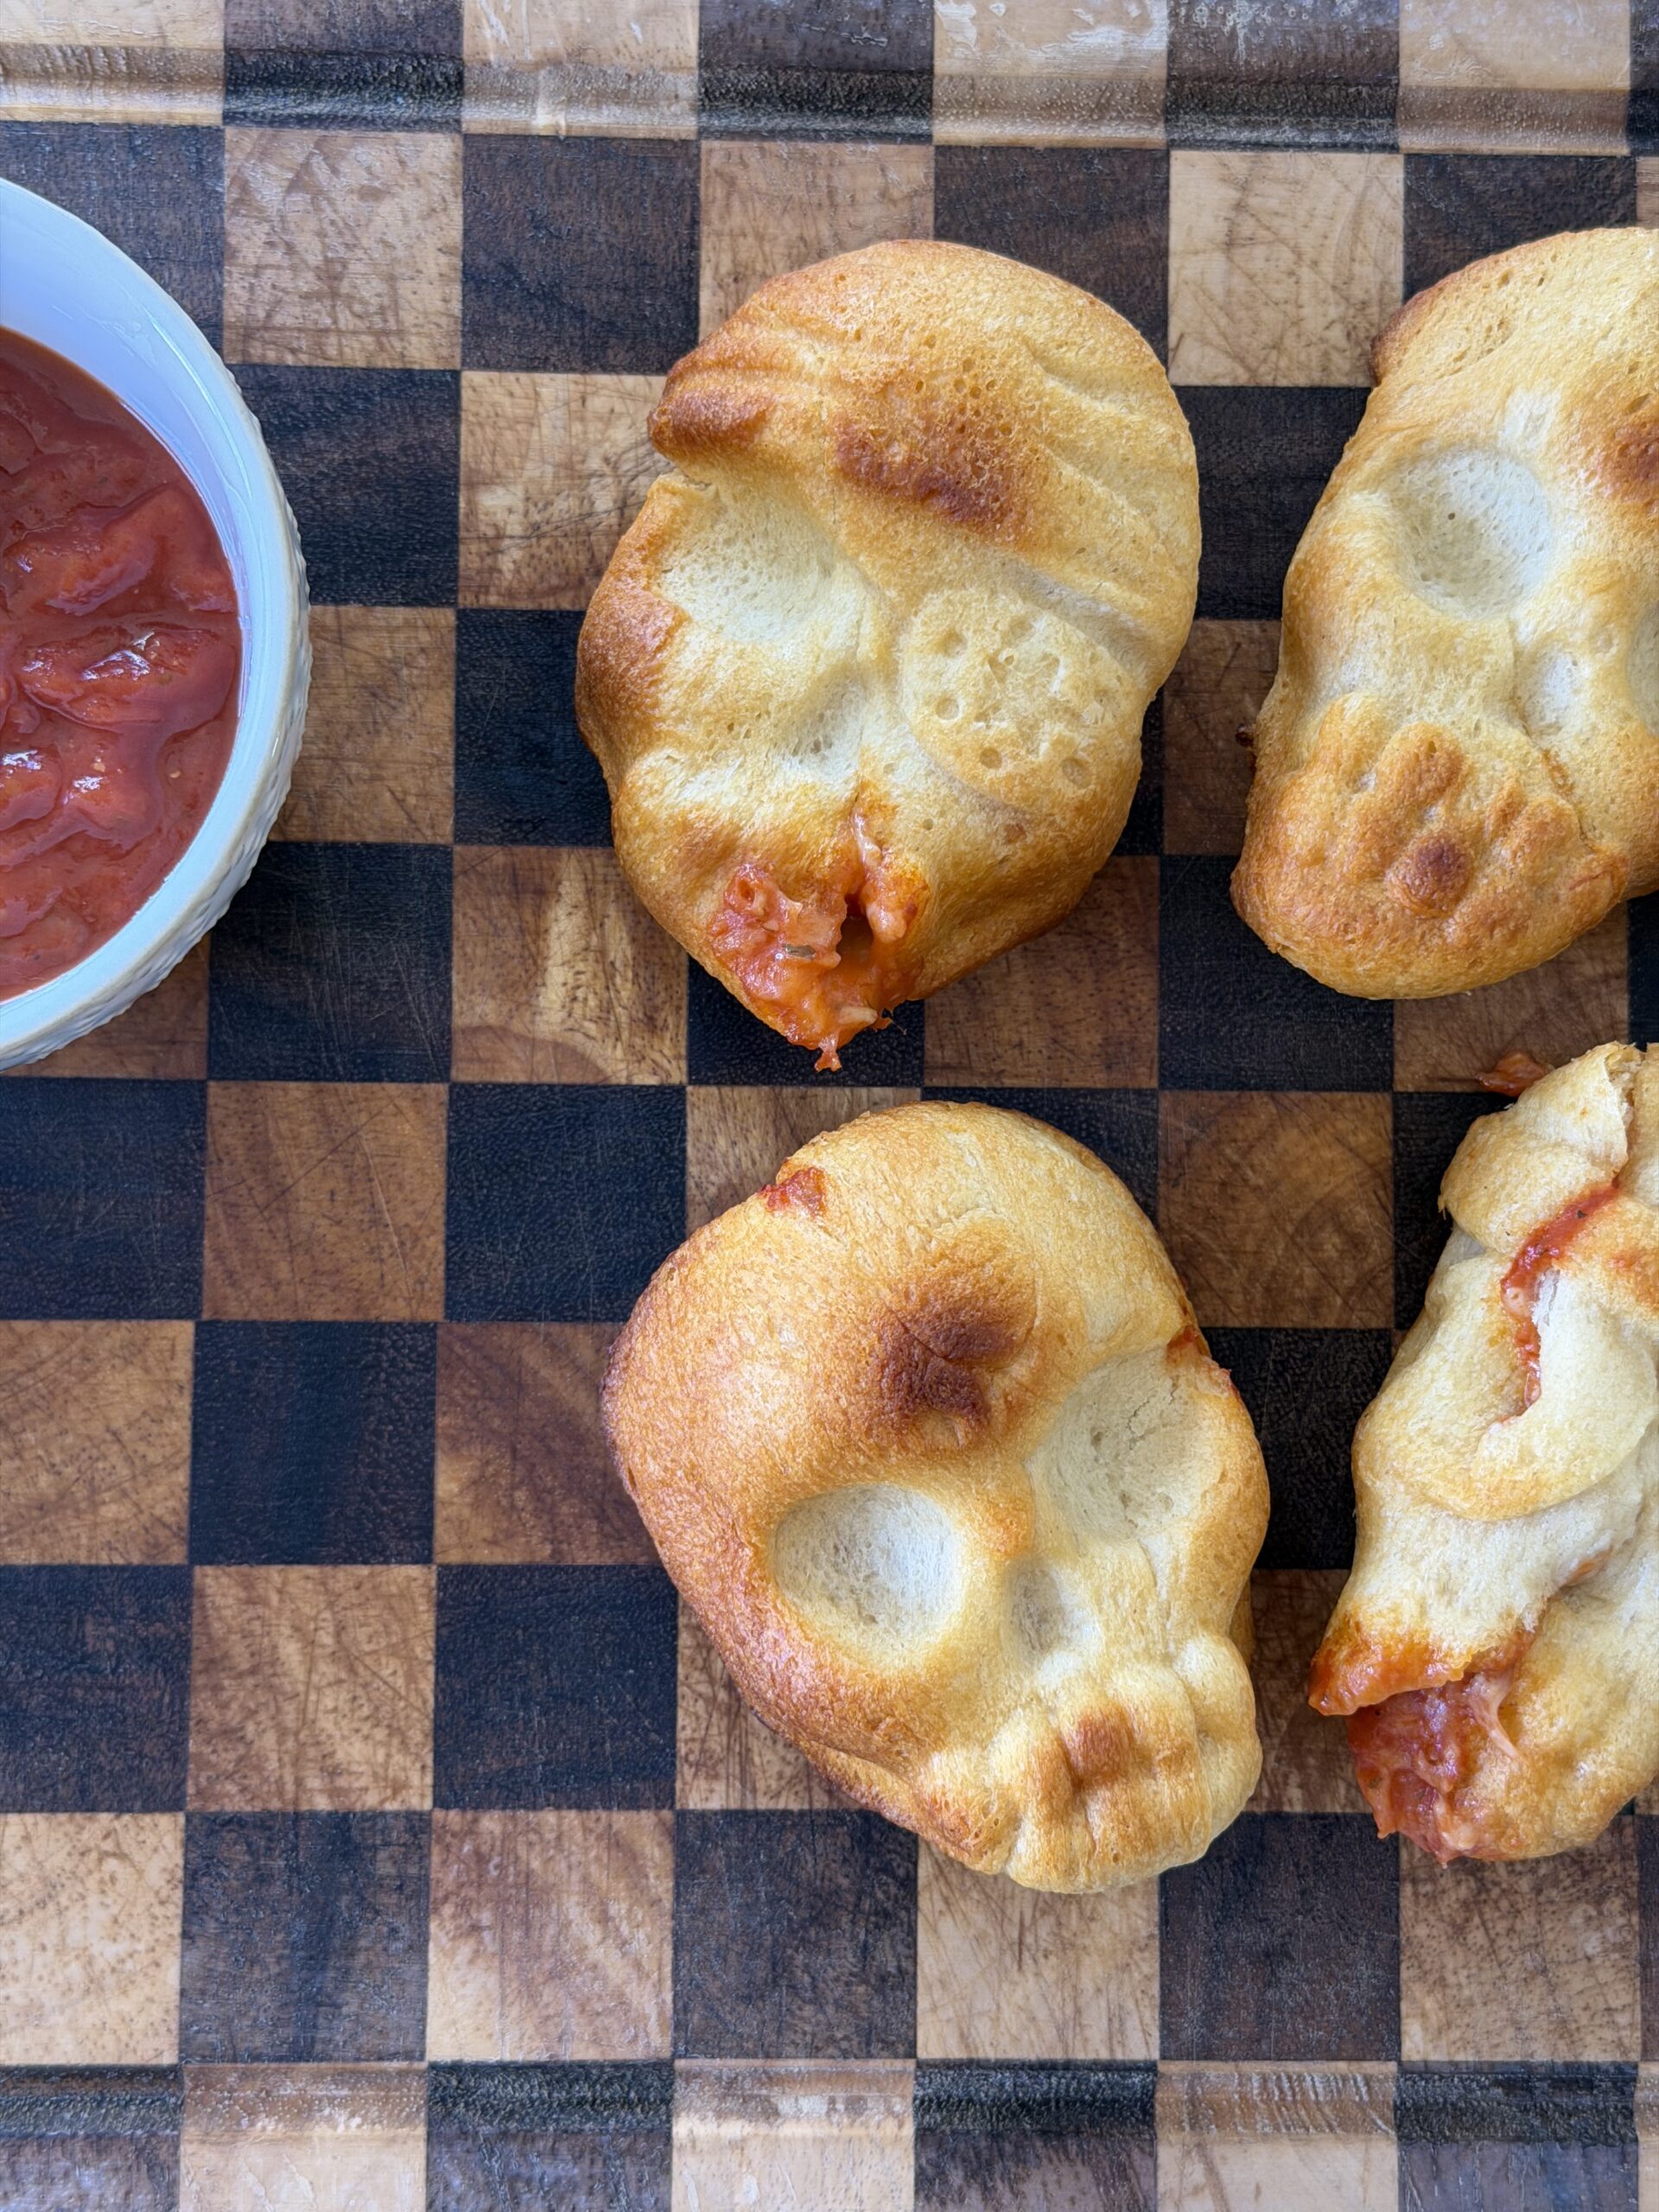
Serve warm with extra pizza sauce or marinara for dipping. For an optional finishing touch, sprinkle with chopped fresh parsley or basil.
Tips for Making the Best Pizza Skulls
Don’t overfill the skulls. It’s tempting to add lots of cheese and toppings, but overfilling can make it difficult to seal the dough. Too much filling may also leak out during baking.
Seal the edges well. Pinch the dough together firmly around the entire pocket. This helps keep the melted cheese and sauce inside while the skulls bake.
Use small, evenly chopped toppings. Smaller pieces fit better inside the mold and help the pizza skulls hold their shape. If you’re using sausage or other raw meat toppings, cook them fully before adding them to the filling.
Watch the baking time. Crescent roll dough and pizza dough can bake differently. Start checking around the 16-minute mark and continue baking until the dough is golden and cooked through.
Let them cool before unmolding. Give the pizza skulls five minutes to rest after baking. This helps the filling settle and makes them easier to remove without breaking.
Use a silicone mold for easy removal. Silicone molds are flexible, which makes it easier to release the finished skulls. If you’re using a metal mold, grease it well and follow the manufacturer’s instructions.
Cheesy Pizza Skull Variations
One of my favorite things about this recipe is how easy it is to customize. Here are a few fun variations to try!
- Pepperoni pizza skulls: Add mini pepperoni and mozzarella for a classic pizza combination.
- Meat lovers pizza skulls: Fill them with cooked Italian sausage, pepperoni, and mozzarella.
- Supreme pizza skulls: Add finely diced bell peppers, onions, olives, mushrooms, and pepperoni.
- Hawaiian pizza skulls: Use diced ham and small pieces of pineapple. Pat the pineapple dry first to remove excess moisture.
- Cheese lovers pizza skulls: Skip the meat and load them with mozzarella, Parmesan, and a little provolone.
- Veggie pizza skulls: Use finely chopped bell peppers, mushrooms, onions, and olives for a meat-free option.
You can also experiment with different cheeses or use Alfredo sauce instead of pizza sauce for a creamy white pizza version.
What to Serve With Pizza Skulls
These pizza skulls are delicious on their own, but they’re even better as part of a Halloween spread!
Here are a few ideas for serving them:
- A bowl of warm marinara or pizza sauce for dipping
- A simple Caesar salad
- Fresh vegetable sticks with ranch dressing
- Garlic bread or breadsticks
- A Halloween snack board with fruit, cheese, crackers, and other spooky treats
For a Halloween party, arrange the pizza skulls on a platter with little bowls of dipping sauce. You can add plastic spiders, Halloween napkins, or other festive decorations around the platter to make the presentation extra fun.
How to Store Leftover Pizza Skulls
If you have leftovers, allow the pizza skulls to cool completely before storing them.
Refrigerator: Store leftovers in an airtight container in the refrigerator for up to 3–4 days.
Freezer: For longer storage, freeze the cooled pizza skulls in a freezer-safe container or bag for up to 2 months for best quality. Separate layers with parchment paper to help prevent sticking.
Reheating: Reheat in an oven or air fryer at 325–350°F until warmed through. The air fryer is especially handy for bringing back some of the crust’s crispness. You can also microwave them, although the dough may become softer.
If reheating from frozen, allow extra time and make sure the centers are heated thoroughly.
FAQs
Can I use pizza dough instead of crescent roll dough?
Absolutely! Both work well. Crescent roll dough creates a softer, buttery crust, while pizza dough has a more traditional chewy pizza texture. Depending on the dough and thickness, you may need to adjust the baking time slightly.
Do I need a silicone skull mold?
No, but a skull-shaped mold is what gives this recipe its Halloween look. A silicone mold is convenient because the finished pizza skulls are easier to remove. If you don’t have a skull mold, you can make regular stuffed pizza pockets on a baking sheet instead.
How do I keep the pizza skulls from leaking?
Avoid overfilling the cavities, use only a small amount of sauce inside each skull, and pinch the dough together firmly. Be sure to seal the entire edge before baking.
Can I make these ahead of time?
Yes! You can assemble the pizza skulls, cover the mold, and refrigerate them for a few hours before baking. For the best results, bake them shortly before serving so the crust is warm and the cheese is melted.
Can I use different pizza toppings?
Of course! Mini pepperoni, cooked sausage, diced ham, olives, mushrooms, and bell peppers are all great options. Just chop toppings into small pieces and cook any raw meat before adding it.
Can I make these in an air fryer?
You may be able to, provided your skull mold is specifically labeled as air-fryer-safe and fits your appliance. Follow the mold manufacturer’s temperature limits and check the dough frequently, since air fryers can cook more quickly than conventional ovens.
What should I serve with Cheesy Pizza Skulls?
Warm marinara or pizza sauce is a must for dipping! You can also serve them with salad, vegetables and ranch, garlic bread, or other Halloween party snacks.
Are Cheesy Pizza Skulls good for kids?
Yes! They’re a fun Halloween dinner or party snack, and kids can help choose the toppings. An adult should handle the oven and hot mold, and the skulls should cool before serving.
More Fun Halloween Recipes
If you’re planning a spooky celebration, these Cheesy Pizza Skulls would be a fun addition to your Halloween menu. Pair them with other festive appetizers, sweet treats, and easy family-friendly recipes for a Halloween night everyone will enjoy.
Whether you’re hosting a party, planning a Halloween movie night, or simply looking for a fun dinner idea, these cheesy, stuffed pizza pockets are sure to bring a little spooky fun to the table!
If you make these Cheesy Pizza Skulls, I’d love to hear what toppings you used. Leave a comment below and let me know how they turned out!
Cheesy Pizza Skulls
Ingredients
Method
- Spray the mini skull baking tin with cooking spray. (Mine is a silicone mold!)
- On a floured surface, roll out your crescent roll and pinch the seams together. Cut into rectangle pieces and lay each dough piece into the skull cavity and start filling it with sauce, mozzarella, a sprinkle of Parmesan cheese and your desired toppings. After adding the toppings, add a little bit of pizza sauce on top before sealing the dough (no more than a tablespoon).
- Fold the dough over the fillings, pinching the dough together to seal them (like a small pizza pocket). Continue until the 6 pieces have been filled and sealed.
- Refrigerate the skull pizza tray while you preheat the oven.
- Preheat the oven to 400 degrees Fahrenheit.
- Remove the tray from the refrigerator and bake for 16 to 20 minutes or until lightly golden brown (some pre-made doughs may need more or less time).
- Remove from the oven and allow it to cool for 5 minutes. Unmold and serve with marinara sauce and chopped parsley or basil (optional).