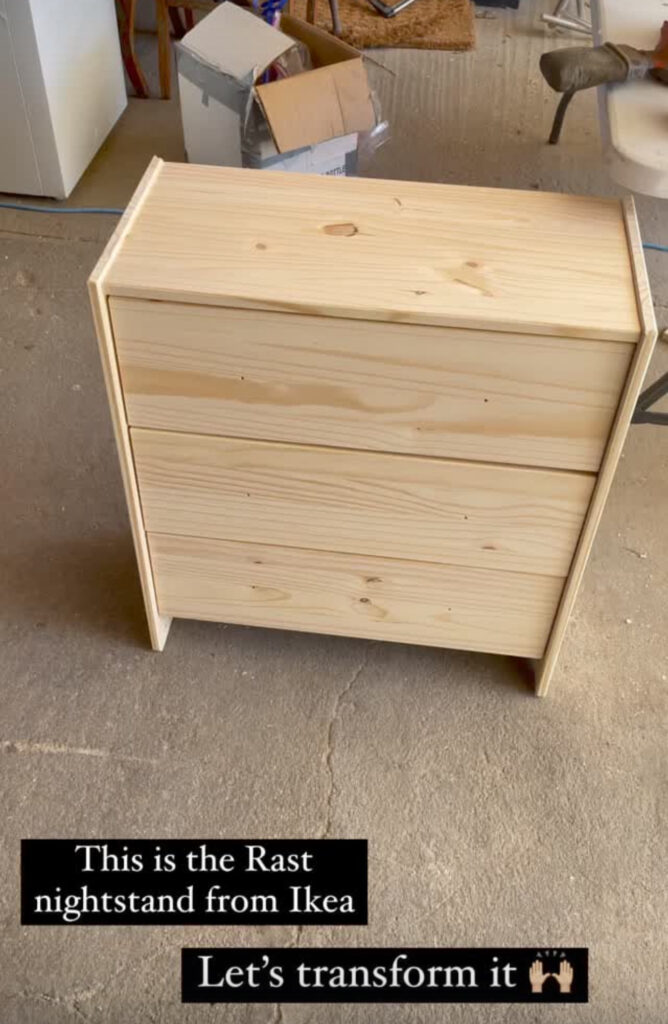
If you’ve ever wandered through IKEA and walked past the RAST nightstand thinking, “Hmm, a little too plain,” then this DIY is for you. The RAST is one of IKEA’s most affordable and versatile pieces—simple pine, solid wood, and a blank canvas begging for a glow-up.
Today, I’m sharing how I transformed this humble piece into a chic, custom nightstand that looks way more expensive than it is. Whether you’re into modern, boho, or classic styles, this project is the perfect weekend upgrade.
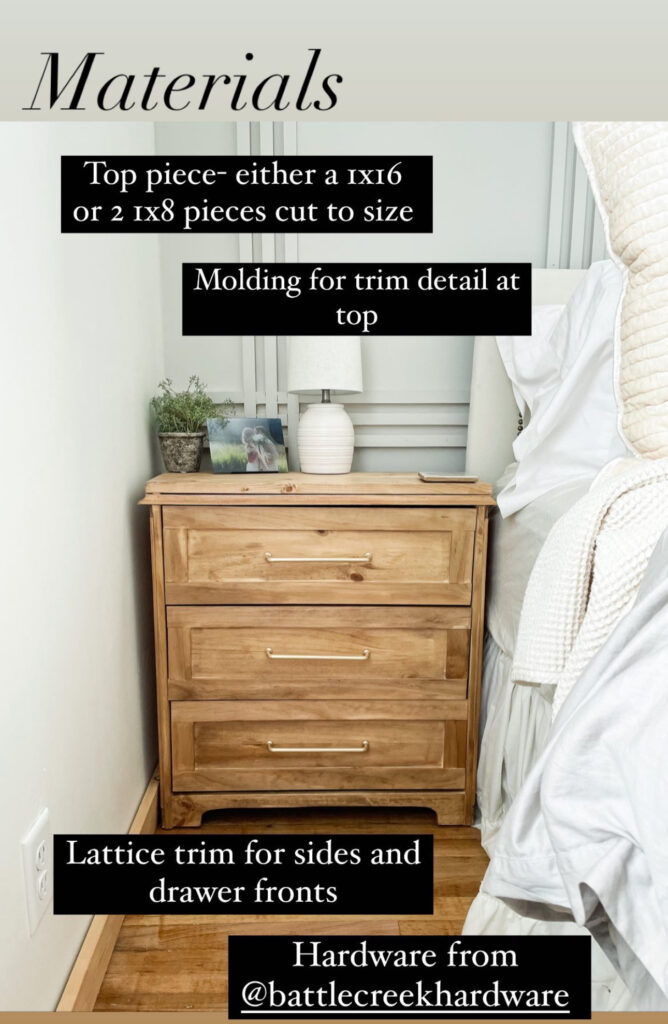
What You’ll Need:
- IKEA RAST 3-drawer chest
- Lattice trim (pre-cut or cut to size)
- Wood filler
- 3/4″ Brad nails + nail gun
- Wood glue
- Jigsaw
- Sandpaper (120 + 220 grit)
- Oil-based wood conditioner
- Oil-based stain (I used Minwax Early American + Pickled Oak)
- Top coat (polyurethane or polycrylic)
- New hardware (optional)
- Miter saw or miter box for angles
Instructions:
1. Prep the Drawers and Trim
Before assembling the RAST, I started by filling in the original knob holes on the drawer fronts using wood filler. Since I planned to use new hardware and place it differently, filling the holes early gave me a smooth, clean surface to work with.
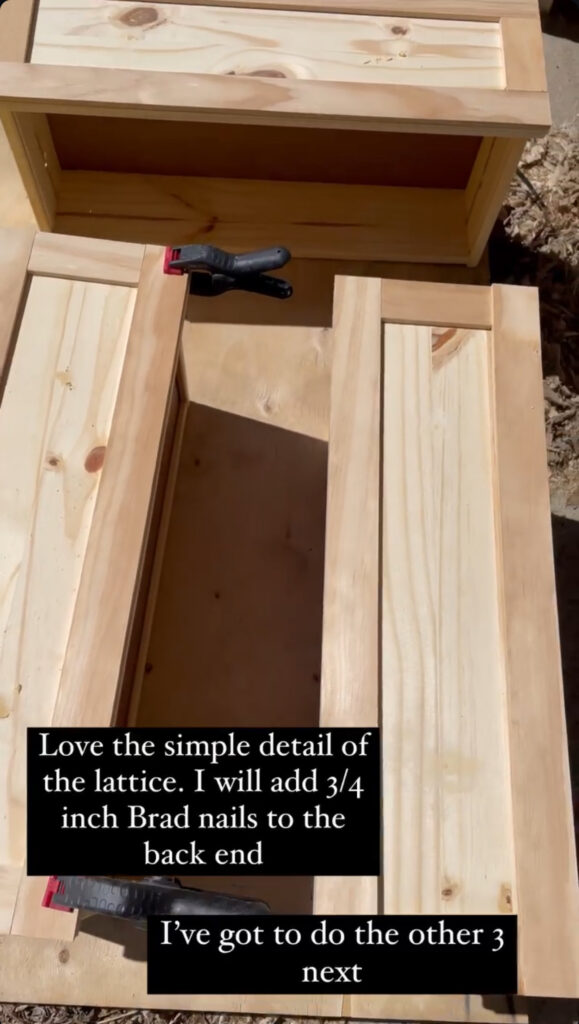
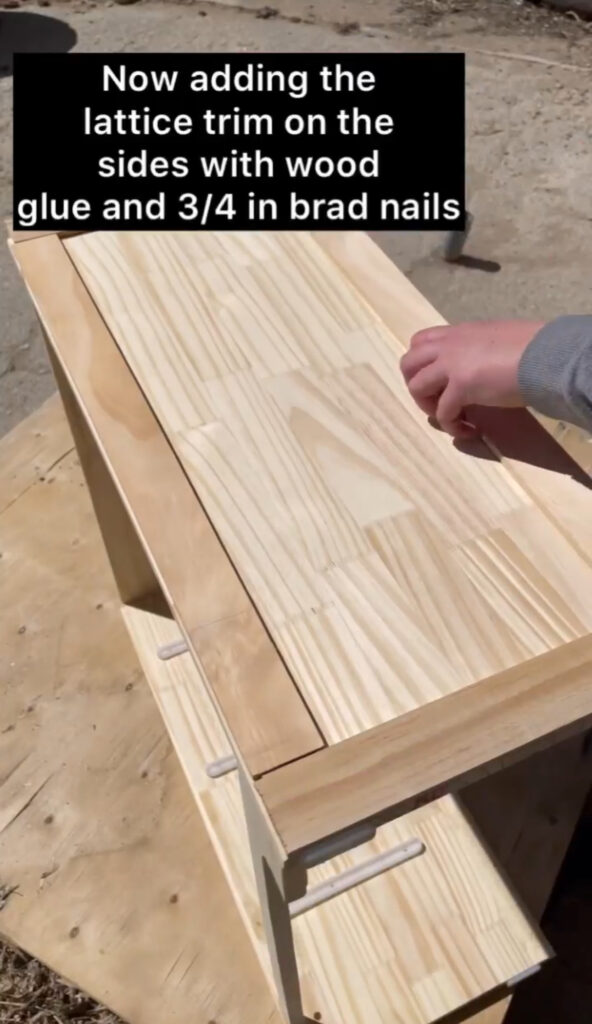
Next, I measured and cut lattice trim strips to create a custom frame on each drawer front. This instantly adds a finished, elevated look. To attach the trim, I used wood glue and secured it with 3/4″ Brad nails along the sides. Bonus: the trim also covers the screw holes on the drawer fronts for a seamless look.

2. Add a Custom Bottom Detail
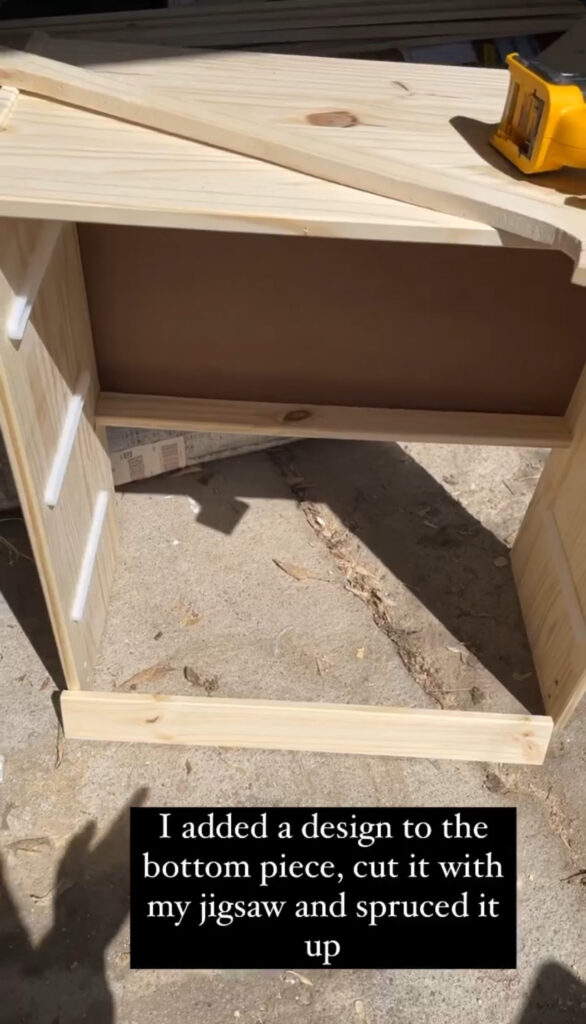
I wanted to give the nightstand a little extra personality, so I designed a simple decorative cutout for the bottom front panel. Using a jigsaw, I carefully cut the design and sanded the edges for a smooth finish. Once it was ready, I made sure the piece was flush with the front of the dresser and screwed it in place.
This small detail made a huge impact and gave the piece more of a custom furniture feel.
3. Frame It Out
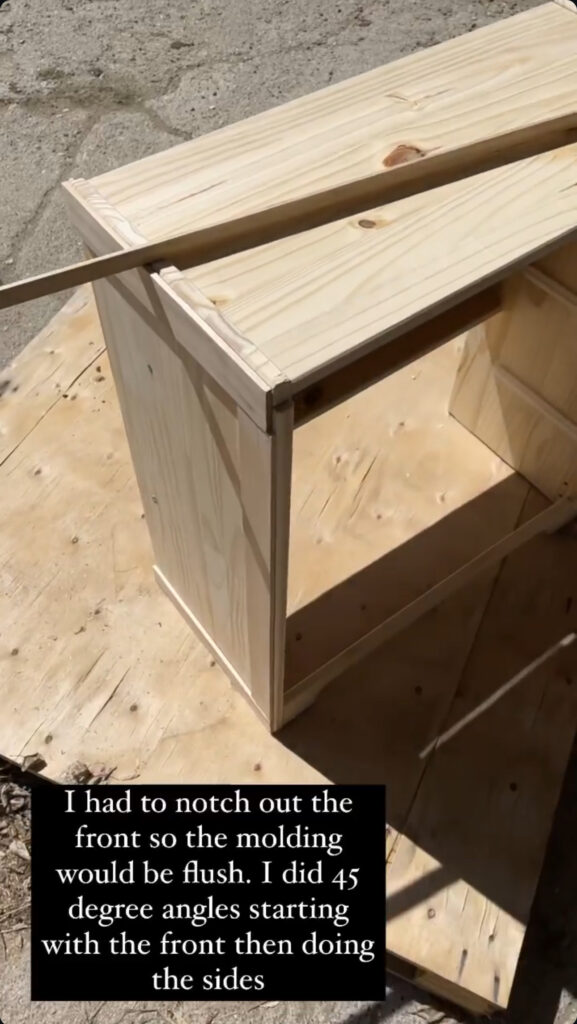
To take it a step further, I added lattice trim along the outer edges of the dresser as well. Again, I used wood glue and 3/4″ Brad nails to secure the trim in place. I had to notch out the front corners so the molding would sit flush against the frame—this involved cutting 45-degree angles, starting at the front and working my way to the sides using a miter saw. This little step makes a huge difference in the overall finish.
4. Sand Everything Down
Once everything was assembled and the trim was attached, I gave the entire piece a light sanding with 120 grit followed by 220 grit sandpaper. This helps smooth out any rough spots, especially around the wood filler and trim edges, and ensures an even finish when staining.


5. Condition and Stain
Time to bring the wood to life!
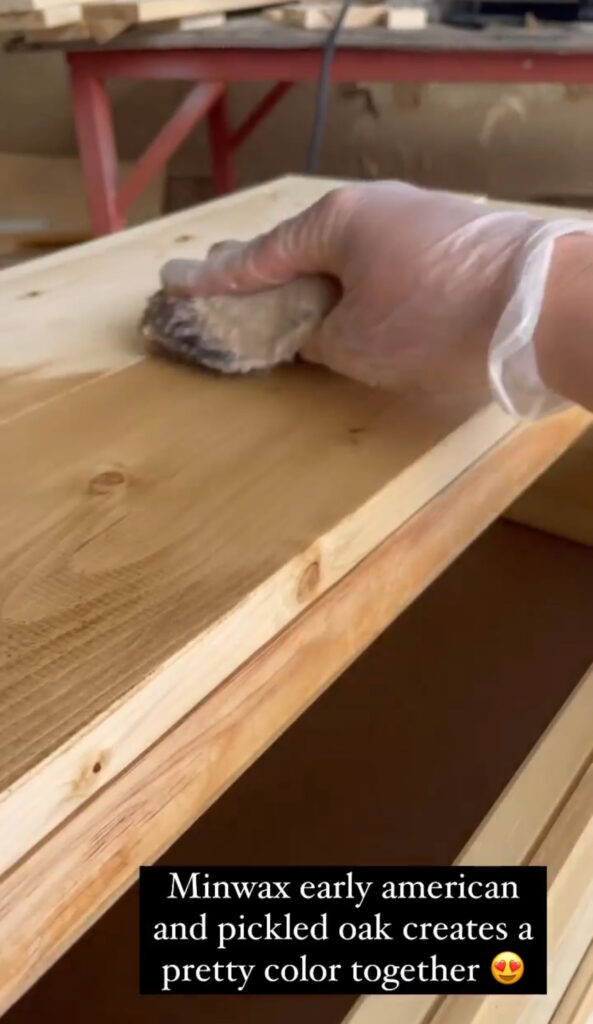
I started with an oil-based wood conditioner to help the stain absorb evenly and prevent blotching. After letting it sit according to the instructions, I applied a custom stain combo: Minwax Early American layered with Pickled Oak. This combination gave the wood a soft, warm tone with a slightly weathered finish—it’s seriously gorgeous.
Let the stain dry completely before sealing.
6. Seal and Style
Once the stain was dry, I applied a clear top coat to protect the finish. I recommend polyurethane for durability, especially on the top surface, but you can also use polycrylic for a low-odor, water-based option.
DIY Rast Nightstand
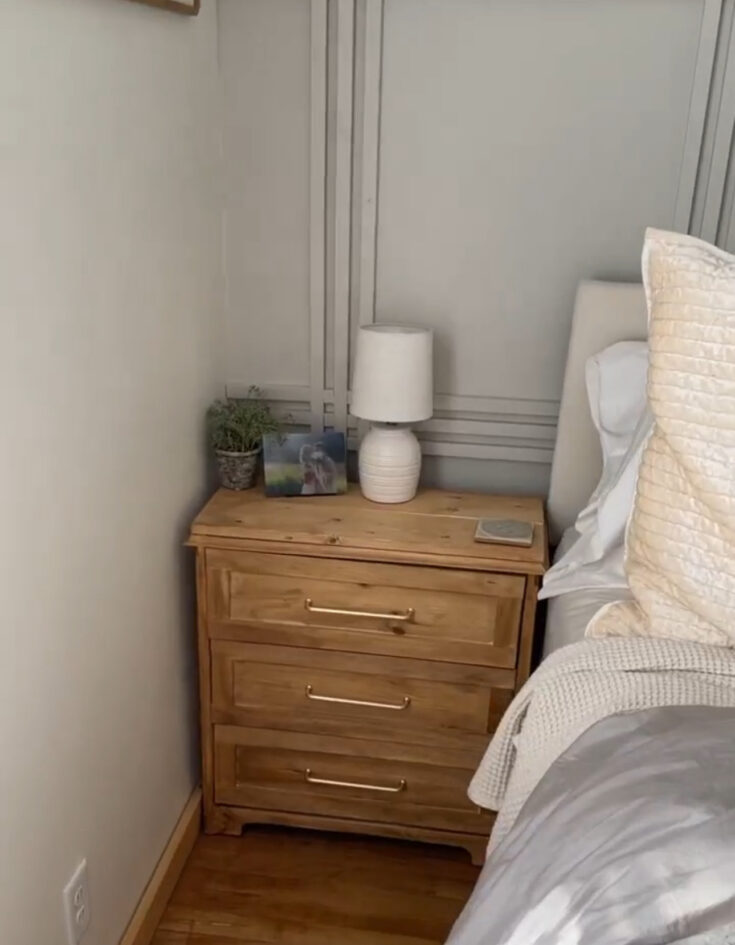
If you're into DIY projects and want to upgrade your space without spending a ton, the IKEA RAST nightstand is the perfect blank canvas. At around $40, this simple solid pine piece has endless potential—and with a little creativity, you can turn it into something that looks high-end and custom.
Materials
- IKEA RAST 3-drawer chest
- Lattice trim (pre-cut or cut to size)
- Wood filler
- Wood glue
- Sandpaper (120 + 220 grit)
- Oil-based wood conditioner
- Oil-based stain (I used Minwax Early American + Pickled Oak)
- Top coat (polyurethane or polycrylic)
- New hardware (optional)
Tools
- 3/4" Brad nails + nail gun
- Jigsaw
- Miter saw or miter box for angles
- Miter saw or miter box for angles
Instructions
1. Prep the Drawers and Trim
Before assembling the RAST, I started by filling in the original knob holes on the drawer fronts using wood filler. Since I planned to use new hardware and place it differently, filling the holes early gave me a smooth, clean surface to work with.
Next, I measured and cut lattice trim strips to create a custom frame on each drawer front. This instantly adds a finished, elevated look. To attach the trim, I used wood glue and secured it with 3/4" Brad nails along the sides. Bonus: the trim also covers the screw holes on the drawer fronts for a seamless look.
2. Add a Custom Bottom Detail
I wanted to give the nightstand a little extra personality, so I designed a simple decorative cutout for the bottom front panel. Using a jigsaw, I carefully cut the design and sanded the edges for a smooth finish. Once it was ready, I made sure the piece was flush with the front of the dresser and screwed it in place.
This small detail made a huge impact and gave the piece more of a custom furniture feel.
3. Frame It Out
To take it a step further, I added lattice trim along the outer edges of the dresser as well. Again, I used wood glue and 3/4" Brad nails to secure the trim in place. I had to notch out the front corners so the molding would sit flush against the frame—this involved cutting 45-degree angles, starting at the front and working my way to the sides using a miter saw. This little step makes a huge difference in the overall finish.
4. Sand Everything Down
Once everything was assembled and the trim was attached, I gave the entire piece a light sanding with 120 grit followed by 220 grit sandpaper. This helps smooth out any rough spots, especially around the wood filler and trim edges, and ensures an even finish when staining.
5. Condition and Stain
Time to bring the wood to life!
I started with an oil-based wood conditioner to help the stain absorb evenly and prevent blotching. After letting it sit according to the instructions, I applied a custom stain combo: Minwax Early American layered with Pickled Oak. This combination gave the wood a soft, warm tone with a slightly weathered finish—it's seriously gorgeous.
Let the stain dry completely before sealing.
6. Seal and Style
Once the stain was dry, I applied a clear top coat to protect the finish. I recommend polyurethane for durability, especially on the top surface, but you can also use polycrylic for a low-odor, water-based option.
