
The holiday season is the perfect time to get creative, and what better way to celebrate than by crafting a unique Christmas tree using materials you already have? A DIY scrap wood Christmas tree is not only budget-friendly but also an eco-friendly alternative to traditional trees. Plus, it adds a rustic charm to your holiday decor. Here’s a step-by-step guide to help you build one.
Materials:
Cut List:
- 4 1/4 pine cut at 6 inches with 30° parallel angle cuts
- 1 1/4 pine cut at 6 inches with 30° perpendicular angle cut
- 1- 1/4 pine cut at 5 1/4 inches with 30° perpendicular angle cut
- (See notes for angle examples!)
Directions:
Set your saw to 30°. All of your angle cuts will be 30°. Here’s your cut list!
4 1×4 pine boards cut at 6 inches with parallel angle cuts. 1 1×4 pine board cut at 6 inches cut with perpendicular angle cuts and 1 1×4 pine board cut at 5 1/4 inches with perpendicular angle cuts.
You really can custom this to whatever size you choose. I am cutting 5 pieces of the 1×4 at 6.5 inches.
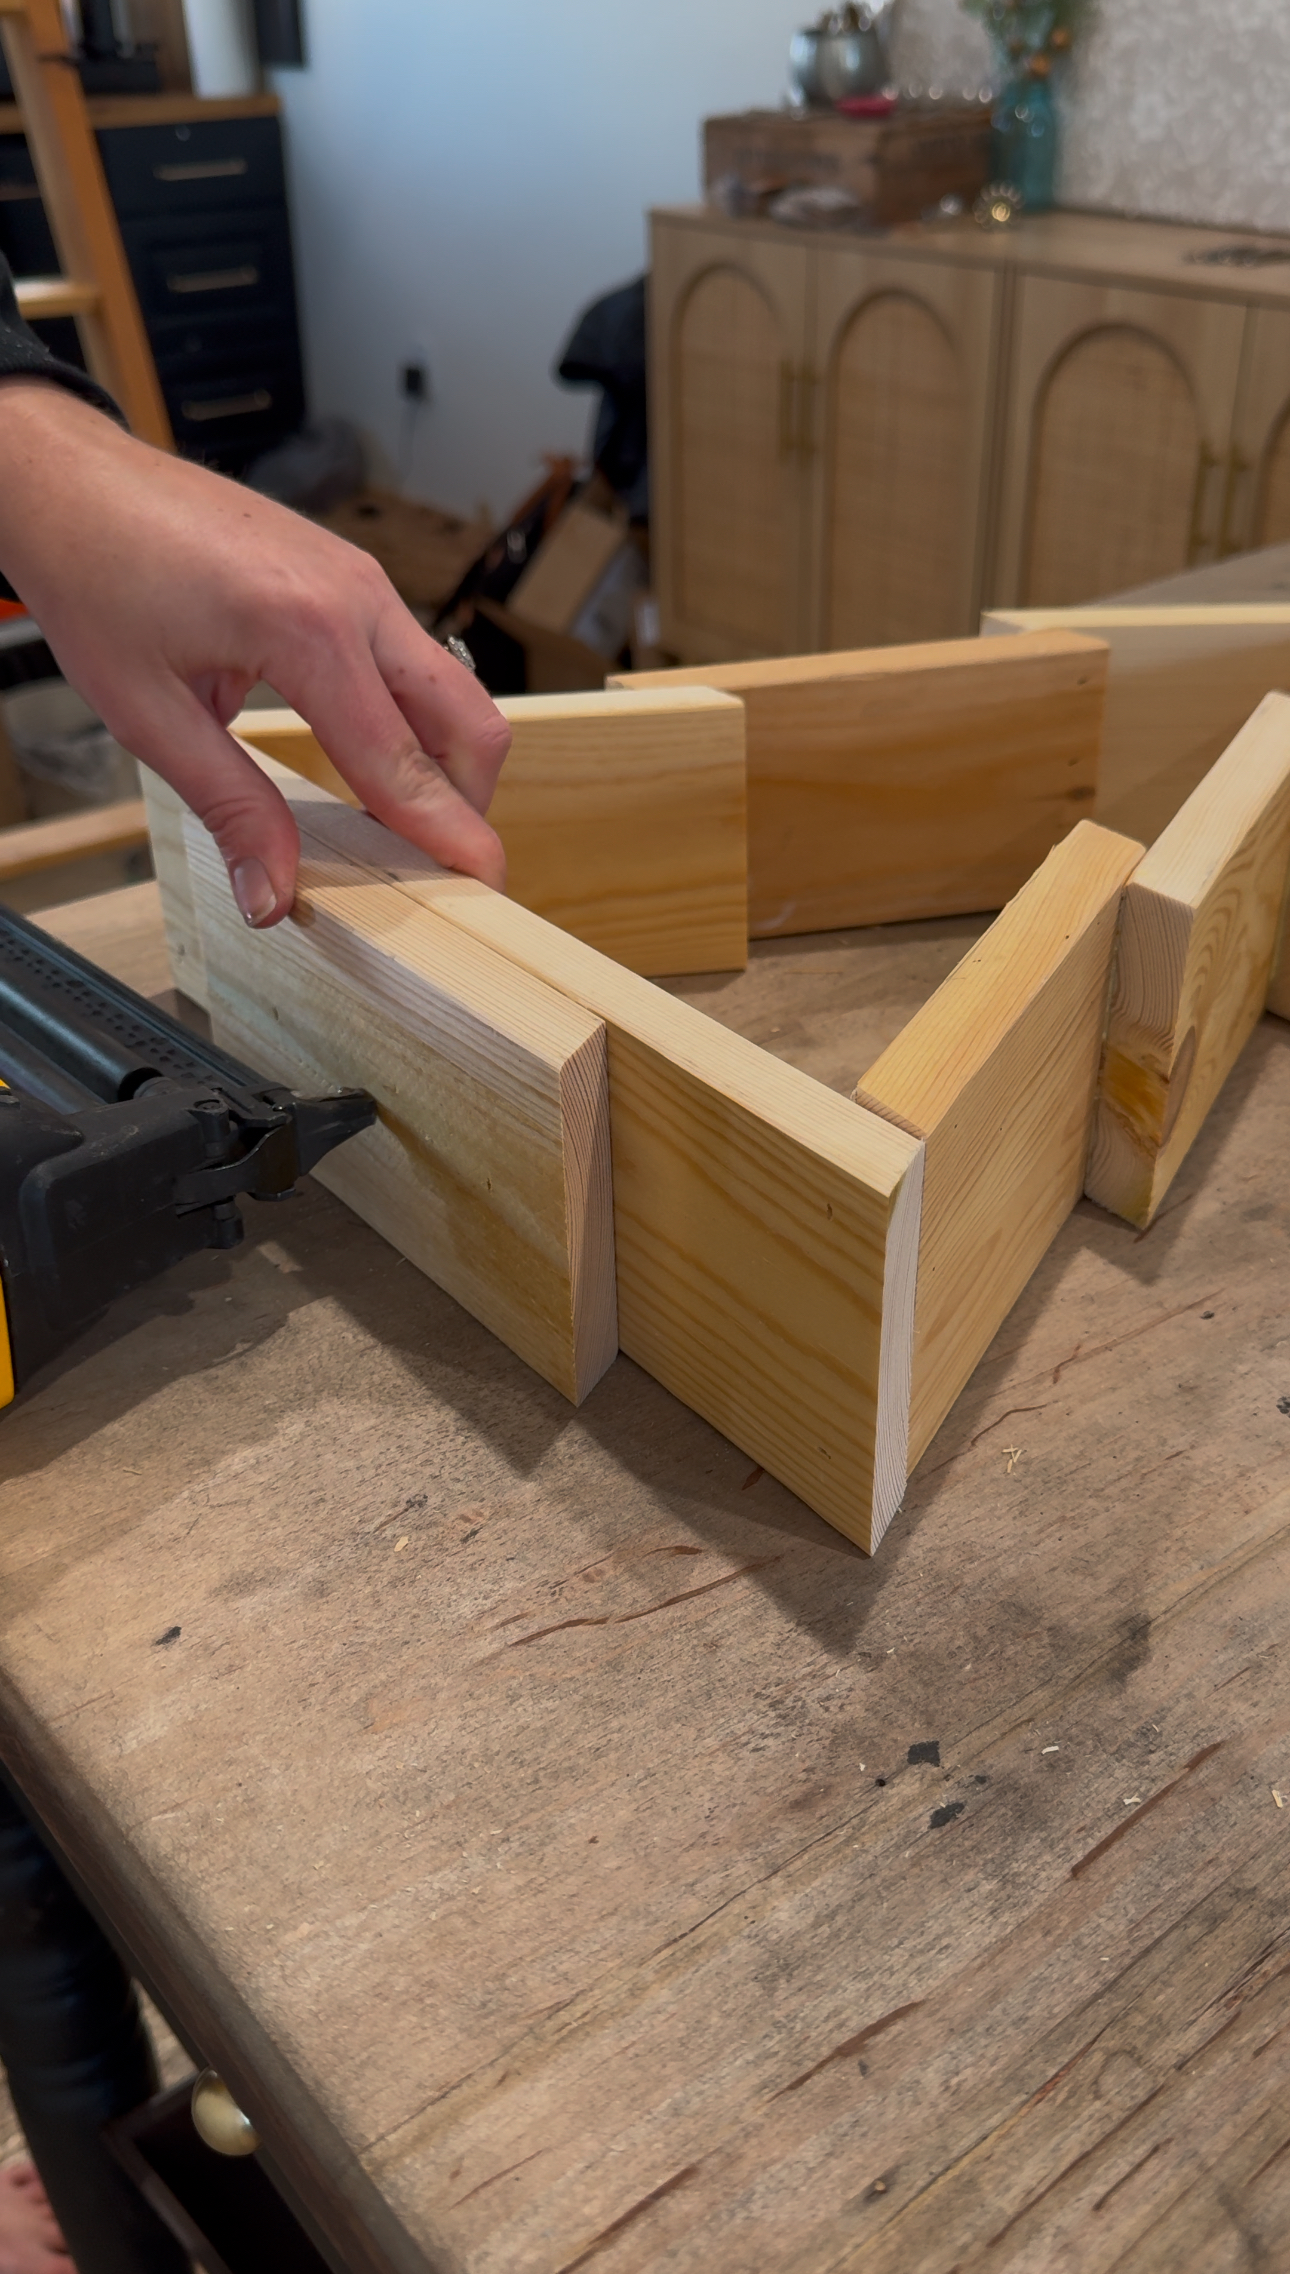
Before you assemble the Christmas tree, sand all the pieces. I just used a 100 grit piece of sandpaper.
I marked my lines with each side pieces to keep them even, there should be about 1″ of overlap, added glue and used my brad mail gun and placed the nails on the inside. I end with the top pieces, gluing and nailing. You have your tree built at this point! I then measure the bottom piece, cut it to size and have my angle cuts on either side (perpendicular). I then cut a shorter piece for the base piece with the angle cuts again that are also perpendicular. Attach the bottom pieces using wood glue and brad nails.
You have now built a tree! Stain/ paint it and I like to add string lights to it or hang a big bell on the inside!
You can grab my favorite String Lights here!
DIY Christmas Tree

The holiday season is the perfect time to get creative, and what better way to celebrate than by crafting a unique Christmas tree using materials you already have? A DIY scrap wood Christmas tree is not only budget-friendly but also an eco-friendly alternative to traditional trees. Plus, it adds a rustic charm to your holiday decor.
Materials
- Wood glue
- Paint/ stain
- 1x4 pine wood
- 1 1/4 inch brad nails
Tools
- Miter Saw
- Brad Nail Gun
Instructions
Cut List
4 1/4 pine cut at 6 inches with 30° parallel angle cuts
1 1/4 pine cut at 6 inches with 30° perpendicular angle cut
1- 1/4 pine cut at 5 1/4 inches with 30° perpendicular angle cut
(See notes for angle examples!)
Directions
Set your saw to 30°. All of your angle cuts will be 30°. Here’s your cut list!
4 1x4 pine boards cut at 6 inches with parallel angle cuts. 1 1x4 pine board cut at 6 inches cut with perpendicular angle cuts and 1 1x4 pine board cut at 5 1/4 inches with perpendicular angle cuts.

You really can custom this to whatever size you choose. I am cutting 5 pieces of the 1x4 at 6.5 inches.
Before you assemble the Christmas tree, sand all the pieces. I just used a 100 grit piece of sandpaper.
I marked my lines with each side pieces to keep them even, there should be about 1″ of overlap, added glue and used my brad mail gun and placed the nails on the inside. I end with the top pieces, gluing and nailing. You have your tree built at this point! I then measure the bottom piece, cut it to size and have my angle cuts on either side (perpendicular). I then cut a shorter piece for the base piece with the angle cuts again that are also perpendicular. Attach the bottom pieces using wood glue and brad nails. 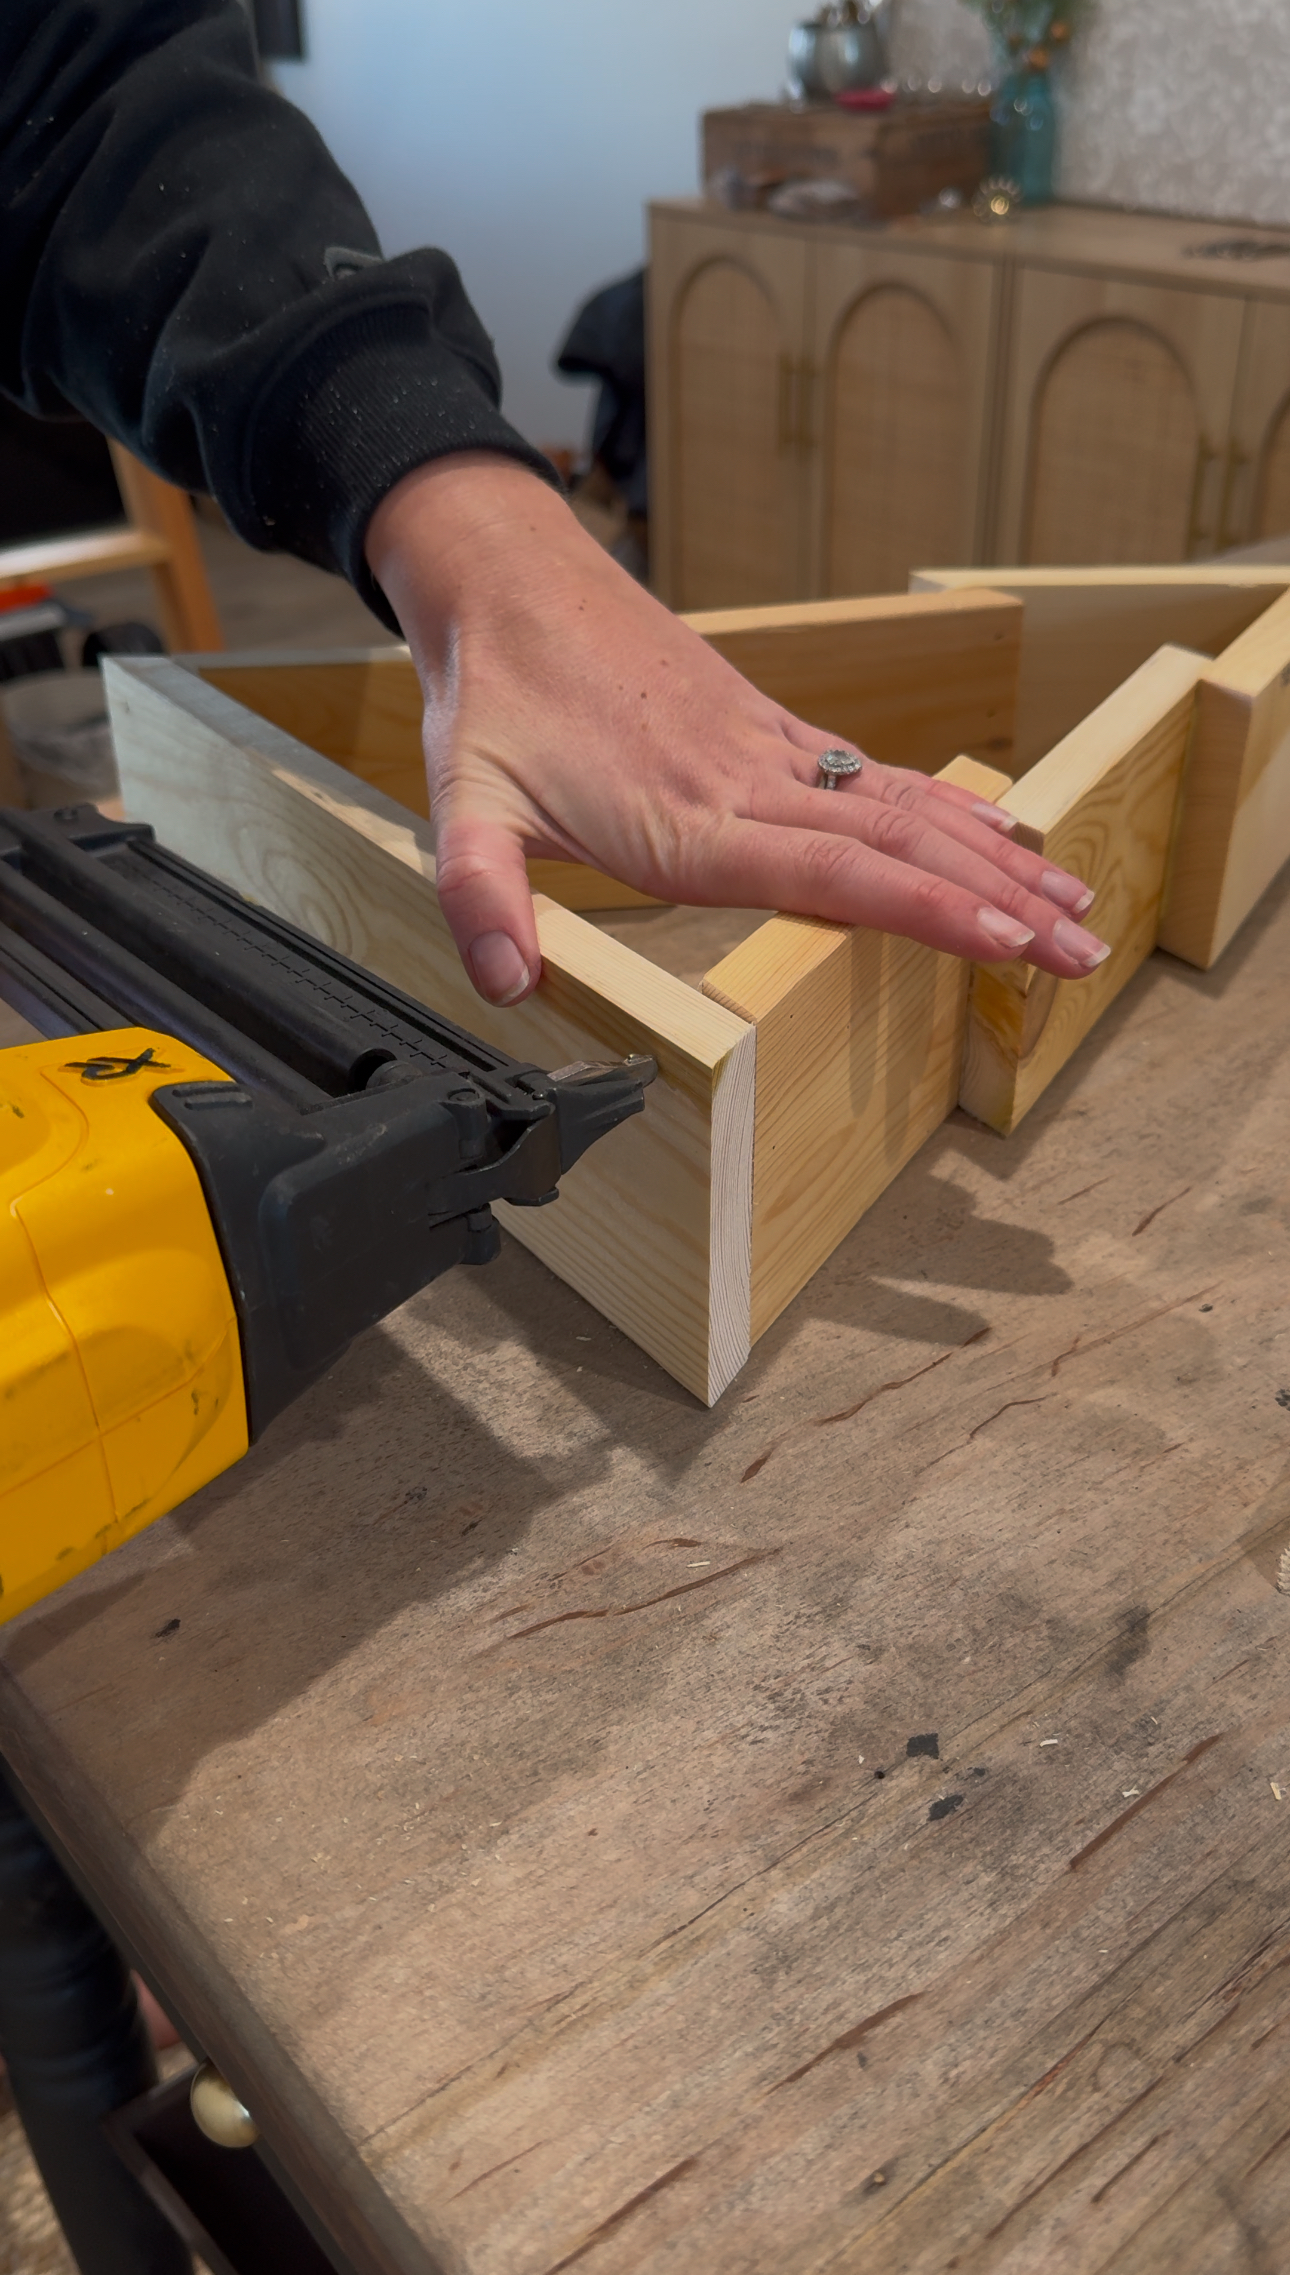

You have now built a tree! Stain/ paint it and I like to add string lights to it or hang a big bell on the inside!